hydrow.com | 1110 | Hydrow Wave User Guide | 01/2023
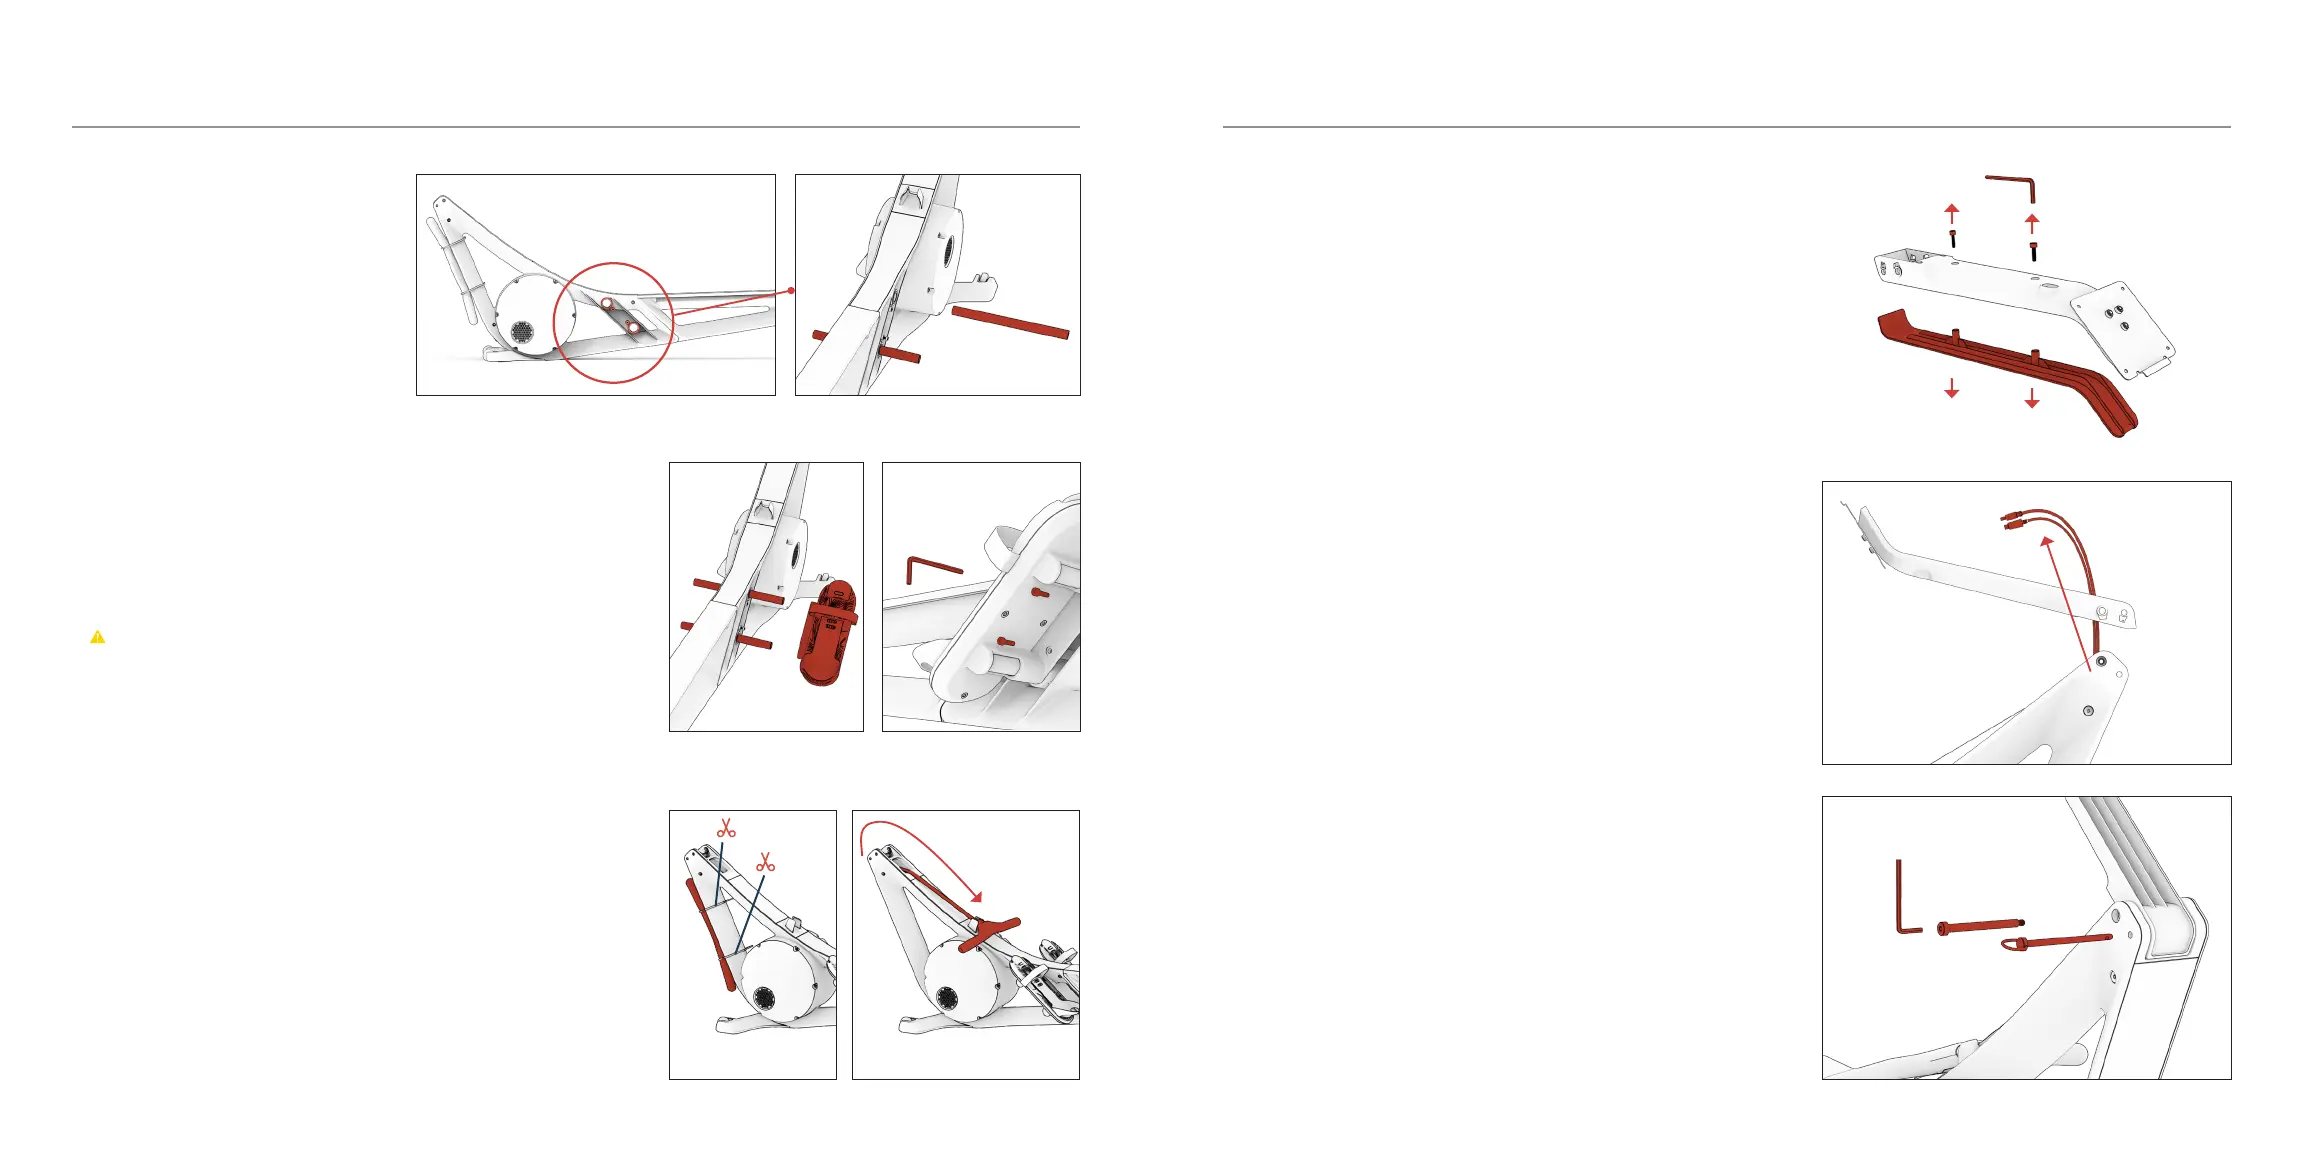
Attach the monitor arm
1. Use the hex key (I) to remove the two bolts from the monitor arm (F), then
pop o the cosmetic cover. Set cover and bolts aside.
2. Locate the cables sticking out of the top of the front frame (A), and thread
them through the hole at the bottom of the monitor arm (F).
• We recommend feeding the cable heads through one at a time.
3. Attach the monitor arm (F) to the front frame (A).
• Align the larger hole in the bottom of the monitor arm (F) with the larger
hole in the top of the front frame (A).
• Use the hex key (I) to attach the monitor arm (F) to the front frame (A)
with the monitor arm bolt (N) in the larger bolt hole.
• Insert the monitor arm pin (O) into the smaller bolt hole by hand to finish
securing the monitor arm (F) to the front frame (A).
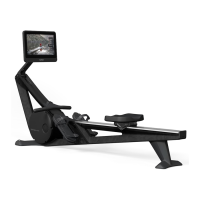
Attach the footrests
1. Slide each footrest tube (D) into a
footrest support hole and roughly
center it.
2. Install the right footrest (E) on the right side of the front frame (A):
• Make sure the numbers 1-7 at the top of the footrest (E) are rightside up.
• Make sure you are facing away from the rear frame (B) when identifying
the right and left sides of the front frame (A).
• Slide the open holes in the footrest (E) over the footrest tubes (D) while
holding the footrest tubes (D) in place.
CAUTION: Take care not to pinch your fingers.
3. Repeat the previous step for the left footrest (E).
4. With one hand on each footrest (E), push the footrests (E) together.
5. Use the hex key (I) to secure the footrests (E) with 2 footrest bolts (M)
on each side.
• There should be only a slight gap between the footrest and frame
when attached.
Position the handle
1. Cut the plastic ties attaching the handle to the front frame (A).
• Do NOT cut the handle strap!
• Be careful not to scratch the front frame (A) when cutting.
2. Pull the handle over the top of the front of the front frame (A),
making sure the handle strap lies flat and is not twisted.
3. Place the handle in the handle rest.
Assembly and Setup
 Loading...