Safety Procedures When Working Near Mast 8000 SRM 1197
Safety Procedures When Working Near Mast
The following procedures must be used when inspect-
ing or working near the mast. Additional precautions
and procedures can be required when repairing or re-
moving the mast.
WARNING
Mast parts are heavy and can move. Distances
between parts are small. Serious injury or
death can result if part of the body is hit by
parts of the mast or the carriage.
• Never put any part of the body into or under
the mast or carriage unless all parts are com-
pletely lowered or a safety chain is installed.
Also make sure that the power is off and the
key is removed. Put a DO NOT OPERATE tag
in the operator’s compartment. Disconnect
the battery on electric lift trucks and put a
tag or lock on the battery connector.
• Be careful of the forks. When the mast is
raised, the forks can be at a height to cause
an injury.
• DO NOT climb on the mast or lift truck at any
time. Use a ladder or personnel lift to work
on the mast.
• DO NOT use blocks to support the mast weld-
ments nor to restrain their movement.
• Mast repairs require disassembly and re-
moval of parts and can require removal
of the mast or carriage. Follow the repair
procedures in the correct Service Manual
section for the mast.
WHEN WORKING NEAR THE MAST, ALWAYS:
1. Lower the mast and carriage completely. Press
the lower button on the control handle. If the
lowering controls do not operate correctly, slowly
open the lowering control valve to relieve pres-
sure from the hydraulic system. and make sure
there is no movement in the mast. Make sure
that all parts of the mast that move are fully low-
ered.
OR
2. If parts of the mast must be in raised position,
install a safety chain to restrain the moving parts
of the mast. Connect moving parts to a part that
does not move. Follow these procedures:
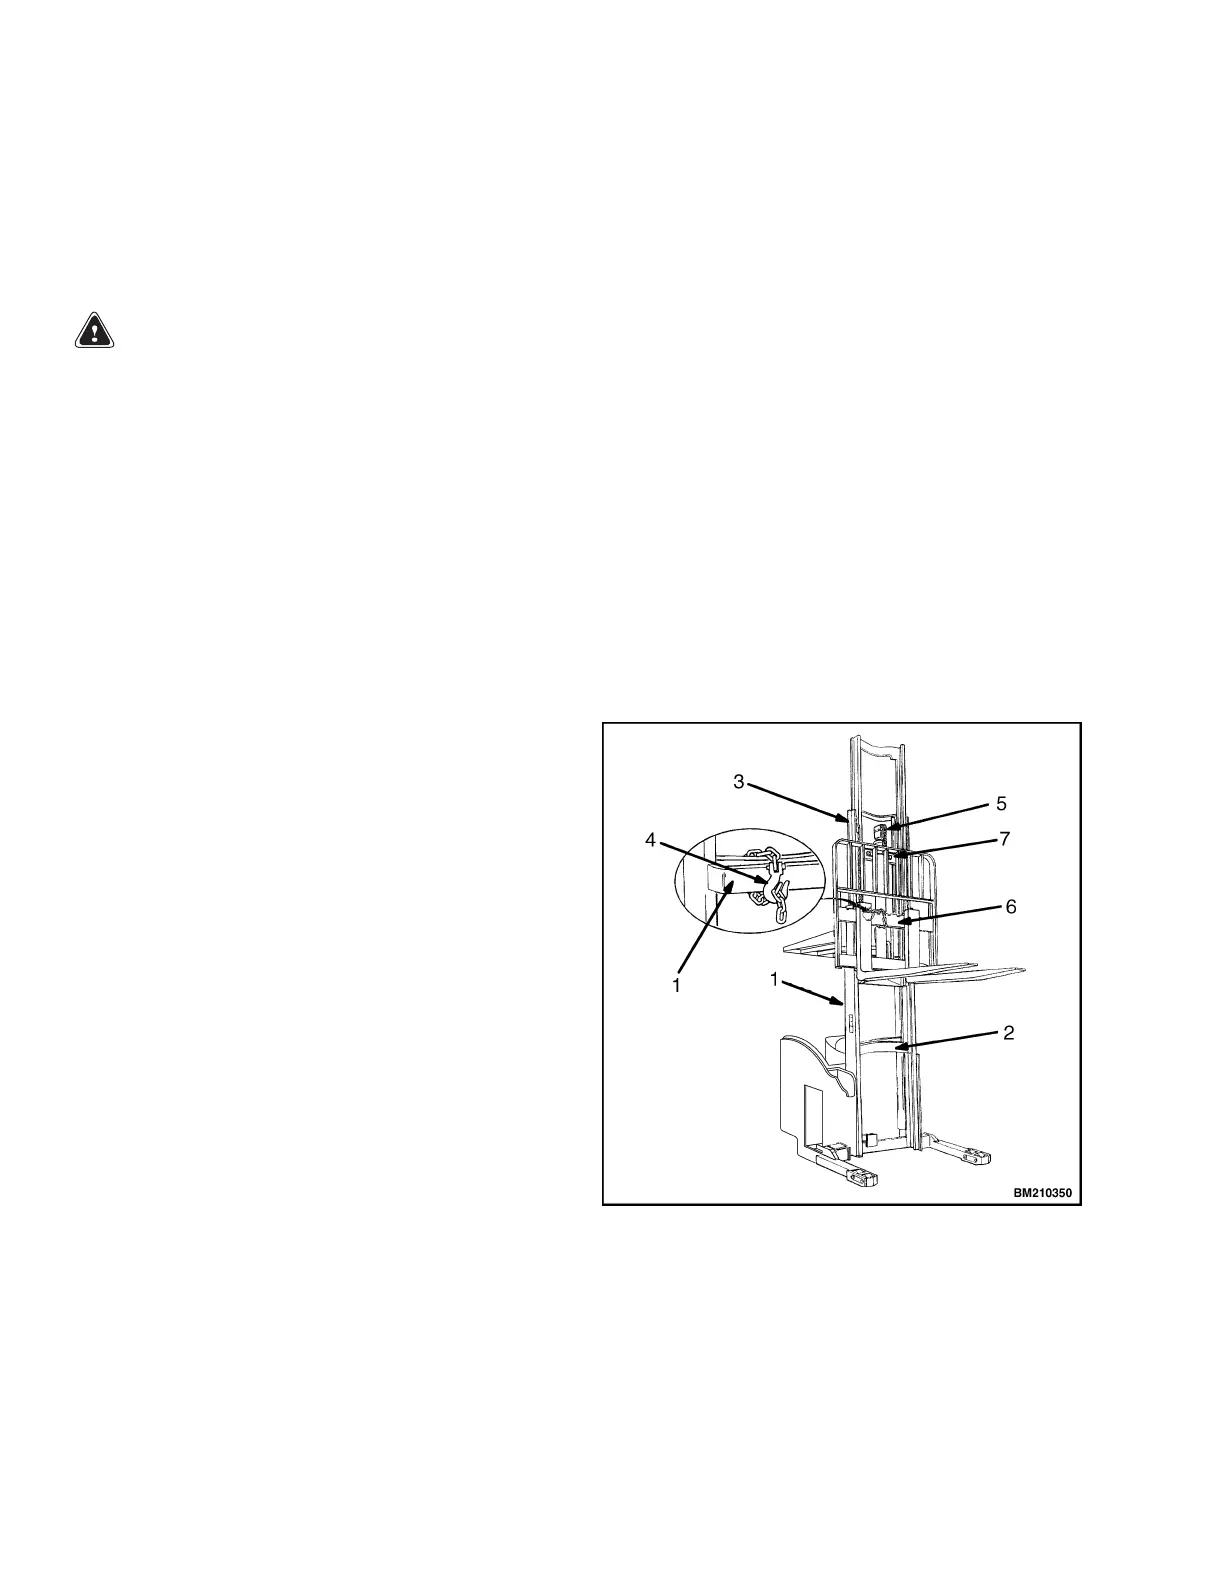
a. Raise the mast to align the bottom cross-
member of the weldment that moves in the
outer weldment with a crossmember on the
outer weldment (1). See Figure 8.
b. Use a 3/8-in. minimum safety chain with
a hook (4) to fasten the crossmembers to-
gether so that the movable member cannot
lower. Put the hook on the back side of the
mast. Makesurethehookiscompletelyen-
gaged with a link in the chain. Make sure
the safety chain does not touch lift chains or
chain sheaves, tubes, hoses, fittings, or other
parts on the mast.
c. Lower the mast until there is tension in the
safety chain, and the free-lift cylinder (5) is
completely retracted. Install a DO NOT RE-
MOVE tag on the safety chain(s).
d. Install another safety chain (3/8 in. min-
imum) around the safety chain already
installed as a secondary safety precaution.
Hook the chain as tight as possible by hand.
1. OUTER MAST
2. INNER MAST
3. INTERMEDIATE MAST
4. HOOK
5. FREE-LIFT CYLINDER
6. CROSSMEMBER
7. CROSSMEMBER
Figure 8. Safety Chains
10

 Loading...