MAN048ING9
8
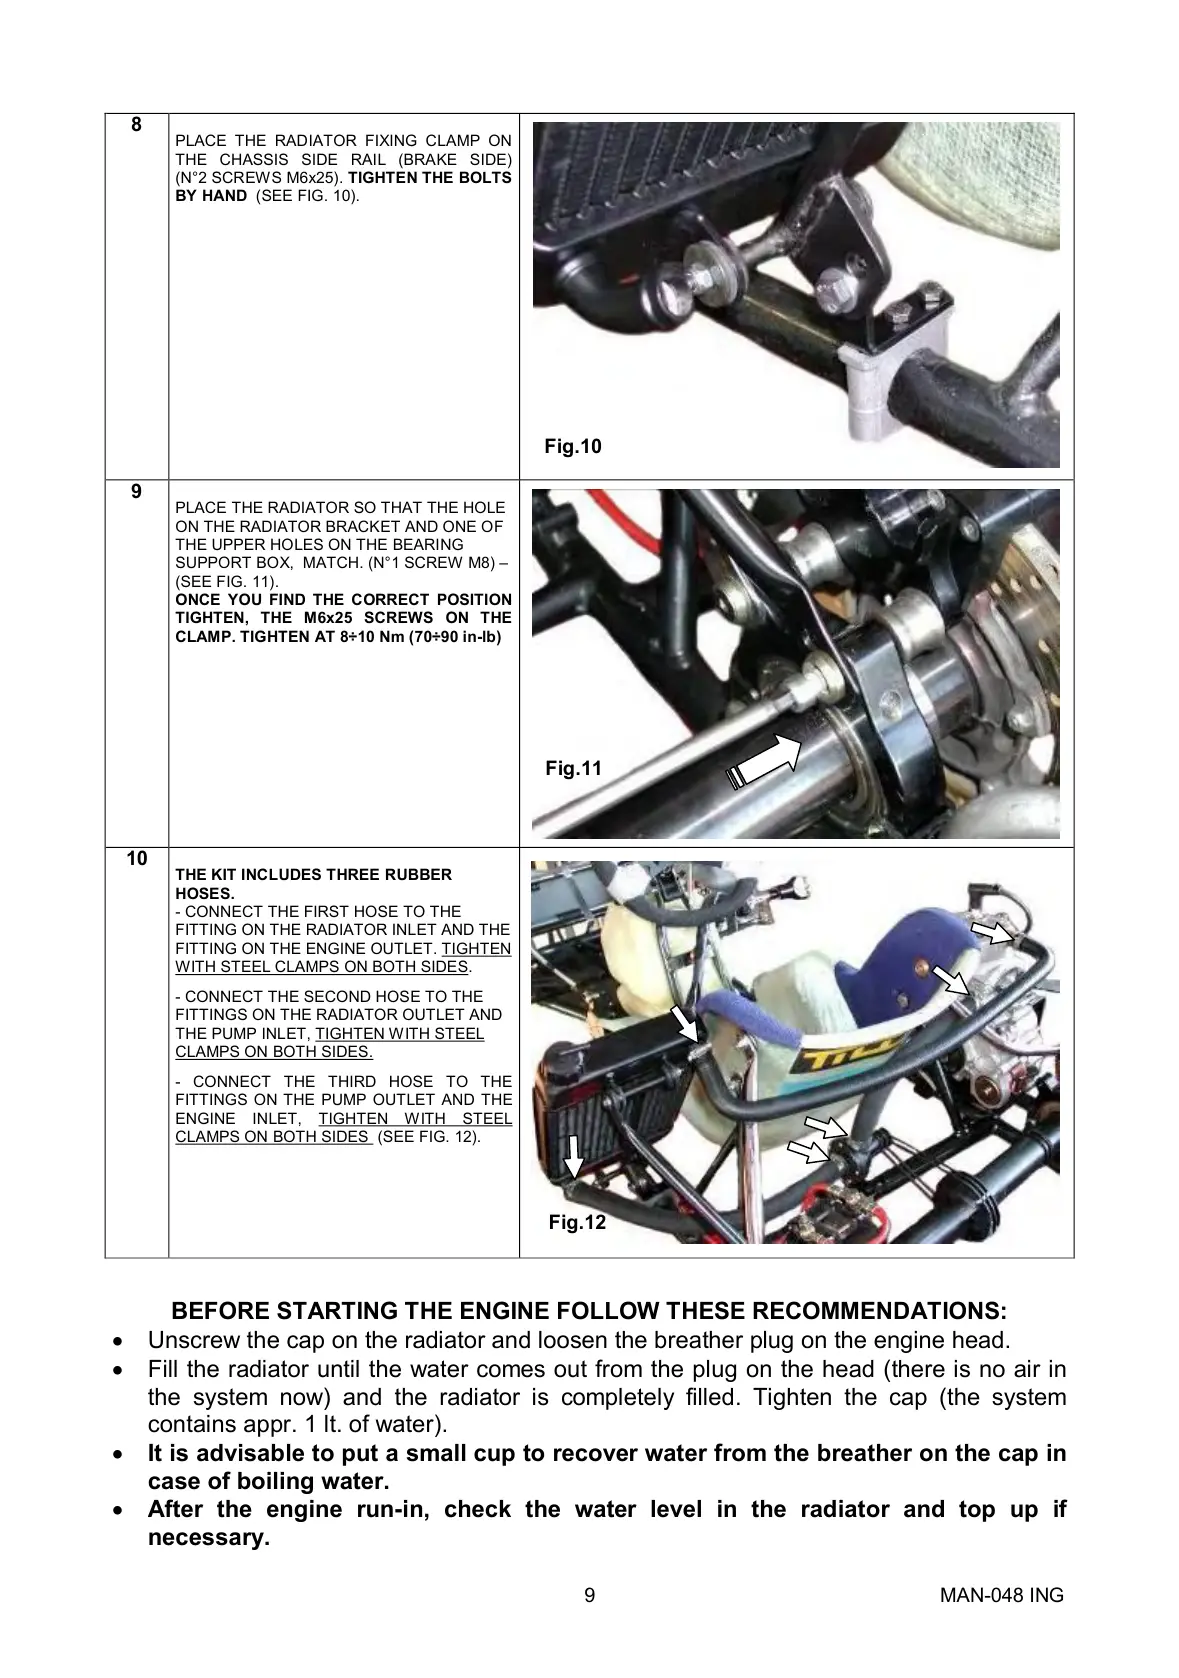
PLACE THE RADIATOR FIXING CLAMP ON
THE CHASSIS SIDE RAIL (BRAKE SIDE)
(N°2SCREWSM6x25).TIGHTENTHEBOLTS
BYHAND (SEEFIG.10).
9
PLACETHERADIATORSOTHATTHEHOLE
ONTHERADIATORBRACKETANDONEOF
THEUPPERHOLESONTHEBEARING
SUPPORTBOX,MATCH.(N°1SCREWM8)–
(SEEFIG.11).
ONCE YOU FIND THE CORRECT POSITION
TIGHTEN, THE M6x25 SCREWS ON THE
CLAMP.TIGHT ENAT8÷10Nm(70÷90inlb)
10
THEKITINCLUDESTHREERUBBER
HOSES.
CONNECTTHEFIRSTHOSETOTHE
FITTINGONTHERADIATORINLETANDTHE
FITTINGONTHEENGINEOUTLET.TIGHTEN
WITHSTEELCLAMPSONBOTHSIDES.
CONNECTTHESECONDHOSETOTHE
FITTINGSONTHERADIATOROUTLETAND
THEPUMPINLET,TIGHTENWITHSTEEL
CLAMPSONBOTHSIDES.
CONNECT THE THIRD HOSE TO THE
FITTINGS ONTHE PUMPOUTLET AND THE
ENGINE INLET, TIGHTEN WITH STEEL
CLAMPSONBOTHSIDES (SEEFIG.12).
BEFORESTARTINGTHEENGINEFOLLOWTHESERECOMMENDATIONS:
· Unscrewthecapontheradiatorandloosenthebreatherplugontheenginehead.
· Filltheradiatoruntilthewatercomesoutfromtheplugonthehead(thereisnoairin
the system now) and the radiator is completely filled. Tighten the cap (the system
containsappr.1lt.ofwater).
· Itisadvisabletoputasmallcuptorecoverwater fromt hebreatheronthe capin
caseofboilingwater.
· After the engine runin, check the water level in the radiator and top up if
necessary.
Fig.10
Fig.11
Fig.12
 Loading...