When the drive module has been successfully taken offline, the LED on the back of
the drive will be flashing yellow. To remove the drive module, do the following
steps.
1. Verify that the external SCSI cable is securely fastened to the connector plate.
2. Loosen the thumbscrews on each side of the connector plate located in the
middle of the drive module. See the following illustration. If this is your fist
time loosening the thumbscrews, you may want to use a screwdriver.
3. Gently remove the connector plate and keep the SCSI cable connected.
CAUTION:
Use standard precautions for electro-static discharge (ESD) protection.
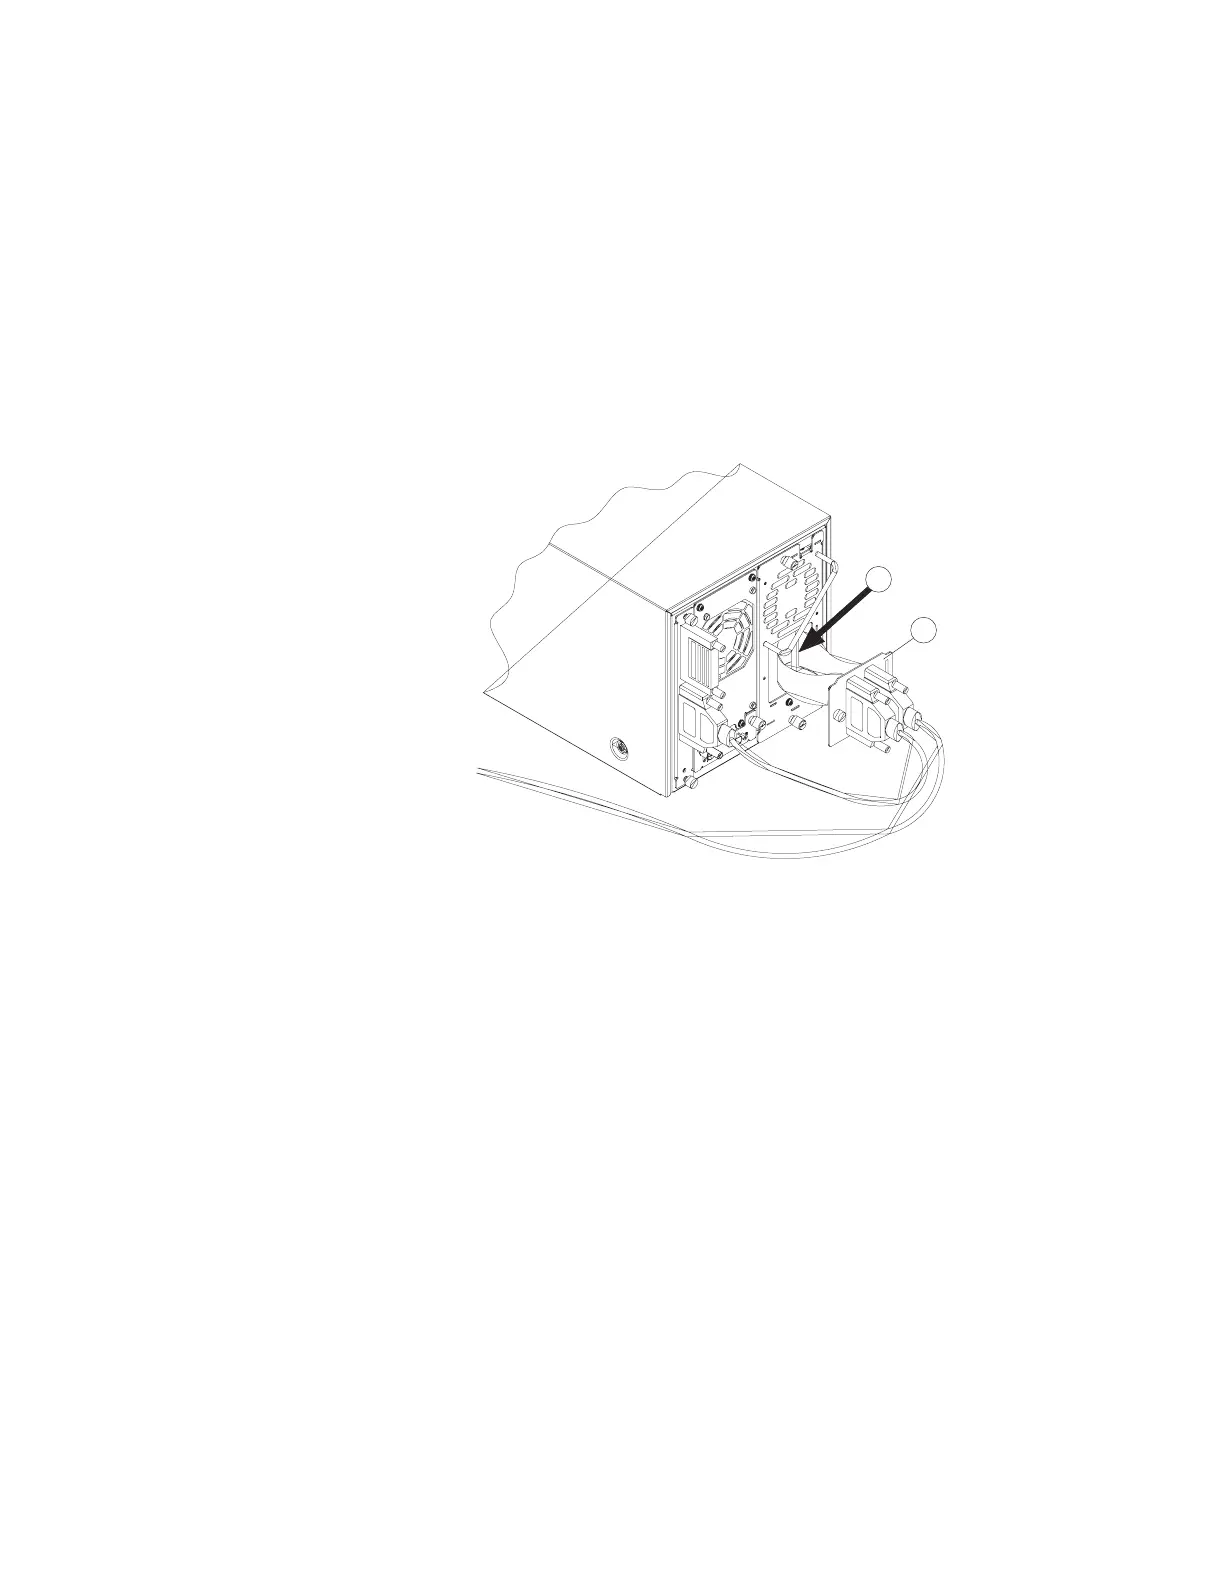
4. Grasp the ribbon cable that is plugged into the drive module. Remove the cable
by pulling the connector to the left. See the following illustration.
1
2
5. Lay the connector assembly to the side, allowing the external cables to hang
from the connector. Do not disconnect external cables from the connector plate.
6. Loosen the top and bottom thumbscrews on the drive module. See the
following illustration.
7. Using the handle that is mounted on the back of the drive module, pull the
drive module straight out with one hand while supporting the bottom of the
drive module with the other hand.
CAUTION:
As the drive module is pulled out. support the bottom of the drive module to
avoid dropping or damaging it.
26 LTO Autoloader: User’s Guide