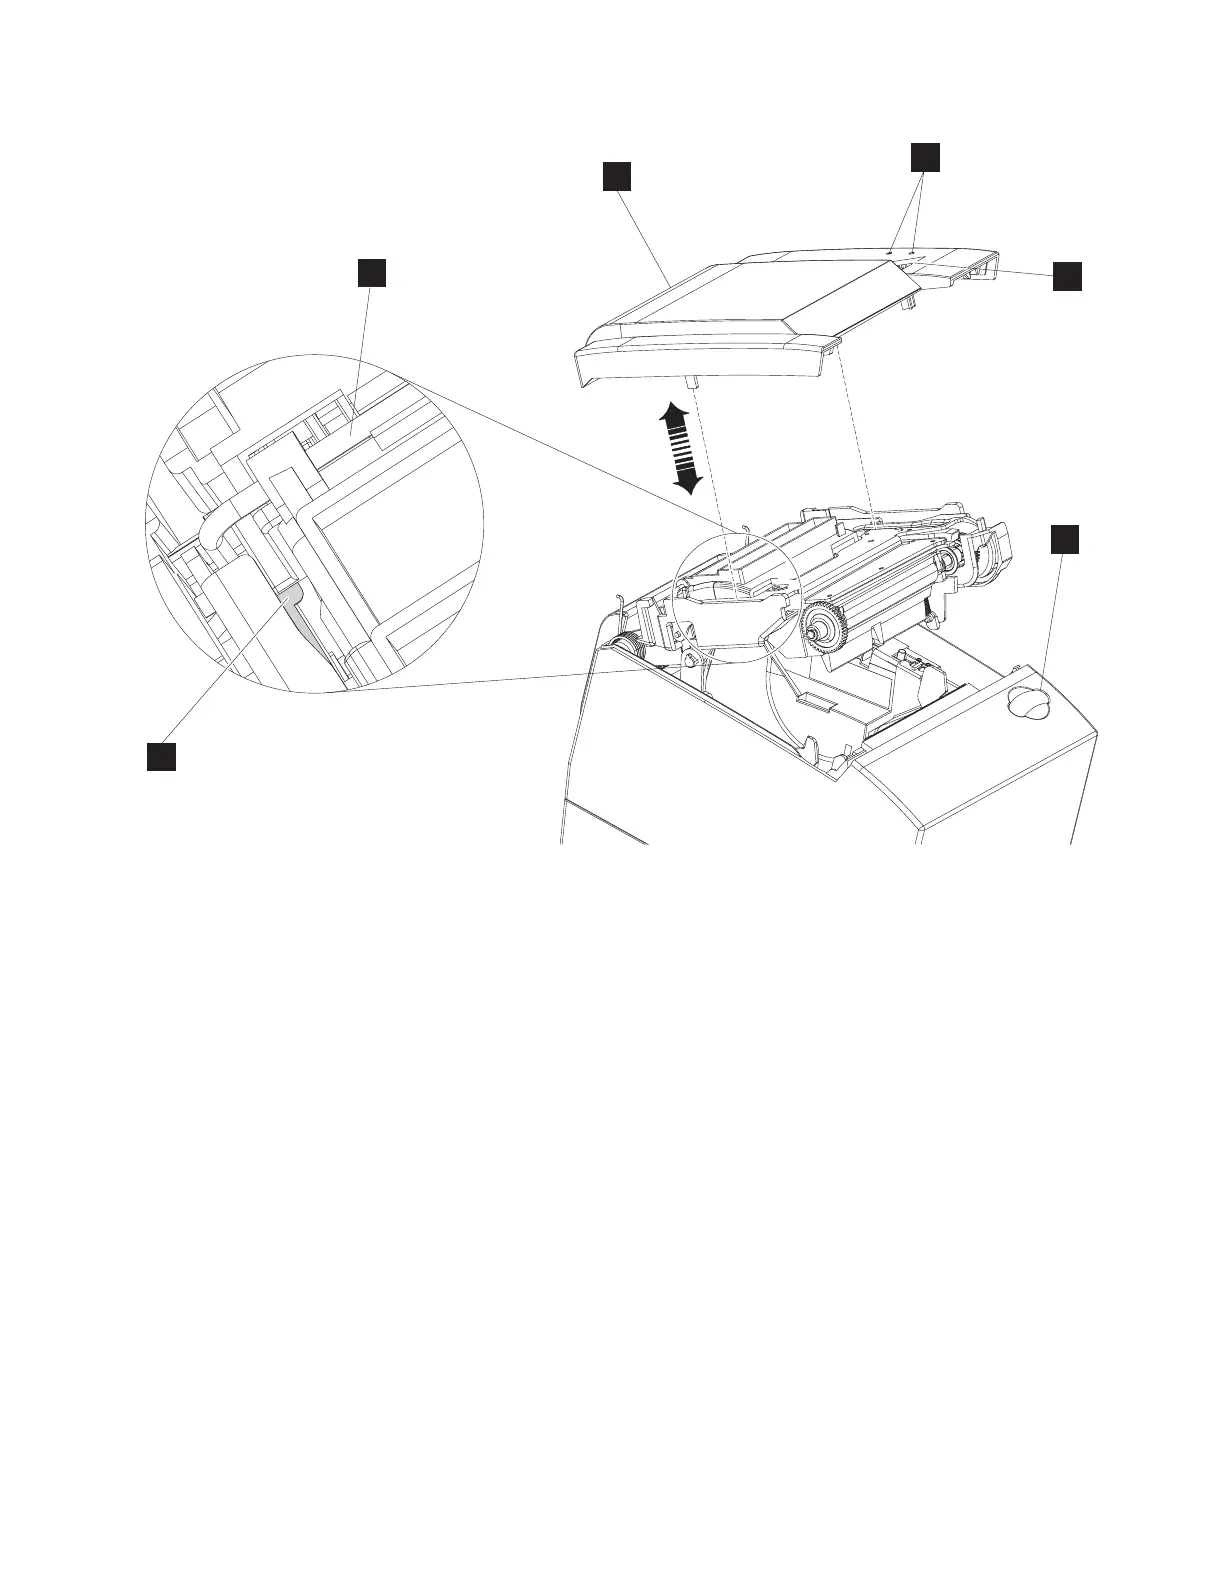
To install the paper door cover A (Figure 19), complete the following steps:
1. Open the paper door and orientate printer so the customer receipt feed button C (Figure 19) is on the
right side of the printer.
2. Align the tabs G (Figure 19) on the bottom of the paper door cover with the mounting slots E
(Figure 19) in the paper door. The slots are located just in front of a large retention clip F (Figure 19)
on the paper door.
3. Insert the tabs into the slots. The customer receipt button and light pipes B (Figure 19) will also pass
through an opening on the right side.
4. Once the cover is flush to the top of the paper door, slide the paper door cover backward until it snaps
into position.
5. Close the paper door.
E
F
B
C
D
A
Figure 19. Installing the paper door cover
Removing and replacing FRUs
Chapter 5. Removing and replacing FRUs 43

 Loading...


