v Servers with two simple-swap bays support 3.5-inch simple-swap SATA hard disk
drives. You can install only 3.5-inch simple-swap SATA drives in these servers.
v Do not mix SAS and SATA drives in the same array.
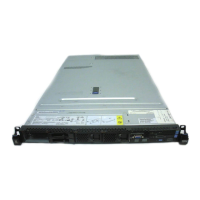
Installing a hot-swap hard disk drive
To install a 2.5-inch or 3.5-inch SAS hard disk drive, complete the following steps.
Note: If you have only one hard disk drive, you must install it in the upper-left bay.
Drive-tray assembly
Drive handle
Filler panel
SAS hard disk
drive backplane
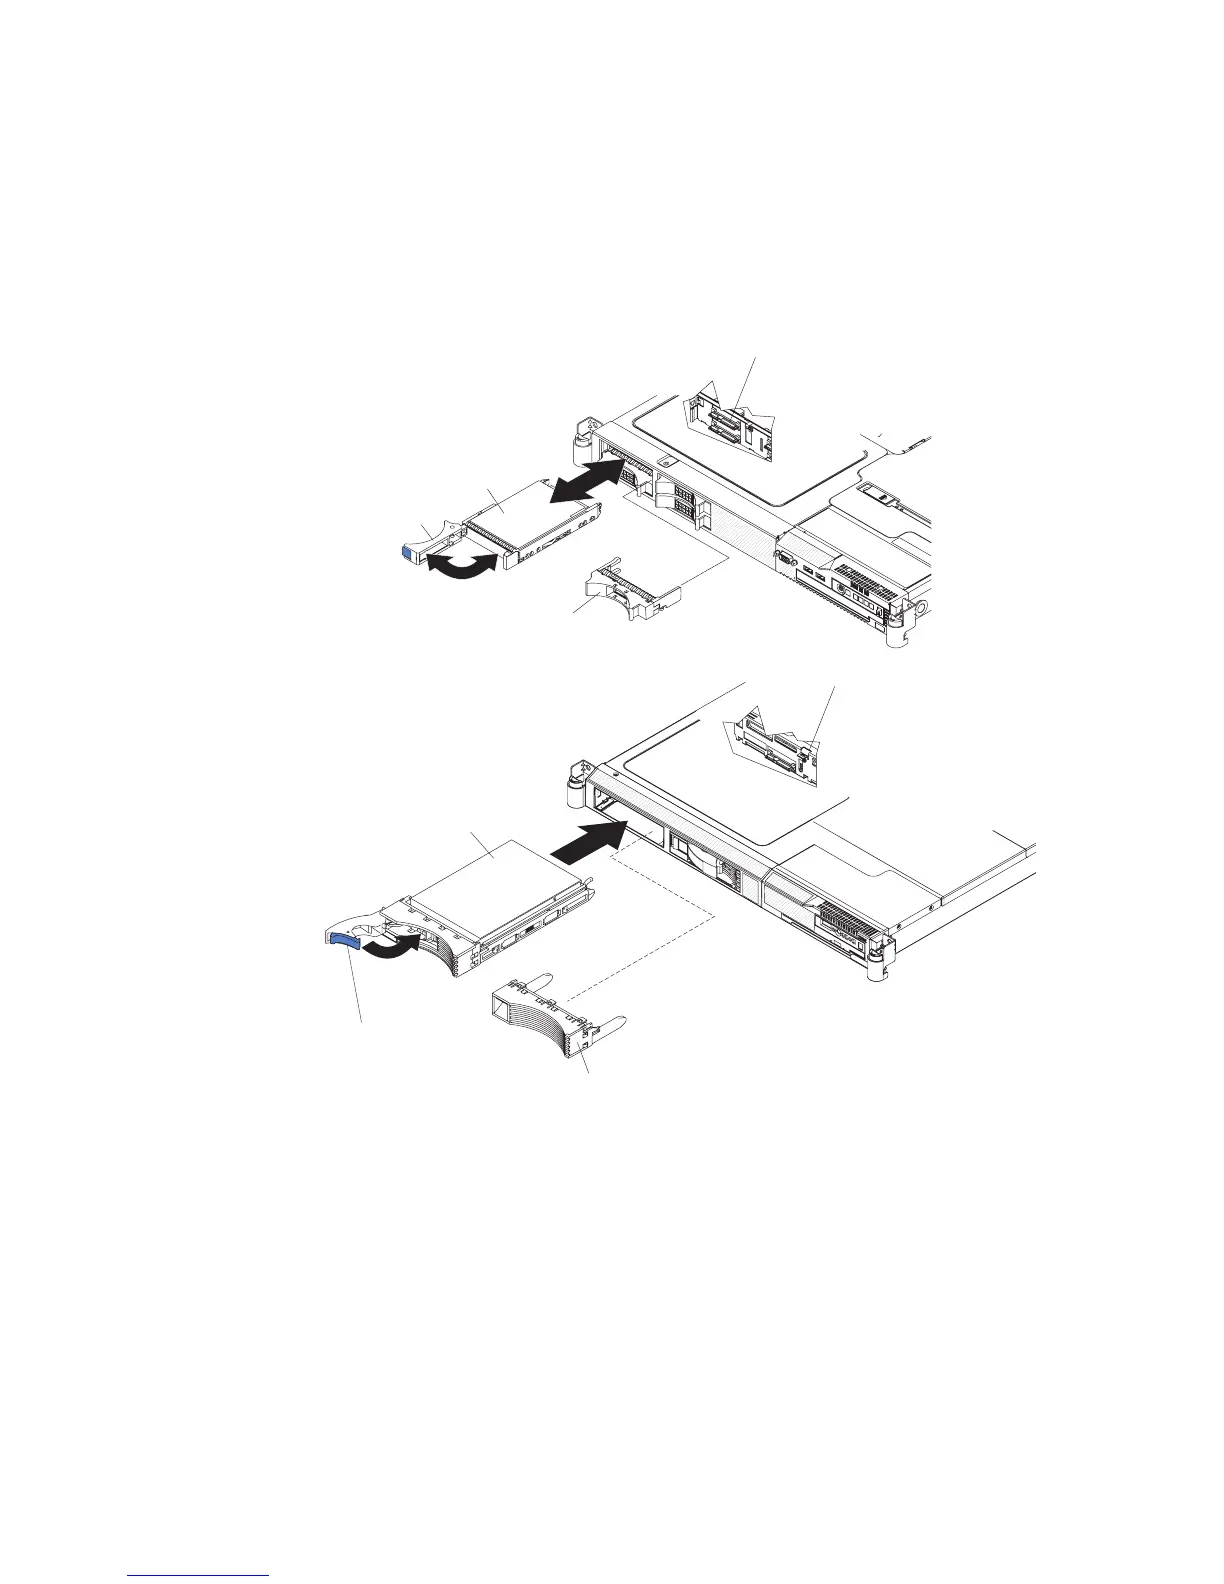
SAS hard disk
drive backplane
Filler panel
Drive-tray assembly
Drive handle
(in open position)
1. Read the safety information that begins on page v and “Installation guidelines”
on page 9.
2. Remove the filler panel from the empty drive bay.
3. Install the hard disk drive in the drive bay.
a. Make sure that the tray handle is open (that is, horizontal to the drive).
b. Align the drive assembly with the guide rails in the bay.
c. Gently push the drive assembly into the bay until the drive stops.
d. Push the tray handle to the closed (locked) position.
e. Check the hard disk drive status LED to verify that the hard disk drive is
operating correctly. If the amber hard disk drive status LED for a drive is lit
continuously, that drive is faulty and must be replaced. If the green hard disk
drive activity LED is flashing, the drive is being accessed.
14 IBM System x3550 Type 7978: Installation Guide

 Loading...