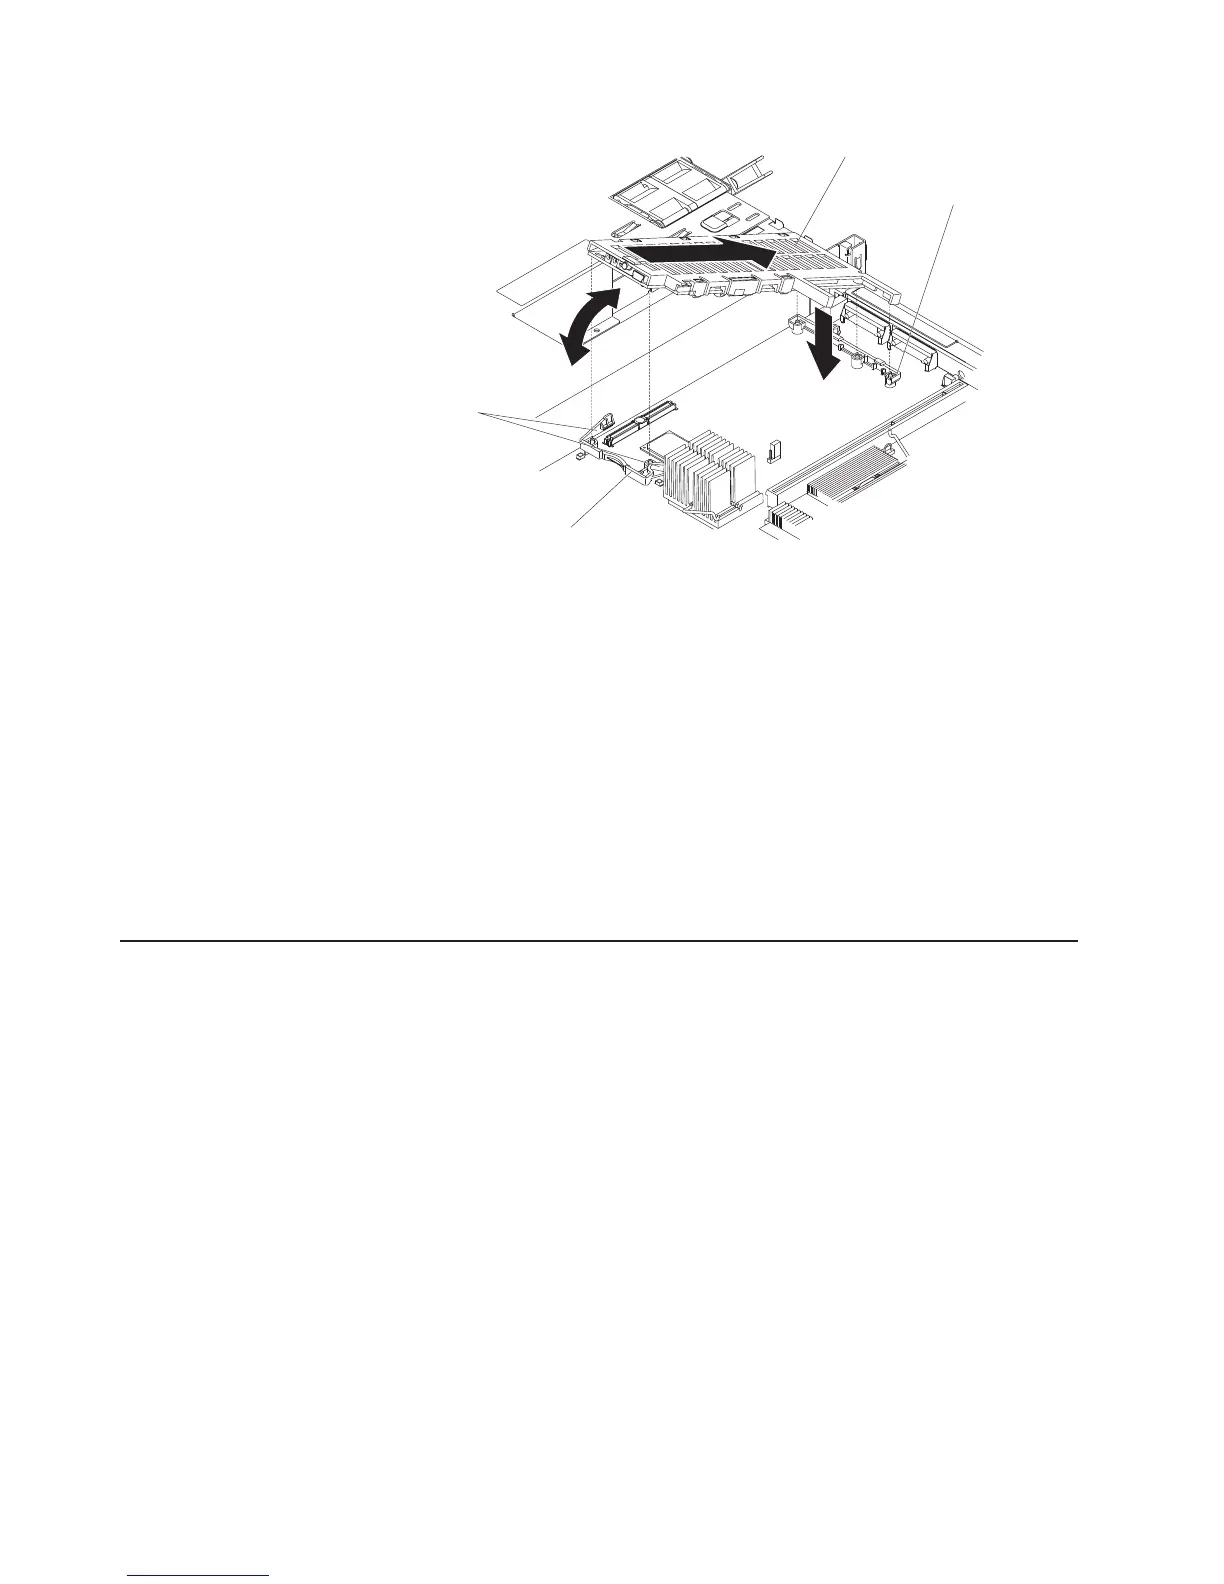
Remote Supervisor Adapter II SlimLine
Mounting bracket
Mounting bracket
Mounting bracket
retention latch
6. At a downward angle, slip the free end of the adapter under the tab on the
mounting bracket, aligning the holes in the adapter with the posts on the
mounting bracket and latch bracket.
7. Rotate the rear of the adapter into the rear mounting bracket, aligning the holes
in the adapter with the posts on the mounting bracket.
8. Press the Remote Supervisor Adapter II SlimLine firmly into the connector and
secure the mounting bracket retention latches over the adapter.
Attention: Incomplete insertion might cause damage to the server or the
adapter.
9. Replace the riser-card assembly in slot 2 on the system board. See “Replacing
a riser-card assembly” on page 15 for more information.
If you have other options to install, do so now. Otherwise, go to “Completing the
installation.”
Completing the installation
To complete the installation, complete the following steps:
1. If you removed any air baffles, reinstall them now. See page 12 for the baffle
locations or for more information.
2. If you removed the server cover, replace it and close the fan doors. For more
information, see “Replacing the server cover.”
3. Install the server in the rack cabinet. See the Rack Installation Instructions that
come with the server for complete rack installation and removal instructions.
4. Connect the cables and power cords. For more information, see “Connecting
the cables” on page 27.
5. Update the server configuration. See “Updating the server configuration” on
page 28 for more information.
Replacing the server cover
To replace the server cover, complete the following steps:
v Slide the server cover toward the front of the server, fitting the cover into the tabs
for a secure fit.
v Close the covers over the fans and snap down the two fan cover-release latches.
26 IBM System x3550 Type 7978: Installation Guide

 Loading...