If you have other options to install, do so now. Otherwise, go to “Completing the
installation” on page 26.
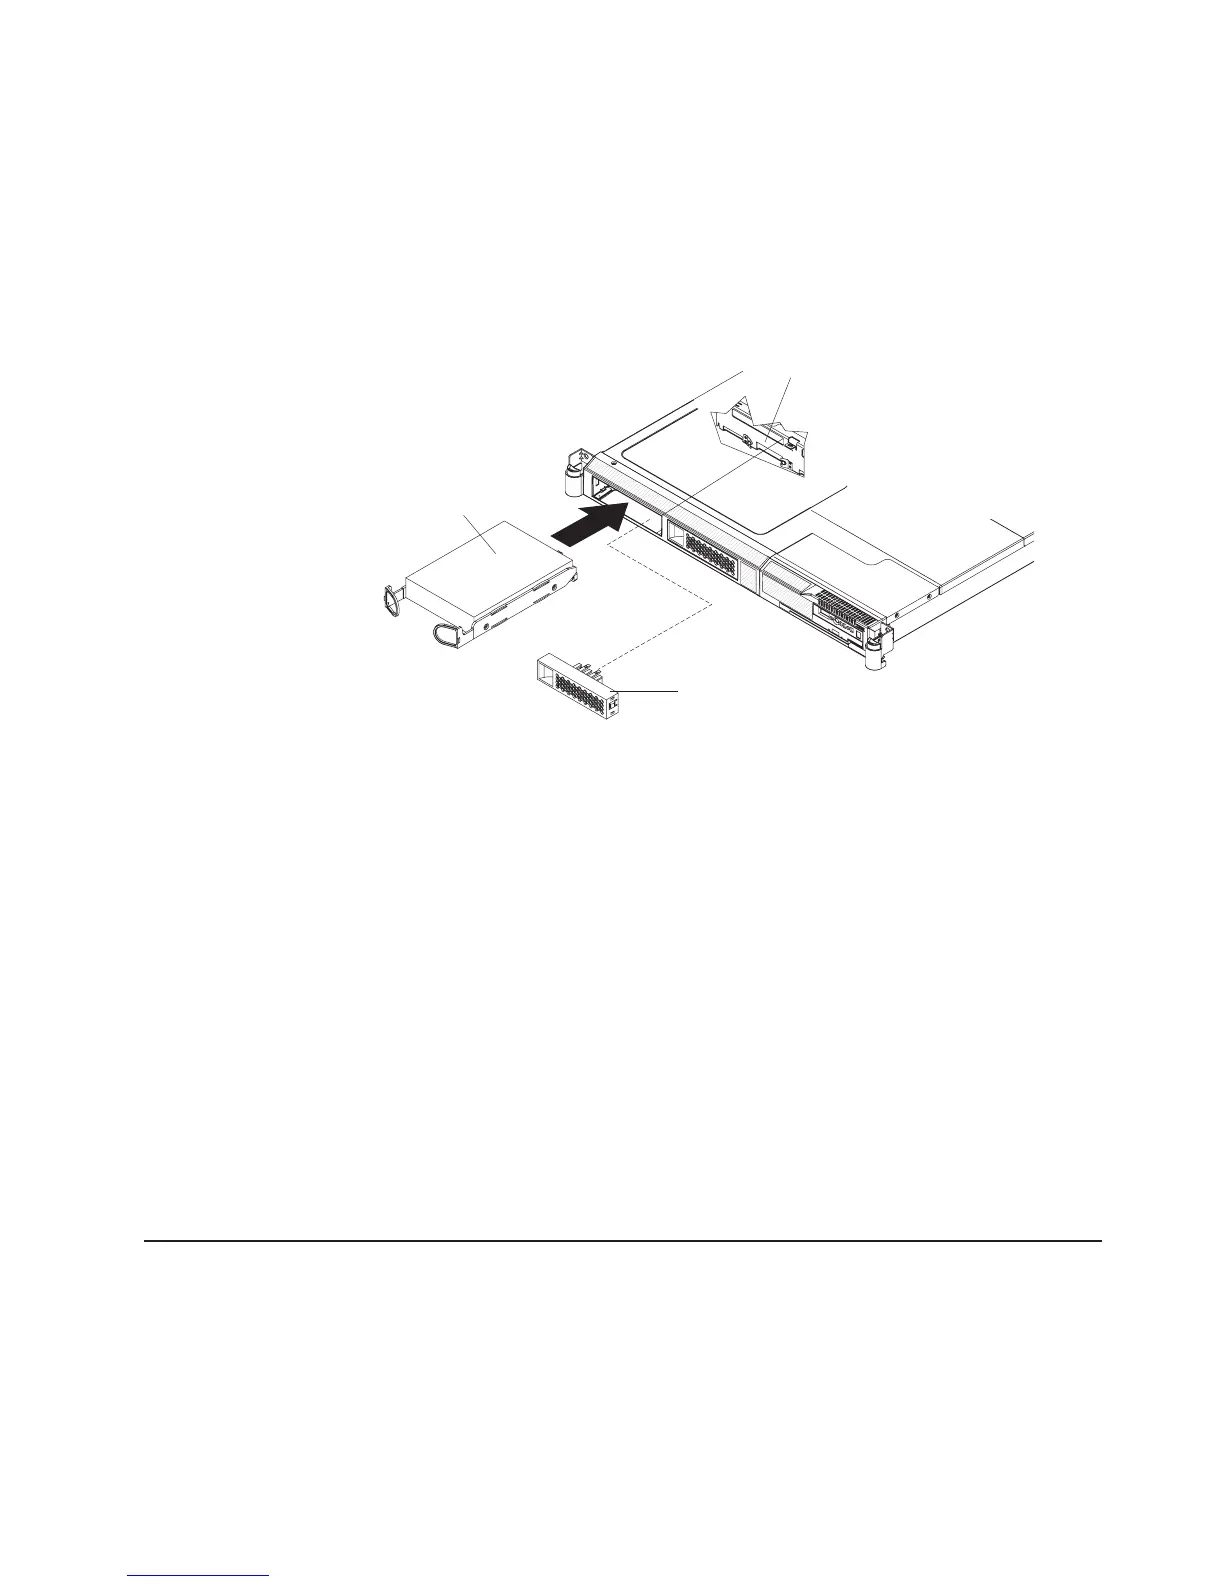
Installing a simple-swap hard disk drive
To install a 3.5-inch SATA simple-swap hard disk drive, complete the following
steps.
Note: If you have only one hard disk drive, you must install it in the left bay.
Filler panel
Drive-tray assembly
SATA hard disk
drive back plate
1. Read the safety information that begins on page v and “Installation guidelines”
on page 9.
2. Turn off the server and disconnect the power cords and all external cables, if
necessary.
3. Remove the filler panel from the empty drive bay.
4. Insert the simple-swap hard disk drive into the drive tray assembly.
a. Align the drive assembly with the guide rails in the bay.
b. Gently push the drive assembly into the bay until the rear of the drive snaps
into place with the connector on the back plate.
5.
Install the filler panel in the drive bay.
6. Reconnect the power cords and turn on the server.
7. Check the hard disk drive status LED to verify that the hard disk drive is
operating correctly. If the amber hard disk drive status LED for a drive is lit
continuously, that drive is faulty and must be replaced. If the green hard disk
drive activity LED is flashing, the drive is being accessed.
If
you have other options to install, do so now. Otherwise, go to “Completing the
installation” on page 26.
Replacing a riser-card assembly
The System x3550 Type 7978 comes with two PCI Express riser-card assemblies.
You can replace one of the PCI Express riser-card assemblies with a PCI-X
riser-card assembly.
To replace a PCI Express riser-card assembly with a PCI-X riser-card assembly,
complete the following steps:
Chapter 2. Installing options 15

 Loading...