14
START UP
After having correctly installed the ice maker
and completed the plumbing and electrical
connections, perform the following “Start-up”
procedure.
A Open the water supply line shutoff valve and
put the unit under electrical power by moving
the main switch, on the power supply line, to
the ON position.
The first LED - GREEN - will glow to signal
that unit is under power.
B Elapsed the stand by period the unit starts
operating with the activation in sequence of
the following assemblies:
GEAR MOTOR/S
COMPRESSOR
FAN MOTOR/S (if unit is an air cooled version)
kept under control by the condenser tempera-
ture sensor which has its probe within the con-
denser fins (Fig.2).
C After 2 or 3 minutes from the compressor
start up, observe that flaker ice begins drop-
ping off the ice spout to fall through the ice
chute into the storage bin.
OPERATING INSTRUCTIONS
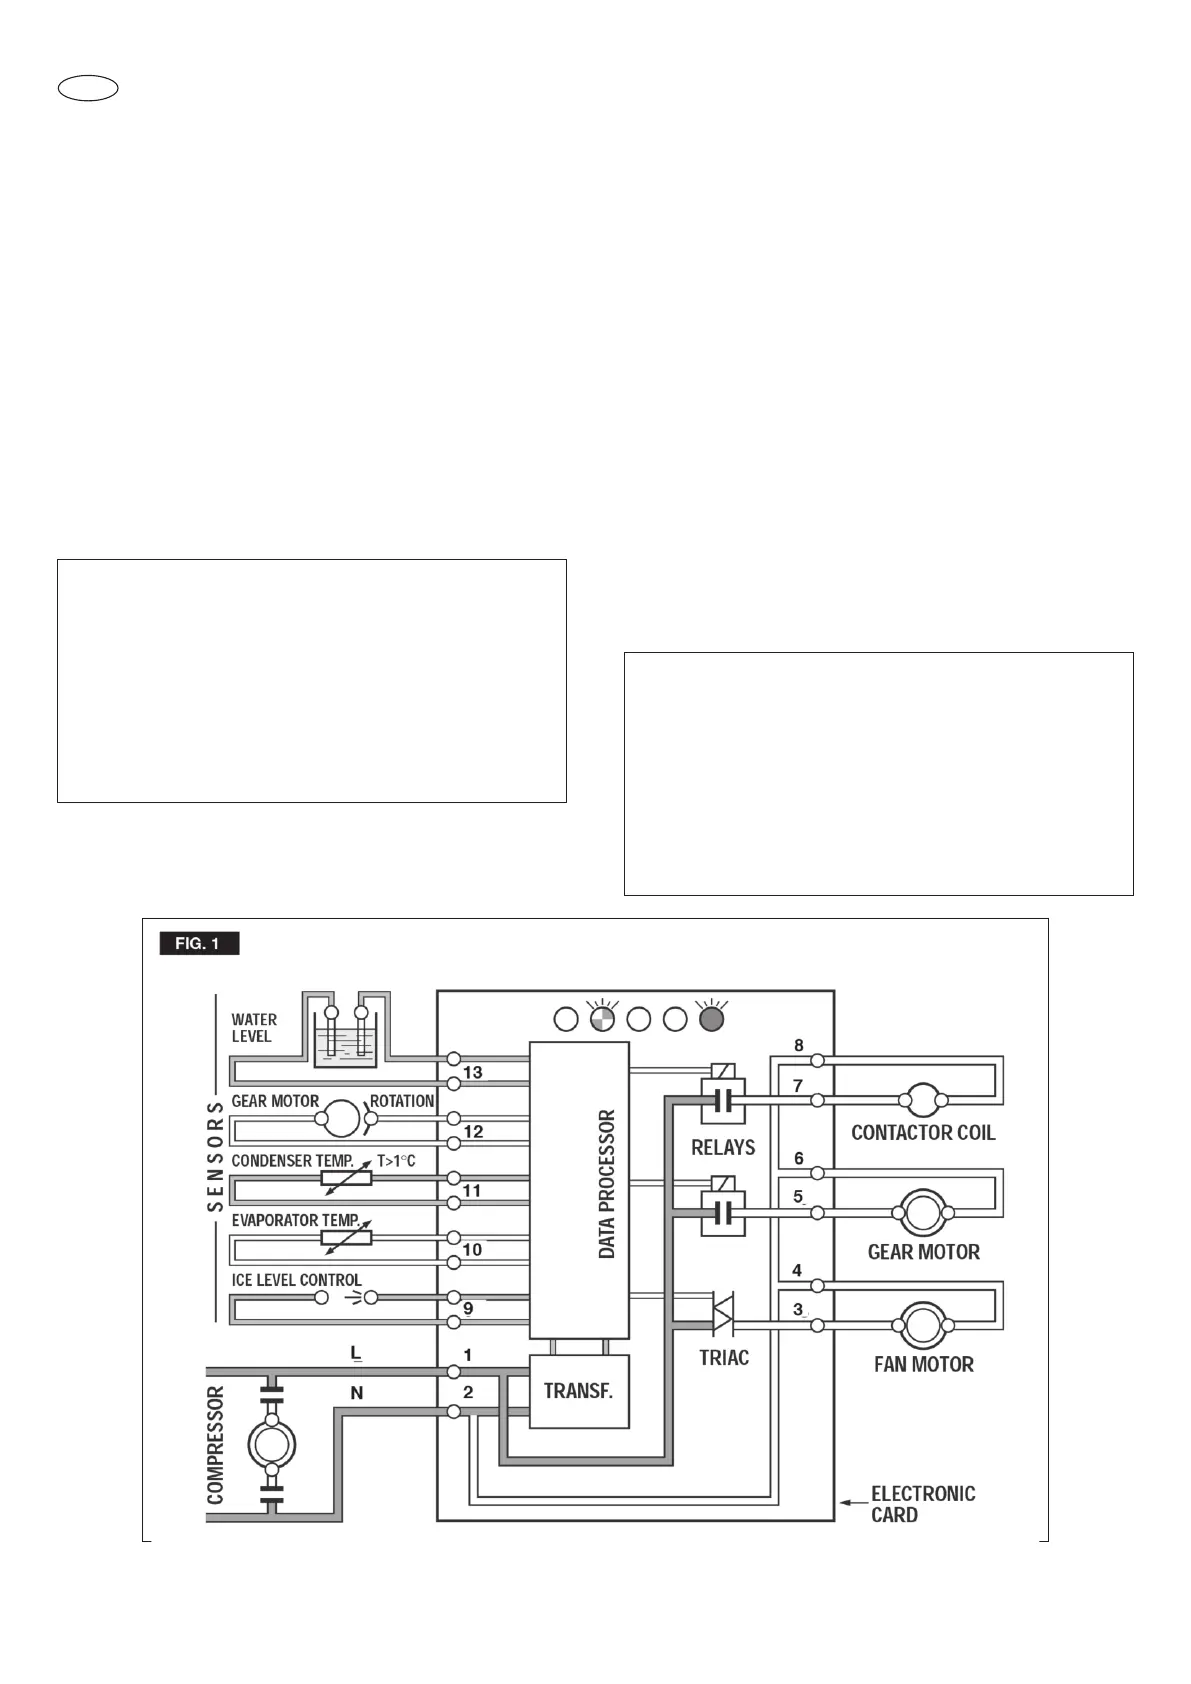
NOTA. Every time the unit is put under power,
after being kept for sometime in shut-off
conditions (electrically disconnected) the
RED LED will blink for 3 minutes (60' on MF
66 only) after which the unit will start up with
the immediate operation of the gear motor
assembly and, after few seconds, of the
compressor (Fig.1).
NOTA. The first ice bits that drop into the ice
storage bin are not so hard as the evapora-
ting temperature has not yet reached the cor-
rect operating value. It is necessary to allow
the ice - just made - to cure itself and wait for
about ten minutes for the evaporating tempe-
rature to reach the correct value so to make
more hard bits of ice.