EasyManua.ls Logo

Icom IC-7610 - User Manual

Icom IC-7610
107 pages
Print Icon
To Next Page IconTo Next Page
Loading...
SERVICE
MANUAL
HF/50 MHz TRANSCEIVER
i761 0
S-15418XZ- C1
December 2017

Other manuals for Icom IC-7610

Questions and Answers

  • M
    Melissa BlackAug 19, 2025
    How to unlock the dial on Icom Transceiver?
    • B
      Brittany WilcoxAug 20, 2025
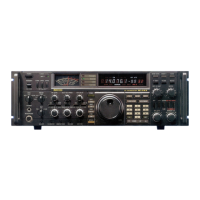
      If the operating frequency is not properly changed by rotating MAIN DIAL on your Icom Transceiver, the Dial Lock function may be activated. Hold down SPEECH to turn the Dial Lock function off.
  • E
    Erika WintersAug 21, 2025
    How to turn on Icom Transceiver if it does not power on?
    • V
      Veronica FitzgeraldAug 21, 2025
      If your Icom Transceiver does not turn on, first ensure the DC power cable is properly connected. If it is, check that the external power supply is turned on. Also, inspect the DC power cable fuses or circuitry fuse; if they are blown, identify and fix the underlying issue before replacing the fuse.
  • T
    tammyhensleyAug 23, 2025
    What to do if there is no sound from the Icom Transceiver speaker?
    • B
      brianamorrisAug 25, 2025
      If you are not hearing any sound from the Icom Transceiver speaker, first, check the audio level and adjust it by rotating AF RF/SQL clockwise. Ensure that the squelch is open by rotating AF RF/SQL to the 12 o’clock position. If using Dualwatch, verify that the Dualwatch function is turned on. Also, check that headphones are disconnected, and the Mute function is off. Finally, inspect the external speaker cable for any defects.
  • M
    Margaret JonesAug 26, 2025
    Why is there no power output or low output power on my Icom Transceiver?
    • K
      Kristy RogersAug 26, 2025
      If you're experiencing no power output or low output power on your Icom Transceiver, make sure that the operating frequency is within the ham band. Adjust the microphone gain in MIC GAIN, and test the microphone and [MIC] connector. Ensure the antenna SWR is less than 3:1, and tune the antenna by holding down TUNER for 1 second. Also, adjust the RF POWER in the Multi-function menu.
  • A
    amandajensenAug 27, 2025
    How to improve Icom Transceiver sensitivity if only strong signals are heard?
    • S
      Stephanie HayesAug 28, 2025
      If your Icom Transceiver's sensitivity is too low, and you're only receiving strong signals, first, turn off the attenuator in the Multi-function key group. Then, open the squelch by rotating AF RF/SQL to the 12 o’clock position. Check the antenna and coaxial cable for defects, and ensure you are using an antenna suitable for the selected band. Finally, tune the antenna by holding down TUNER.
  • A
    Andrew HardingAug 30, 2025
    Why does my Icom Transceiver automatically switch to transmit?
    • C
      Carrie LoganAug 30, 2025
      If your Icom Transceiver automatically switches to transmit while receiving, the VOX function may be on. Turn off the VOX function in the Multi-function menu. If the issue persists, adjust the VOX gain.
  • W
    wwongAug 31, 2025
    What to do if I cannot contact another station with my Icom Transceiver?
    • M
      Martin WolfSep 1, 2025
      If you cannot contact another station with your Icom Transceiver, even if receiving and transmitting seem normal, the Split function might be activated. Turn off the Split function by pushing SPLIT. Also, check if the RIT or TX function is on, and if so, turn them off by pushing RIT or TX.
  • J
    johnmillerSep 2, 2025
    Why is the received audio unclear or distorted in SSB mode on my Icom Transceiver?
    • C
      Candace EvansSep 3, 2025
      If the received audio in SSB mode is unclear or distorted on your Icom Transceiver, the incorrect sideband may be selected. Toggle between USB and LSB. Additionally, check if the PBT function is activated, and if so, rotate TWIN PBT CLR to clear the settings.
  • B
    Brett PhelpsSep 4, 2025
    What does 'OVF' displayed on my Icom Transceiver mean and how do I fix it?
    • J
      John BryantSep 5, 2025
      If “OVF” is displayed on your Icom Transceiver, it means an excessively strong signal is being received. Rotate AF RF/SQL counter clockwise. You can also turn on the attenuator, turn off the Preamplifier (P.AMP OFF), or turn on the Digital Selector function.
  • P
    pedwardsSep 7, 2025
    Why is the transmit signal unclear or distorted in SSB mode on my Icom Transceiver?
    • G
      garyrogersSep 7, 2025
      If the transmit signal is unclear or distorted in SSB mode on your Icom Transceiver, the transceiver’s microphone gain might be too high. Adjust the MIC GAIN level so that the meter reading swings between 30 and 50% of the ALC scale.

Summary

Introduction

Service Cautions

Critical warnings regarding power, environment, and RF signal application.

Ordering Parts

Required information for ordering replacement parts: part number, name, model, and quantity.

Repair Notes

Essential guidelines for safe and effective repair procedures, including precautions and tool usage.

Specifications

General Specifications

Key operational parameters including frequency, modes, power, temperature, dimensions, and weight.

Transmitter Specifications

Details on output power, modulation, spurious emissions, carrier/sideband suppression, and microphone impedance.

Receiver Specifications

Details on receive system, sensitivity, selectivity, spurious rejection, audio output, and RIT range.

Antenna Tuner Specifications

Parameters for antenna tuner matching impedance, tuning time, and accuracy.

Inside Views

PA;Tuner Unit (Top View)

Top view diagram showing the PA and Tuner units with labeled components.

Main;Digisel Unit Views (Top)

Top view diagrams of the Main, Digisel-A, and Digisel-B units with labeled components.

Interface Information

Front Panel Connectors

Description and specifications for PHONES, MIC, and ELEC-KEY connectors on the front panel.

Rear Panel Connectors (1)

Details of various connectors on the rear panel: SEND, ALC, METER, TUNER, DC, X-VERTER, REF IN, REMOTE, EXT KEYPAD.

Rear Panel ACC Connectors (2)

Pin assignments and specifications for ACC 1 and ACC 2 connectors on the rear panel.

Rear Panel Connectors (3)

Details of rear panel connectors for RX ANT OUT/IN, KEY, and EXT SP A/B.

Adjustment Procedures

Preparation for Adjustment

Required equipment and connection diagrams for performing adjustments.

Entering Adjustment Mode

Step-by-step instructions on how to enter the adjustment mode using front panel controls.

Key Assignments for Adjustment Mode

Explanation of key functions (Y, Z, DIAL, SET, EXIT) used for navigating and modifying adjustment values.

TX;ID Adjustments

Procedures for adjusting TX/ID parameters, including VDL, FINAL, DRIVER, and SWR.

Tuner;Reference Adjustments

Procedures for adjusting tuner voltage reference and frequency reference.

Receive Adjustments

Procedures for adjusting total gain and S-meter level for receive sensitivity.

Transmit Adjustments

Procedures for adjusting TX power output (HF, 50 MHz), AM carrier rate, ALC, drive gain, SWR meter, and Id APC.

Antenna Tuner;Reference Adjustments

Procedures for adjusting tuner voltage reference and reference frequency.

Refulk Adjustment

Procedure for performing the Refulk adjustment.

Digi-Sel Adjustments

Procedure for performing the DIGI-SEL ALL adjustment.

Parts List

Main Unit Parts

List of components for the main unit, including part number, description, and location.

Main Unit Parts (Continued)

Continuation of the parts list for the main unit.

Main Unit Parts (Continued)

Continuation of the parts list for the main unit.

Main Unit Parts (Continued)

Continuation of the parts list for the main unit.

Main Unit Parts (Continued)

Continuation of the parts list for the main unit.

Main Unit Parts (Continued)

Continuation of the parts list for the main unit.

Main Unit Parts (Continued)

Continuation of the parts list for the main unit.

Main Unit Parts (Continued)

Continuation of the parts list for the main unit.

Main Unit Parts (Continued)

Continuation of the parts list for the main unit.

Main Unit Parts (Continued)

Continuation of the parts list for the main unit.

Main Unit Parts (Continued)

Continuation of the parts list for the main unit.

Main Unit Parts (Continued)

Continuation of the parts list for the main unit.

Main Unit Parts (Continued)

Continuation of the parts list for the main unit.

Main Unit Parts (Continued)

Continuation of the parts list for the main unit.

Main Unit Parts (Continued)

Continuation of the parts list for the main unit.

Main Unit Parts (Continued)

Continuation of the parts list for the main unit.

Main Unit Parts (Continued)

Continuation of the parts list for the main unit.

Main Unit Parts (Continued)

Continuation of the parts list for the main unit.

Main Unit Parts (Continued)

Continuation of the parts list for the main unit.

Main Unit Parts (Continued)

Continuation of the parts list for the main unit.

Main Unit Parts (Continued)

Continuation of the parts list for the main unit.

Main Unit Parts (Continued)

Continuation of the parts list for the main unit.

Main Unit Parts (Continued)

Continuation of the parts list for the main unit.

Main Unit Parts (Continued)

Continuation of the parts list for the main unit.

Main Unit Parts (Continued)

Continuation of the parts list for the main unit.

Main Unit Parts (Continued)

Continuation of the parts list for the main unit.

Main Unit Parts (Continued)

Continuation of the parts list for the main unit.

Main Unit Parts (Continued)

Continuation of the parts list for the main unit.

Main Unit Parts (Continued)

Continuation of the parts list for the main unit.

Main Unit Parts (Continued)

Continuation of the parts list for the main unit.

Main Unit Parts (Continued)

Continuation of the parts list for the main unit.

Main Unit Parts (Continued)

Continuation of the parts list for the main unit.

Main Unit Parts (Continued)

Continuation of the parts list for the main unit.

Main Unit Parts (Continued)

Continuation of the parts list for the main unit.

Mechanical Parts

Chassis Unit Mechanical Parts

List of mechanical parts for the chassis unit, including part number, description, and quantity.

Main Unit Mechanical Parts

List of mechanical parts for the main unit, including part number, description, and quantity.

Main Unit Mechanical Parts (Continued)

Continuation of the list of mechanical parts for the main unit.

Board Layouts

Board Layouts - Front Panel Units

Board layouts for MIC, JACK, MULTI, USB, VR, and PBT units.

Board Layouts - Main Unit (Top View)

Top view layout of the PC board for the Main Unit B-8536F.

Board Layouts - Main Unit (Bottom View)

Bottom view layout of the PC board for the Main Unit B-8536F.

Block Diagram

Digisel-A Unit Block Diagram

Block diagram of the Digisel-A unit, showing its internal components and signal flow.

Digisel-B Unit Block Diagram

Block diagram of the Digisel-B unit, showing its internal components and signal flow.

BPF-A Unit Block Diagram

Block diagram of the BPF-A unit, illustrating its circuitry.

BPF-B Unit Block Diagram

Block diagram of the BPF-B unit, illustrating its circuitry.

Block Diagram (Continued)

Block diagrams for PA Unit, Tuner Unit, Main Unit (ALC/Regulator), and Chassis Unit.

Wiring Diagram

RF Unit Wiring Diagram

Wiring diagram for the RF unit, showing connections between components and units.

PA Unit Wiring Diagram

Wiring diagram for the PA unit, showing internal and external connections.

Tuner Unit Wiring Diagram

Wiring diagram for the Tuner unit, illustrating its internal connections.

Main Unit Wiring Diagram (Chassis)

Wiring diagram for the Main Unit Chassis, showing connections to various modules.

Main Unit Wiring Diagram (Main Connections)

Wiring diagram detailing main connections within the Main Unit.

Main Unit Wiring Diagram (Digisel-A)

Wiring diagram showing connections between the Main Unit and Digisel-A unit.

Main Unit Wiring Diagram (Digisel-B)

Wiring diagram showing connections between the Main Unit and Digisel-B unit.

Front Unit Wiring Diagram

Wiring diagram for the front unit, showing connections to the main unit and other modules.

USB Unit Wiring Diagram

Wiring diagram detailing the connections for the USB unit.

SD Unit Wiring Diagram

Wiring diagram detailing the connections for the SD unit.

Jack Unit Wiring Diagram

Wiring diagram for the Jack unit, showing its connections.

Voltage Diagram

Display Unit Voltage Diagram (1;2)

Voltage diagram for the Display Unit, showing voltage levels at various points.

Display Unit Voltage Diagram (2;2)

Continuation of the voltage diagram for the Display Unit.

USB Unit Voltage Diagram

Voltage diagram for the USB unit, indicating voltage levels for its components.

SD Unit Voltage Diagram

Voltage diagram for the SD unit, showing voltage levels at various points.

Multi Unit Voltage Diagram

Voltage diagram for the Multi Unit, indicating voltage levels for its components.

Mic Unit Voltage Diagram

Voltage diagram for the Mic Unit, showing voltage levels at various points.

Jack Unit Voltage Diagram

Voltage diagram for the Jack Unit, indicating voltage levels for its components.

VR Unit Voltage Diagram

Voltage diagram for the VR Unit, showing voltage levels at various points.

PBT Unit Voltage Diagram

Voltage diagram for the PBT Unit, indicating voltage levels for its components.

Icom IC-7610 Specifications

General IconGeneral
Receiver TypeDirect sampling
Number of Antenna Connectors2
TypeHF/50 MHz Transceiver
IF DSPYes
Antenna ConnectorSO-239
Frequency Range0.030–60.000 MHz
Power Supply13.8 V DC ±15%
ModesAM, FM
RF Output Power100 W
Display7-inch color
Weight8.5 kg
External Speaker Connector3.5 mm
USB ConnectorType B
Output Power100 W
Operating Temperature-10°C to +60°C

Related product manuals