EasyManuals Logo

Icom IC-M1 User Manual

Icom IC-M1
24 pages
To Next Page IconTo Next Page
To Previous Page IconTo Previous Page
Page #19 background imageLoading...
Page #19 background image
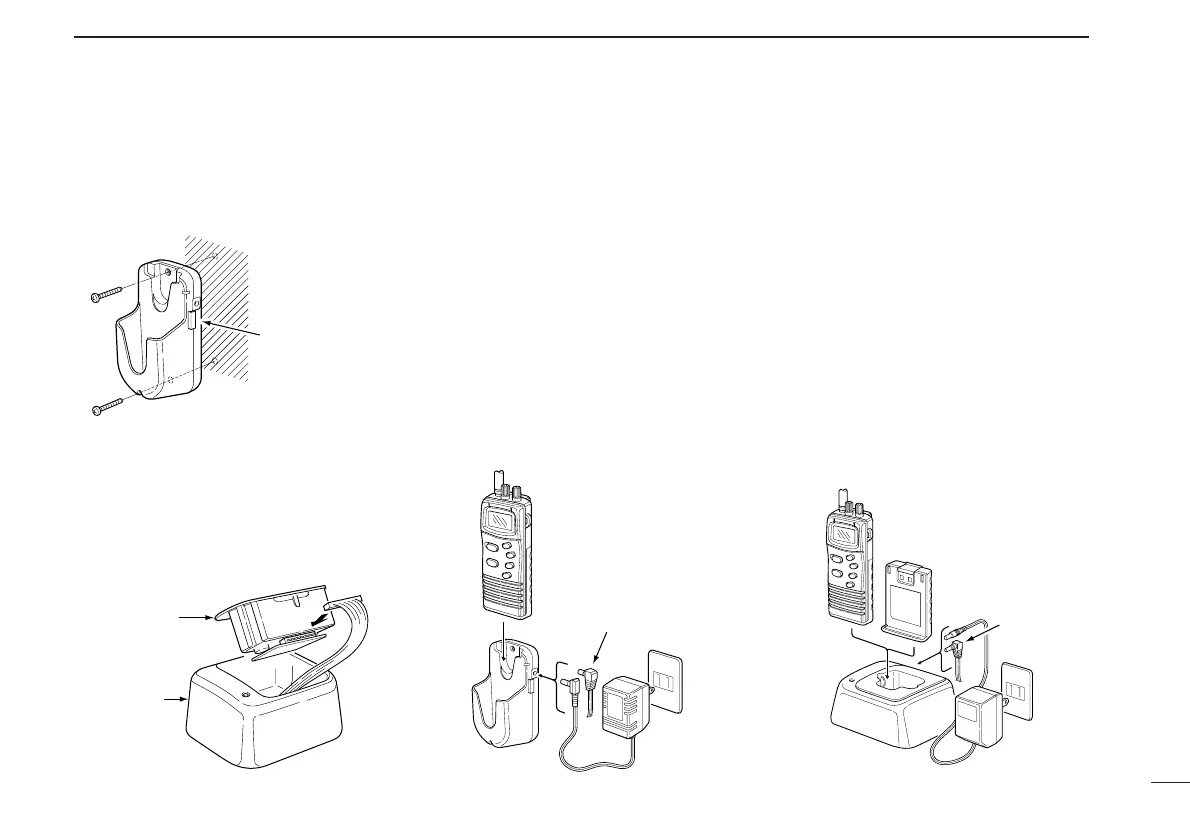
D Attaching the AD-58 to a
wall
D Installing the AD-69 to the
BC-119
1 Connect the cable as shown below.
2 Attach the AD-69 with the 2 supplied
screws.
D Charging with the AD-58
1 Connect the AC adapter (BC-122) or
optional cable (CP-17L or
OPC-515L) as shown below.
2 Insert the transceiver with attached
battery pack into the charger.
The charge indicator lights orange.
3 Charge the battery pack for 15
hours.
D Charging with the optional
BC-119+AD-69
1 Connect the AC adapter (BC-123) or
optional cable (CP-17L or
OPC-515L) as shown below.
2 Insert the transceiver with attached
battery pack (or the battery pack
only) into the charger.
The charge indicator lights orange.
3 Charge the battery pack until the
charge indicator changes to green.
Charging time: Approx. 1 to 1.5 hours
BC-119
AD-69
6
BATTERY CHARGING
16
Turn power
OFF.
AD-58
BC-122A/E
CP-17L or OPC-515L
Turn power
OFF.
BP-185 or
BP-186
BC-123A/E
BC-119+
AD-69
CP-17L or
OPC-515L
AVOID overcharging!
The AD-58 is NOT a
transceiver hanger. Take
out the transceiver within
48 hours.
Eyelet:
USE a rubber
band to secure
the transceiver, if
desired.

Questions and Answers:

Question and Answer IconNeed help?

Do you have a question about the Icom IC-M1 and is the answer not in the manual?

Icom IC-M1 Specifications

General IconGeneral
BrandIcom
ModelIC-M1
CategoryTransceiver
LanguageEnglish

Related product manuals