9
3
1
87
B
78
2. To make assembly easier, read the information
on page 8. Before you begin, make sure
that you have:
• removed the packaging materials from all
of the parts
• placed all of the parts near you in a
clear area
• located the included grease packet
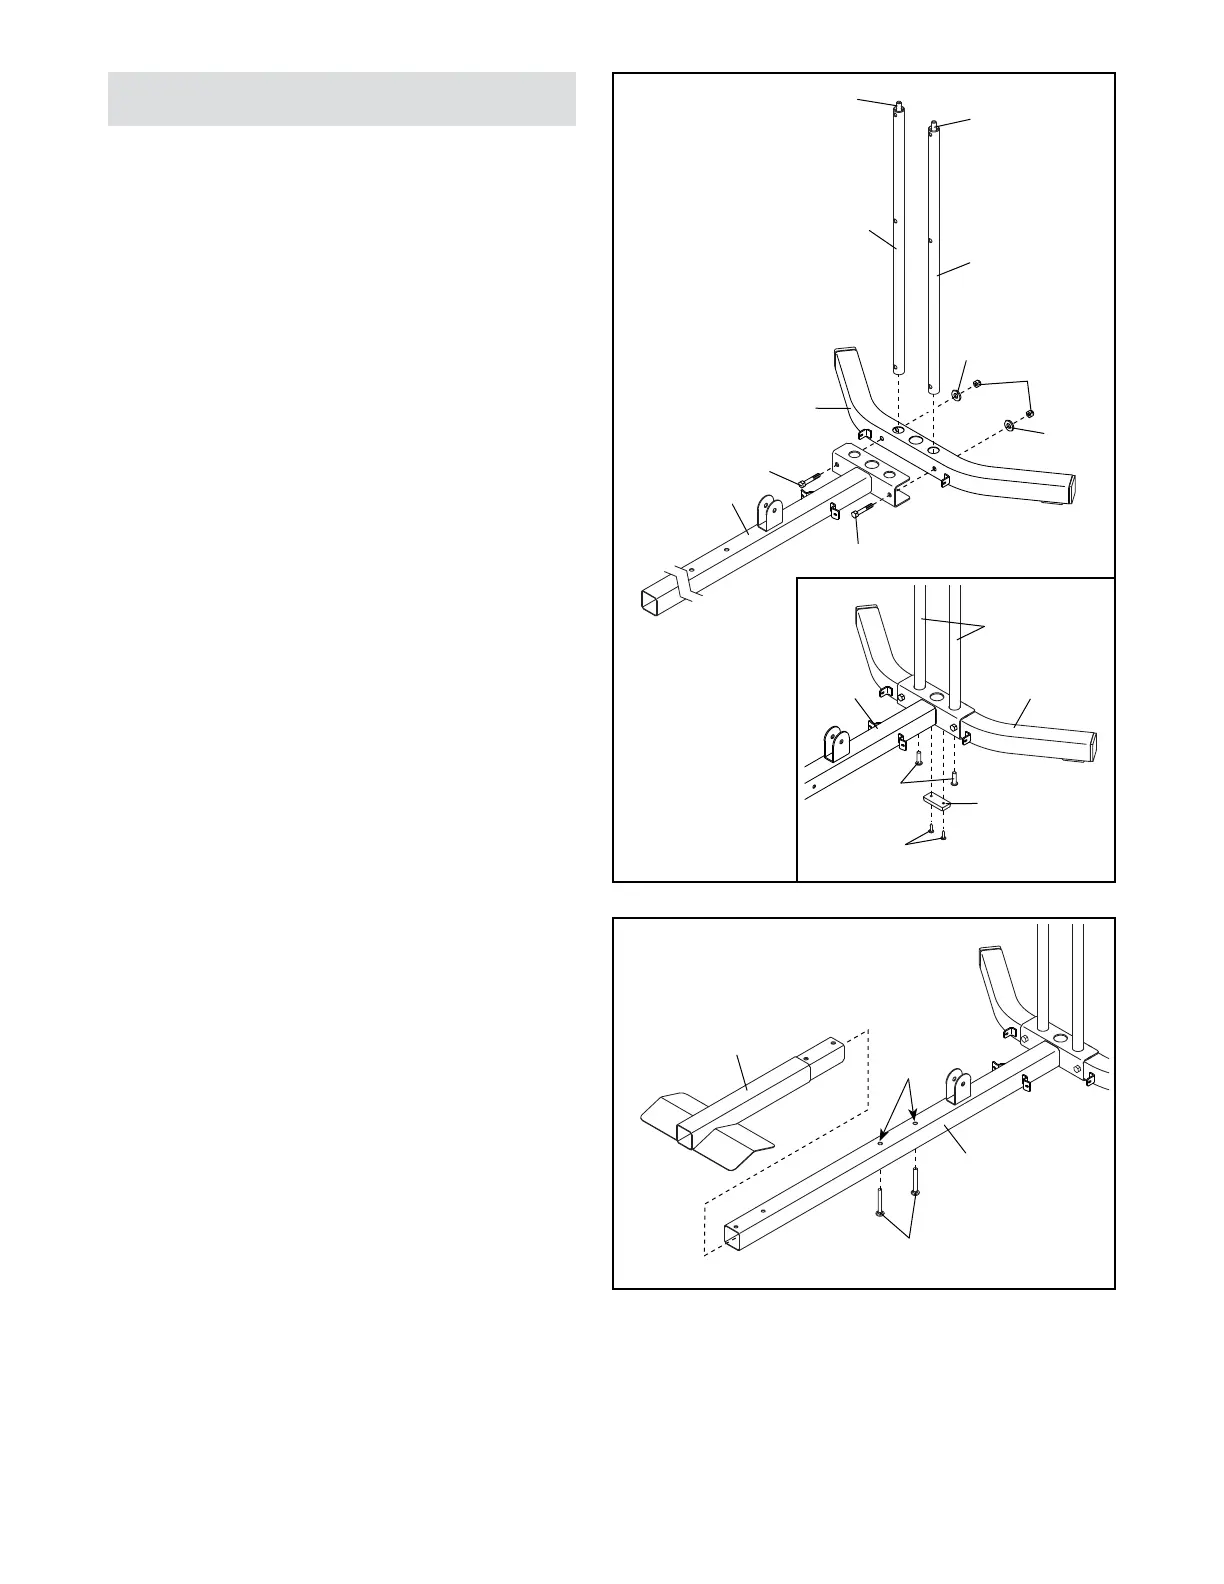
Identify the two Lower Weight Guides (25), which
have threaded upper ends (A).
Attach the Lower Weight Guides (25) and
the Stabilizer (2) to the Base (1) with two
M10 x 68mm Bolts (71), two M10 Washers (57),
and two M10 Locknuts (56). Do not tighten the
Locknuts yet.
See the inset drawing. Insert two M10 x 25mm
Screws (77) upward into the Base (1) and into
the Stabilizer (2), and tighten the Screws into the
Lower Weight Guides (25).
Then, attach the Base Foot (19) to the Base (1)
with two M4 x 19mm Self-tapping Screws (69).
2
56
1
71
71
1
77
69
2
25
19
2
57
57
25
A
A
25
Frame Assembly
3. Insert the Front Base (78) into the Base (1).
Note: The Front Base will be attached in step 6.
Then, insert two M8 x 65mm Carriage Bolts (87)
upward into the indicated holes (B) in the Base
(1). Note: The Carriage Bolts will be used in the
next step.