22 23
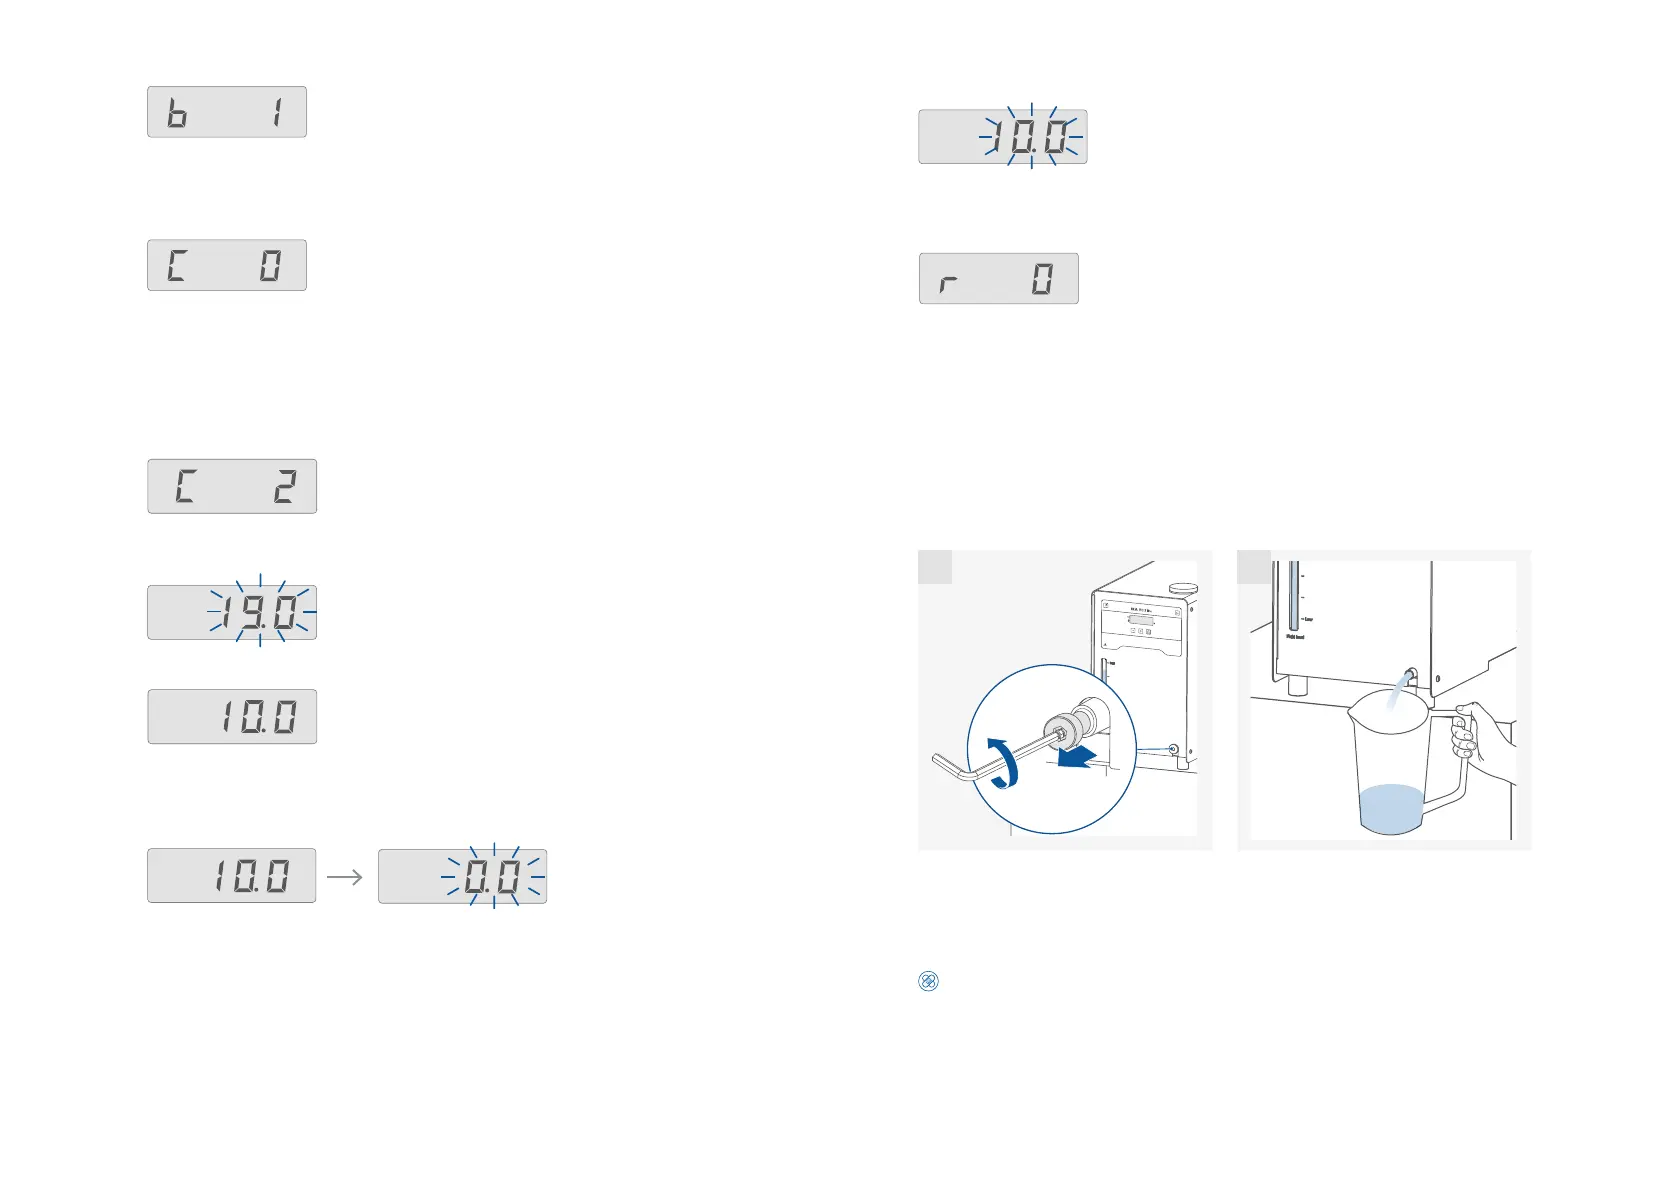
Reset to factory settings (r):
r 0: Without resetting to factory settings.
r 1: Resetting to factory settings.
Calibration of the other points is performed in the same way.
Transportation and storage
› Remove the power cord before transporting the device.
› The device must be protected against mechanical impact, vibrations, dust deposits and corrosive ambient
air during transportation and storage.
In addition, take care to ensure that the relative humidity does not exceed 80 %.
› The device must be completely emptied before transportation and storage.
1.
2.
1 2
› Beware of the high dead weight of the device when transporting.
› Ensure that your fingers do not get crushed when setting down the device.
› The device can be transported:
- by hand / unaided (2 to 4 persons).
- with a pallet truck.
Caution!
Beware of tipping over because of the high center of gravity when lift and move the device!
Confirm the value by pressing the “OK / Temp“ button. The first point calibration is finished now.
The screen displays the set value for the first point calibration and flashes.
Alarm and button tone (b):
b 0: no alarm and button tone
b 1: alarm and button tone is activated
Calibration and adjustment (C):
C 0: Reset calibration
C 2: 2-point calibration
C 3: 3-point calibration.
Example: 2-point calibration:
Dip the temperature sensor of the reference measuring instrument into the bath fluid.
Select 2-point calibration with plus (+) button / minus (-) button and “OK / Temp“ button in
the menu.
Set the first point temperature (step 1, e.g. 10 °C) with plus (+) button / minus (-) button.
Confirm the setting by pressing “OK / Temp“ button. The unit now starts and controls to the
set value.
When the temperature has reached the set value and has become constant, the value in the
screen changes from the set temperature value to "0.0" and flashes.
Input the calibration value from the reference measuring instrument (e.g. 10.3 °C) with plus (+)
button / minus (-) button.
Note: the difference between the input calibration value from reference measuring instrument
and set value is limited to less than +/-3 K.
Press the “OK / Temp“ button to start the 2-point calibration. The last calibration temperature
value flashes.