Connect your appliance to a drainage connection so dirty water is discharged via the wash cycle.
Installing the drainage connection
1. Consult the installation instructions supplied for the steps required here.
2. Connect the wastewater hose to the outlet connection of the siphon using the enclosed parts.
3. When doing so, check that the wastewater hose is not kinked, crushed or twisted.
4. Also, check that there is no cover in the drainage system preventing the wastewater from being discharged.
Drinking water connection
Connect your appliance to a drinking water connection. Installing the drinking water connection
Note: If you are replacing the appliance, you must use a new water supply hose.
1. Consult the installation instructions supplied for the steps required here.
2. Connect the appliance to the drinking water connection using the enclosed parts. Observe the Technical data.
3. When doing so, check that the drinking water connection is not kinked, crushed or twisted.
Electrical connection
Connect your appliance to the power supply.
Connecting the appliance to the electricity supply Notes
Follow the “Safety instructions” → Page 6.
Connect the appliance to alternating current only, in the range of 220 240 V and 50 Hz or 60 Hz.
Please note that the water safety system is only functional if there is a power supply.
1. Insert the non-heating appliance plug of the power cable into the appliance.
2. Insert the mains plug of the appliance into a nearby socket. The connection data for the appliance can be found on the rating plate.
3. Check that the mains plug is inserted properly.
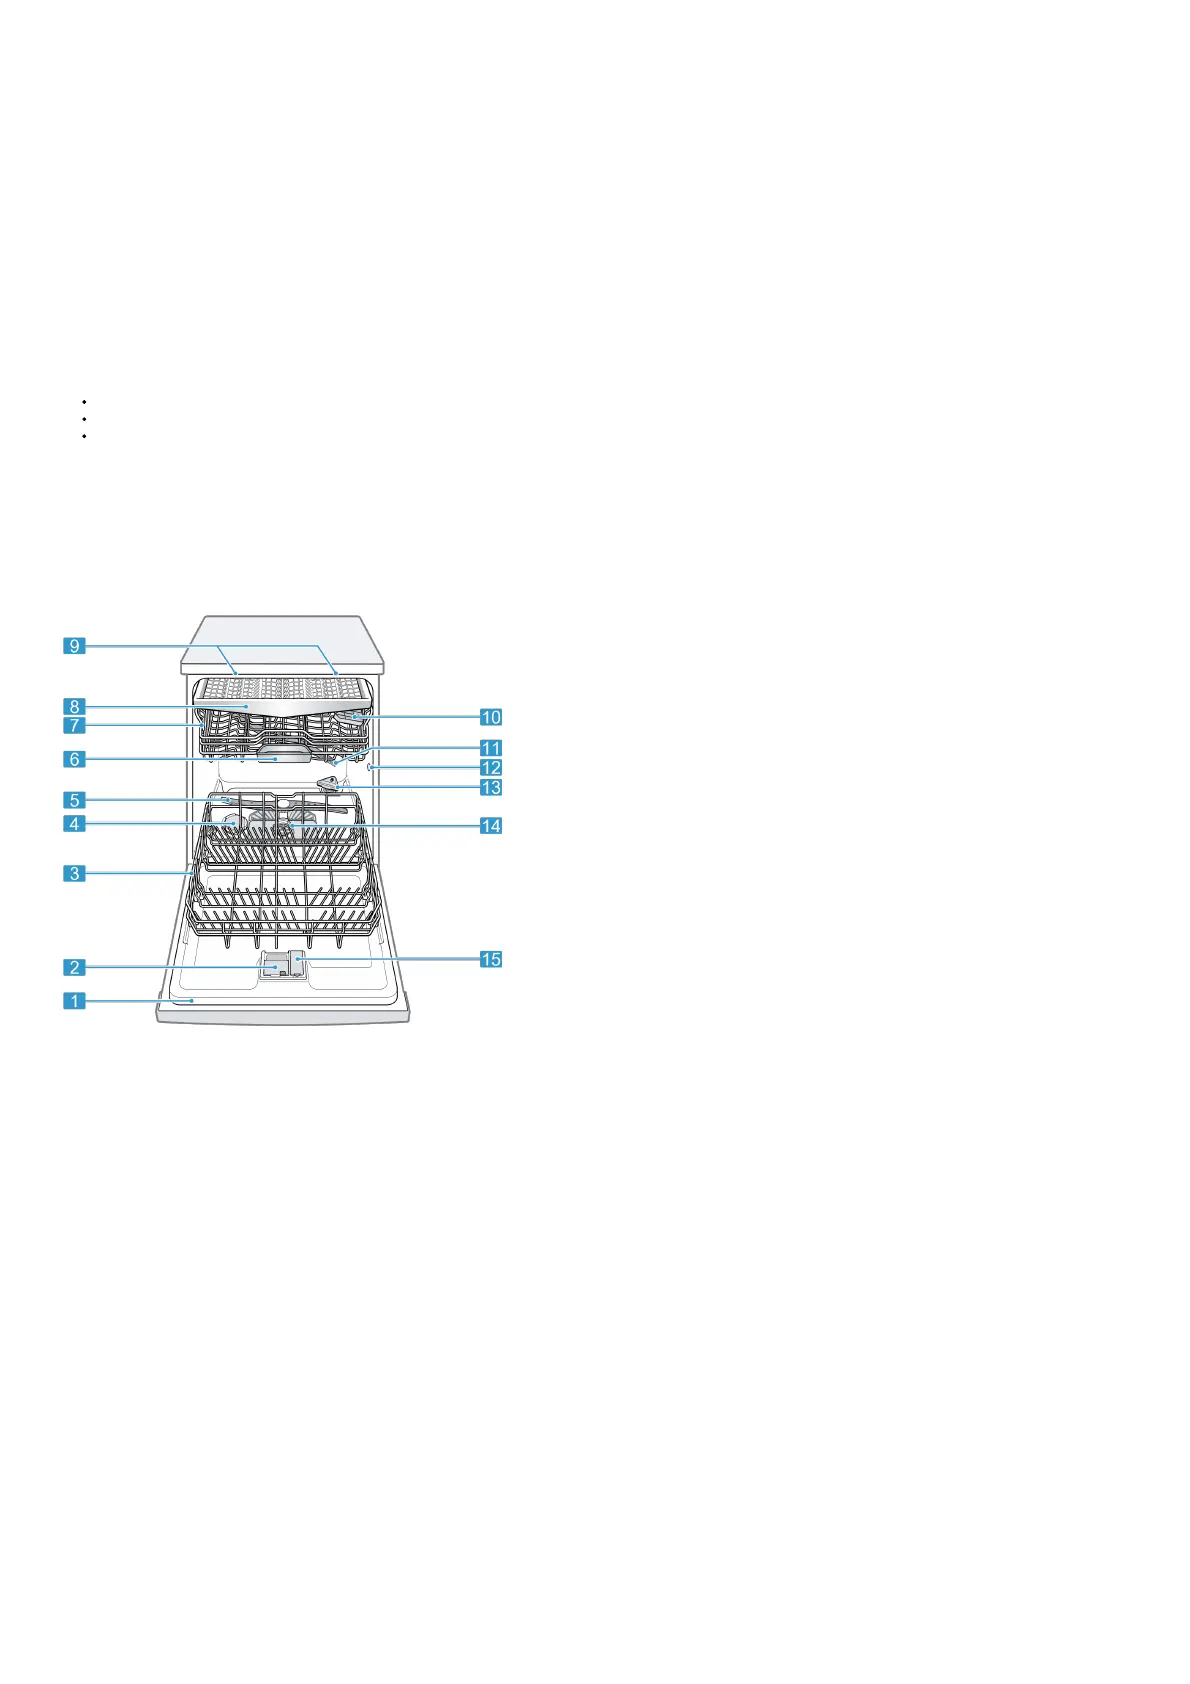
Familiarising yourself with your appliance
Appliance
You can find an overview of the parts of your appliance here.
1 Rating plate Rating plate with E number and FD number. The data you need for Customer Service.
2 Detergent dispenser “Detergent” → Page 33 is added to the detergent dispenser.
3
Bottom basket “Bottom basket” → Page 26