ITALIANO 58
EN
11
OPTIONS AND FUNCTIONS
OPTIONS can be selected directly by pressing the corresponding button (see CONTROL PANEL).
If an option is not compatible with the selected program see PROGRAMS TABLE, the corresponding LED ashes rapidly 3 times
and beeps will sound. The option will not be enabled.
TABLET (Tab)
This setting allows you to optimize the performance of
the program according to the type of detergent used.
Press the START/PAUSE button for 3 seconds (the
corresponding symbol will light up) if you use combined
detergents in tablet form (rinse aid, salt and detergent in
1 dose).
If you use powder or liquid detergent, this option
should be off.
NaturalDry
NaturalDry is a convection drying system which automatically
opens the door during/after drying phase to ensure exceptional
drying performance every day. Door opens at the temperature
that is safe to your kitchen furniture, thus door will not be opened
when the option of SHORT TIME is on.
As additional steam protection, special designed protection foil is
added together with the dishwasher. To see how to mount protec-
tion foil please refer to (INSTALLATION GUIDE).
NaturalDry functionality could be disabled by the user as follows:
1. Go to the Dishwasher software menu pressing and holding
button (6 sec).
2. You are currently in Light Control Menu (please refer to
OPERATION INDICATOR description), if you don’t want to
change anything please press and hold
button (until one of
the two letters appears on the display)
3. You switched to NaturalDry Control Menu, you could change
status of NaturalDry functionality by pressing button:
E – enabled d – disabled
To conrm the change and exit from the Control Menu please
press and hold
button (3 sec).
DELAY
The start time of the program may be delayed for a period
of time between 1 and 12 hours.
1. Press the DELAY button: the corresponding «h» symbol
appears on the display; each time you press the button,
the time (1h, 2h, etc. up to max. 12h) from the start of
the selected wash cycle will be increased.
2. Select the wash program, press the START/PAUSE
button and within 4 seconds close the door: the timer
will begin counting down.
3. Once this time has elapsed, the indicator light «h»
switches off and the wash cycle begins.
To adjust the delay time and select a shorter period of time,
press the DELAY button. To cancel it, press the button
repeatedly until the selected delayed start indicator light
«h» switches off.
The DELAY function cannot be set once a wash cycle
has been started.
FLEXI WASH
If there are not many dishes to be washed, a half loading
may be used in order to save water, electricity and
detergent.
Select the program and then press the FLEXI WASH button:
the symbol of the chosen rack will appear on the display.
By default the appliance washes dishes in all racks.
To wash only the specic rack, press this button repeatedly:
shown on the display (only lower rack)
shown on the display (only upper rack)
shown on the display (only cutlery rack)
shown on the display (option is OFF and the appliance will
wash dishes in all racks).
Remember to load the upper or lower rack only, and to
reduce the amount of detergent accordingly.
If upper rack is removed, please apply detergent
directly to tub instead of detergent dispenser.
SHORT TIME
This option can be used to reduce the duration of the main
programs while maintaining the same washing and drying
performance levels.
After selecting the program, press the SHORT TIME button
and the indicator light will switch on. To deselect the option,
press the same button again.
EXTRA DRY
To improve the drying of the dishes, after selecting the
program, press the EXTRA DRY button and the indicator
light comes on.
A higher temperature during the nal rinse and an extended
drying phase allow for improving drying. To deselect the
option, press the same button again. The EXTRA DRY
option results in the lengthening of the wash cycle.
OPERATION INDICATOR
A LED light projected on the oor indicates that the
dishwasher is working. One of the following operating
modes can be selected:
a) Disabled function.
b) When the cycle starts the light goes on for few seconds,
stays off during the cycle and ashes at the end of the
cycle.
c) The light stays on during the cycle and ashes at the
end of the cycle (default mode).
If the delayed start was set, the light goes on either for the
rst few seconds or the entire duration of the countdown,
based on whether mode b) or c) was set.
The light goes off every time the door is opened. To select
the mode you prefer, switch on the machine, hold down
button P until one of the three letters appears on the display,
press button P until you reach the desired letter (or mode),
hold down button P to conrm the selection.
Note: If NaturalDry is active and it opens the door, then
Operation Indicator will not ash at the end of cycle.
LAVAGGIO FLESSIBILE
Nel caso in cui i piatti da lavare siano pochi, per
limitare il consumo di acqua, elettricità e detersivo si
può utilizzare il programma Mezzo carico.
Selezionare il programma richiesto e quindi premere
il tasto LAVAGGIO FLESSIBILE: sul display compare il
simbolo del cestello prescelto.
Come sua impostazione predenita, l’apparecchio
esegue il lavaggio in tutti i cestelli.
Per il lavaggio esclusivamente di un cestello in
particolare, premere ripetutamente il tasto in
questione:
EN
11
OPTIONS AND FUNCTIONS
OPTIONS can be selected directly by pressing the corresponding button (see CONTROL PANEL).
If an option is not compatible with the selected program see PROGRAMS TABLE, the corresponding LED ashes rapidly 3 times
and beeps will sound. The option will not be enabled.
TABLET (Tab)
This setting allows you to optimize the performance of
the program according to the type of detergent used.
Press the START/PAUSE button for 3 seconds (the
corresponding symbol will light up) if you use combined
detergents in tablet form (rinse aid, salt and detergent in
1 dose).
If you use powder or liquid detergent, this option
should be off.
NaturalDry
NaturalDry is a convection drying system which automatically
opens the door during/after drying phase to ensure exceptional
drying performance every day. Door opens at the temperature
that is safe to your kitchen furniture, thus door will not be opened
when the option of SHORT TIME is on.
As additional steam protection, special designed protection foil is
added together with the dishwasher. To see how to mount protec-
tion foil please refer to (INSTALLATION GUIDE).
NaturalDry functionality could be disabled by the user as follows:
1. Go to the Dishwasher software menu pressing and holding
button (6 sec).
2. You are currently in Light Control Menu (please refer to
OPERATION INDICATOR description), if you don’t want to
change anything please press and hold
button (until one of
the two letters appears on the display)
3. You switched to NaturalDry Control Menu, you could change
status of NaturalDry functionality by pressing button:
E – enabled d – disabled
To conrm the change and exit from the Control Menu please
press and hold
button (3 sec).
DELAY
The start time of the program may be delayed for a period
of time between 1 and 12 hours.
1. Press the DELAY button: the corresponding «h» symbol
appears on the display; each time you press the button,
the time (1h, 2h, etc. up to max. 12h) from the start of
the selected wash cycle will be increased.
2. Select the wash program, press the START/PAUSE
button and within 4 seconds close the door: the timer
will begin counting down.
3. Once this time has elapsed, the indicator light «h»
switches off and the wash cycle begins.
To adjust the delay time and select a shorter period of time,
press the DELAY button. To cancel it, press the button
repeatedly until the selected delayed start indicator light
«h» switches off.
The DELAY function cannot be set once a wash cycle
has been started.
FLEXI WASH
If there are not many dishes to be washed, a half loading
may be used in order to save water, electricity and
detergent.
Select the program and then press the FLEXI WASH button:
the symbol of the chosen rack will appear on the display.
By default the appliance washes dishes in all racks.
To wash only the specic rack, press this button repeatedly:
shown on the display (only lower rack)
shown on the display (only upper rack)
shown on the display (only cutlery rack)
shown on the display (option is OFF and the appliance will
wash dishes in all racks).
Remember to load the upper or lower rack only, and to
reduce the amount of detergent accordingly.
If upper rack is removed, please apply detergent
directly to tub instead of detergent dispenser.
SHORT TIME
This option can be used to reduce the duration of the main
programs while maintaining the same washing and drying
performance levels.
After selecting the program, press the SHORT TIME button
and the indicator light will switch on. To deselect the option,
press the same button again.
EXTRA DRY
To improve the drying of the dishes, after selecting the
program, press the EXTRA DRY button and the indicator
light comes on.
A higher temperature during the nal rinse and an extended
drying phase allow for improving drying. To deselect the
option, press the same button again. The EXTRA DRY
option results in the lengthening of the wash cycle.
OPERATION INDICATOR
A LED light projected on the oor indicates that the
dishwasher is working. One of the following operating
modes can be selected:
a) Disabled function.
b) When the cycle starts the light goes on for few seconds,
stays off during the cycle and ashes at the end of the
cycle.
c) The light stays on during the cycle and ashes at the
end of the cycle (default mode).
If the delayed start was set, the light goes on either for the
rst few seconds or the entire duration of the countdown,
based on whether mode b) or c) was set.
The light goes off every time the door is opened. To select
the mode you prefer, switch on the machine, hold down
button P until one of the three letters appears on the display,
press button P until you reach the desired letter (or mode),
hold down button P to conrm the selection.
Note: If NaturalDry is active and it opens the door, then
Operation Indicator will not ash at the end of cycle.
indicazione sul display (solo cestello inferiore)
indicazione sul display (solo cestello superiore)
indicazione sul display (solo cestello portaposate)
indicazione sul display (l’opzione è impostata su
Spegnimento e l’apparecchio esegue il lavaggio per
tutti i cestelli).
Ricordarsi di riempire soltanto i cestelli superiore e inferiore e
di ridurre conseguentemente la dose di detersivo. Se il cestello
superiore viene rimosso, introdurre il detersivo direttamente
nell’apparecchio anziché nell’apposita vaschetta.
9
ENGLISH
1. Press the DELAY button: the corresponding «h» symbol
appears on the display; each time you press the button,
the time (1h, 2h, etc. up to max. 12h) from the start of
the selected wash cycle will be increased.
2. Select the wash program, press the START/PAUSE
button and within 4 seconds close the door: the timer
will begin counting down.
3. Once this time has elapsed, the indicator light «h»
switches off and the wash cycle begins.
To adjust the delay time and select a shorter period of time,
press the DELAY button. To cancel it, press the button
repeatedly until the selected delayed start indicator light
«h» switches off.
The DELAY function cannot be set once a wash cycle
has been started.
NaturalDry
Door opening system NaturalDry is a convection drying system
which automatically opens the door during/after drying phase to
ensure exceptional drying performance every day. Door opens at
the temperature that is safe to your kitchen furniture.
As additional steam protection, special designed protection foil is
added together with the dishwasher. To see how to mount protec-
tion foil please refer to (INSTALLATION GUIDE).
NaturalDry functionality could be disabled by the user as follows:
1. Go to the Dishwasher software menu pressing and holding
button (6 sec).
2. You switched to NaturalDry Control Menu, you could change
status of NaturalDry functionality by pressing button:
E – enabled d – disabled
To conrm the change and exit from the Control Menu please
press and hold
button (3 sec).
DELAY
The start time of the program may be delayed for a period
of time between 1 and 12 hours.
Program
Drying
phase
Natural
Dry
Available
options
*)
Duration of
wash pro-
gram
(h:min)
**)
Water
consumption
(litres/cycle)
Energy
consumption
(kWh/cycle)
50°
2:45 12.0 0.92
1
Eco
2
Conventional
wash and dry
55°
2:00 15.0 1.35
3
Intensive 65° - 2:30 15.0 1.50
4
Fast 50°
-
- 0:55 11.5 1.10
5
Sanitizing 65° - 1:40 11.5 1.30
6
Pre-Wash
-
-
- 0:10 4.5 0.01
7
Self-Clean 65°
-
-
0:50 8.0 0.80
ECO program data is measured under laboratory conditions according to European Standard EN 60436:2019.
Note for Test Laboratories: For information on comparative EN testing conditions, please send an email to the following
address: dw_test_support@whirlpool.com
Pre-treatment of the dishes is not needed before any of the programs.
*) Not all options can be used simultaneously.
**) Values given for programes other than the eco program are indicative only. The actual time may vary depending on many
factors such as temperature and pressure of the incoming water, room temperature, amount of detergent, quantity and type of
load, load balancing, additional selected options and sensor calibration.
Standby consumption: Left-on mode consumption: 5 W - Off mode consumption: 0.5 W
PROGRAMS DESCRIPTION
AVVIO RITARDATO
È possibile ritardare l’avvio del programma per un
tempo compreso tra 1 e 12 ore.
1. Premere il tasto AVVIO RITARDATO: sul display
appare il simbolo “h” corrispondente; a ogni
pressione del tasto aumenta l’intervallo di tempo (1
h, 2 h, ecc. no a un massimo di 12 h) tra il momento
in cui i seleziona il programma e l’avvio del ciclo di
lavaggio selezionato.
2. Selezionare il programma di lavaggio, premere
il tasto AVVIO/PAUSA e chiudere la porta entro 4
secondi: Il timer inizia il conto alla rovescia.
3. Una volta trascorso il tempo impostato, l’indicatore
“h” si spegne e inizia il ciclo di lavaggio. Per regolare
il tempo di avvio ritardato e selezionare un intervallo
di tempo inferiore a quello impostato, premere il
tasto AVVIO RITARDATO. Per annullare l’impostazione,
premere ripetutamente il tasto no allo spegnimento
dell’indicatore “h”.
Una volta avviato il ciclo di lavaggio, non è più
possibile impostare la funzione di avvio ritardato
EN
11
OPTIONS AND FUNCTIONS
OPTIONS can be selected directly by pressing the corresponding button (see CONTROL PANEL).
If an option is not compatible with the selected program see PROGRAMS TABLE, the corresponding LED ashes rapidly 3 times
and beeps will sound. The option will not be enabled.
TABLET (Tab)
This setting allows you to optimize the performance of
the program according to the type of detergent used.
Press the START/PAUSE button for 3 seconds (the
corresponding symbol will light up) if you use combined
detergents in tablet form (rinse aid, salt and detergent in
1 dose).
If you use powder or liquid detergent, this option
should be off.
NaturalDry
NaturalDry is a convection drying system which automatically
opens the door during/after drying phase to ensure exceptional
drying performance every day. Door opens at the temperature
that is safe to your kitchen furniture, thus door will not be opened
when the option of SHORT TIME is on.
As additional steam protection, special designed protection foil is
added together with the dishwasher. To see how to mount protec-
tion foil please refer to (INSTALLATION GUIDE).
NaturalDry functionality could be disabled by the user as follows:
1. Go to the Dishwasher software menu pressing and holding
button (6 sec).
2. You are currently in Light Control Menu (please refer to
OPERATION INDICATOR description), if you don’t want to
change anything please press and hold
button (until one of
the two letters appears on the display)
3. You switched to NaturalDry Control Menu, you could change
status of NaturalDry functionality by pressing button:
E – enabled d – disabled
To conrm the change and exit from the Control Menu please
press and hold
button (3 sec).
DELAY
The start time of the program may be delayed for a period
of time between 1 and 12 hours.
1. Press the DELAY button: the corresponding «h» symbol
appears on the display; each time you press the button,
the time (1h, 2h, etc. up to max. 12h) from the start of
the selected wash cycle will be increased.
2. Select the wash program, press the START/PAUSE
button and within 4 seconds close the door: the timer
will begin counting down.
3. Once this time has elapsed, the indicator light «h»
switches off and the wash cycle begins.
To adjust the delay time and select a shorter period of time,
press the DELAY button. To cancel it, press the button
repeatedly until the selected delayed start indicator light
«h» switches off.
The DELAY function cannot be set once a wash cycle
has been started.
FLEXI WASH
If there are not many dishes to be washed, a half loading
may be used in order to save water, electricity and
detergent.
Select the program and then press the FLEXI WASH button:
the symbol of the chosen rack will appear on the display.
By default the appliance washes dishes in all racks.
To wash only the specic rack, press this button repeatedly:
shown on the display (only lower rack)
shown on the display (only upper rack)
shown on the display (only cutlery rack)
shown on the display (option is OFF and the appliance will
wash dishes in all racks).
Remember to load the upper or lower rack only, and to
reduce the amount of detergent accordingly.
If upper rack is removed, please apply detergent
directly to tub instead of detergent dispenser.
SHORT TIME
This option can be used to reduce the duration of the main
programs while maintaining the same washing and drying
performance levels.
After selecting the program, press the SHORT TIME button
and the indicator light will switch on. To deselect the option,
press the same button again.
EXTRA DRY
To improve the drying of the dishes, after selecting the
program, press the EXTRA DRY button and the indicator
light comes on.
A higher temperature during the nal rinse and an extended
drying phase allow for improving drying. To deselect the
option, press the same button again. The EXTRA DRY
option results in the lengthening of the wash cycle.
OPERATION INDICATOR
A LED light projected on the oor indicates that the
dishwasher is working. One of the following operating
modes can be selected:
a) Disabled function.
b) When the cycle starts the light goes on for few seconds,
stays off during the cycle and ashes at the end of the
cycle.
c) The light stays on during the cycle and ashes at the
end of the cycle (default mode).
If the delayed start was set, the light goes on either for the
rst few seconds or the entire duration of the countdown,
based on whether mode b) or c) was set.
The light goes off every time the door is opened. To select
the mode you prefer, switch on the machine, hold down
button P until one of the three letters appears on the display,
press button P until you reach the desired letter (or mode),
hold down button P to conrm the selection.
Note: If NaturalDry is active and it opens the door, then
Operation Indicator will not ash at the end of cycle.
RAPIDO
L’opzione consente di ridurre la durata dei principali
programmi ma di mantenere la stessa qualità nelle
prestazioni di lavaggio e asciugatura. Dopo aver
selezionato il programma, premere il tasto RAPIDO:
la spia corrispondente si illumina. Per deselezionare
l’opzione in questione premere nuovamente lo stesso
tasto.
EN
11
OPTIONS AND FUNCTIONS
OPTIONS can be selected directly by pressing the corresponding button (see CONTROL PANEL).
If an option is not compatible with the selected program see PROGRAMS TABLE, the corresponding LED ashes rapidly 3 times
and beeps will sound. The option will not be enabled.
TABLET (Tab)
This setting allows you to optimize the performance of
the program according to the type of detergent used.
Press the START/PAUSE button for 3 seconds (the
corresponding symbol will light up) if you use combined
detergents in tablet form (rinse aid, salt and detergent in
1 dose).
If you use powder or liquid detergent, this option
should be off.
NaturalDry
NaturalDry is a convection drying system which automatically
opens the door during/after drying phase to ensure exceptional
drying performance every day. Door opens at the temperature
that is safe to your kitchen furniture, thus door will not be opened
when the option of SHORT TIME is on.
As additional steam protection, special designed protection foil is
added together with the dishwasher. To see how to mount protec-
tion foil please refer to (INSTALLATION GUIDE).
NaturalDry functionality could be disabled by the user as follows:
1. Go to the Dishwasher software menu pressing and holding
button (6 sec).
2. You are currently in Light Control Menu (please refer to
OPERATION INDICATOR description), if you don’t want to
change anything please press and hold
button (until one of
the two letters appears on the display)
3. You switched to NaturalDry Control Menu, you could change
status of NaturalDry functionality by pressing button:
E – enabled d – disabled
To conrm the change and exit from the Control Menu please
press and hold
button (3 sec).
DELAY
The start time of the program may be delayed for a period
of time between 1 and 12 hours.
1. Press the DELAY button: the corresponding «h» symbol
appears on the display; each time you press the button,
the time (1h, 2h, etc. up to max. 12h) from the start of
the selected wash cycle will be increased.
2. Select the wash program, press the START/PAUSE
button and within 4 seconds close the door: the timer
will begin counting down.
3. Once this time has elapsed, the indicator light «h»
switches off and the wash cycle begins.
To adjust the delay time and select a shorter period of time,
press the DELAY button. To cancel it, press the button
repeatedly until the selected delayed start indicator light
«h» switches off.
The DELAY function cannot be set once a wash cycle
has been started.
FLEXI WASH
If there are not many dishes to be washed, a half loading
may be used in order to save water, electricity and
detergent.
Select the program and then press the FLEXI WASH button:
the symbol of the chosen rack will appear on the display.
By default the appliance washes dishes in all racks.
To wash only the specic rack, press this button repeatedly:
shown on the display (only lower rack)
shown on the display (only upper rack)
shown on the display (only cutlery rack)
shown on the display (option is OFF and the appliance will
wash dishes in all racks).
Remember to load the upper or lower rack only, and to
reduce the amount of detergent accordingly.
If upper rack is removed, please apply detergent
directly to tub instead of detergent dispenser.
SHORT TIME
This option can be used to reduce the duration of the main
programs while maintaining the same washing and drying
performance levels.
After selecting the program, press the SHORT TIME button
and the indicator light will switch on. To deselect the option,
press the same button again.
EXTRA DRY
To improve the drying of the dishes, after selecting the
program, press the EXTRA DRY button and the indicator
light comes on.
A higher temperature during the nal rinse and an extended
drying phase allow for improving drying. To deselect the
option, press the same button again. The EXTRA DRY
option results in the lengthening of the wash cycle.
OPERATION INDICATOR
A LED light projected on the oor indicates that the
dishwasher is working. One of the following operating
modes can be selected:
a) Disabled function.
b) When the cycle starts the light goes on for few seconds,
stays off during the cycle and ashes at the end of the
cycle.
c) The light stays on during the cycle and ashes at the
end of the cycle (default mode).
If the delayed start was set, the light goes on either for the
rst few seconds or the entire duration of the countdown,
based on whether mode b) or c) was set.
The light goes off every time the door is opened. To select
the mode you prefer, switch on the machine, hold down
button P until one of the three letters appears on the display,
press button P until you reach the desired letter (or mode),
hold down button P to conrm the selection.
Note: If NaturalDry is active and it opens the door, then
Operation Indicator will not ash at the end of cycle.
EXTRA DRY
Per migliorare l’asciugatura dei piatti, dopo aver
selezionato il programma richiesto premere il tasto
EXTRA DRY: la corrispondente spia si illumina. Una
temperatura superiore durante il risciacquo nale e
la maggiore durata del programma consentono una
migliore asciugatura. Per deselezionare l’opzione
in questione premere nuovamente lo stesso tasto.
L’opzione EXTRA DRY comporta una maggior durata
del ciclo di lavaggio.
1. CHECK WATER CONNECTION
Check that the dishwasher is connected to the water supply
and that the tap is open.
2. SWITCH ON THE DISHWASHER
Open the door and press the ON/OFF button.
3.
4.
LOAD THE RACKS (see LOADING THE RACKS)
FILLING THE DETERGENT DISPENSER
(see PROGRAMS TABLE).
5.
6.
7.
CHOOSE THE PROGRAM AND CUSTOMISE THE CYCLE
Select the most appropriate program in accordance with the
type of crockery and its soiling level (see PROGRAMS
DESCRIPTION) by pressing the button.
Select the desired options (see OPTIONS AND FUNCTIONS).
START
Start the wash cycle by pressing START/Pause button (led
is lit) and closing the door within 4 sec. When the program
starts you hear a single beep. If the door was not closed within
4sec., the alarm sound will be played. In this case, open the
door, press START/Pause button and close the door again
within 4 sec.
END OF WASH CYCLE
The end of the wash cycle is indicated by beeps and by the
ashing of the wash cycle number on the display. Open the
door and switch off the appliance by pressing the ON/OFF
button.
Wait for a few minutes before removing the crockery - to avoid
burns. Unload the racks, beginning with the lower one.
The machine will switch off automatically during certain
extended periods of inactivity, in order to minimise electri-
city consumption. If the crockery is only lightly soiled or
if it has been rinsed with water before being placed in the
dishwasher, reduce the amount of detergent used accordingly.
MODIFYING A RUNNING PROGRAM
If a wrong program was selected, it is possible to change it, pro-
vided that it has only just begun: open the door, press and hold
the ON/OFF button, the machine will switch off.
Switch the machine back on using the ON/OFF button and select
the new wash cycle and any desired options; Start the wash cycle
by pressing START/Pause button and closing the door within 4 sec.
ADDING EXTRA CROCKERY
Without switching off the machine, open the door (START/Pause
led starts blinking) (be ware of HOT steam!) and place the
crockery inside the dishwasher. Press the START/Pause button
and close the door within 4 sec., the cycle will resume from the
point at which it was interrupted.
ACCIDENTAL INTERRUPTIONS
If the door is opened during the wash cycle, or if there is a power
cut, the cycle stops. Press the START/Pause button and close
the door within 4 sec., the cycle will resume from the point at
which it was interrupted.
DAILY USE
Functions
1. ECO - Normally soiled crockery. Standard program, the most efficient in terms of its combined energy and water
consumption.
2. NORMAL - Mixed soil. For normally soiled dishes with dried food residues.
3. INTENSIVE - Program recommended for heavily soiled crockery, especially suitable for pans and saucepans (not to be used
for delicate items).
4. PRE-WASH - Use to refresh crockery planned to be washed later. No detergent to be used with this program.
5. FAST - Normally soiled crockery. Everyday cycle, that ensures optimal cleaning performance in shorter time.
6. SANITIZING - Normally or heavily soiled crockery, with additional antibacterial wash. Can be used to perform
maintenance of the dishwasher.
7. SELF- CLEAN - Program to be used to perform maintenance of the dishwasher. It cleans the interior of the appliance
using hot water.
OPTIONS can be selected directly by pressing the corresponding button (see CONTROL PANEL).
If an option is not compatible with the selected program see PROGRAMS TABLE, the corresponding LED � � � �rapidly 3 times
and beeps will sound. The option will not be enabled.
HALF LOAD
If there are not many dishes to be washed, a half load
cycle may be used in order to save water, electricity and
detergent. Select the program and press the HALF LOAD
button: the indicator light will light up. Press the HALF
LOAD button to deselect this option.
Remember to halve the amount of detergent.
To adjust the delay time and select a shorter period of time,
press the DELAY button. To cancel it, press the button
repeatedly until the selected delayed start indicator light
«h» switches off.
The DELAY function cannot be set once a wash cycle
has been started.
TABLET (Tab)
This setting allows you to optimize the performance of
the program according to the type of detergent used.
Press the START/PAUSE button for 3 seconds (the
corresponding symbol will light up) if you use combined
detergents in tablet form (rinse aid, salt and detergent in
1 dose).
If you use powder or liquid detergent, this option
should be off.
1. Go to the Dishwasher software menu pressing and holding
button (6 sec).
2. You switched to NaturalDry Control Menu, you could change
status of NaturalDry functionality by pressing button:
E – enabled d – disabled
To conrm the change and exit from the Control Menu please
press and hold
button (3 sec).
Pastiglia
Questa impostazione permette di ottimizzare le
prestazioni del programma in base al tipo di detersivo
usato.
Premere il tasto AVVIO/PAUSA per 3 secondi (la
spia corrispondente si accenderà) se si utilizza un
detersivo combinato in pastiglie (brillantante, sale e
detersivo in un’unica dose).
Se si utilizza un detersivo in polvere o in forma
liquida, questa opzione deve essere disattivata.
EN
11
OPTIONS AND FUNCTIONS
OPTIONS can be selected directly by pressing the corresponding button (see CONTROL PANEL).
If an option is not compatible with the selected program see PROGRAMS TABLE, the corresponding LED ashes rapidly 3 times
and beeps will sound. The option will not be enabled.
TABLET (Tab)
This setting allows you to optimize the performance of
the program according to the type of detergent used.
Press the START/PAUSE button for 3 seconds (the
corresponding symbol will light up) if you use combined
detergents in tablet form (rinse aid, salt and detergent in
1 dose).
If you use powder or liquid detergent, this option
should be off.
NaturalDry
NaturalDry is a convection drying system which automatically
opens the door during/after drying phase to ensure exceptional
drying performance every day. Door opens at the temperature
that is safe to your kitchen furniture, thus door will not be opened
when the option of SHORT TIME is on.
As additional steam protection, special designed protection foil is
added together with the dishwasher. To see how to mount protec-
tion foil please refer to (INSTALLATION GUIDE).
NaturalDry functionality could be disabled by the user as follows:
1. Go to the Dishwasher software menu pressing and holding
button (6 sec).
2. You are currently in Light Control Menu (please refer to
OPERATION INDICATOR description), if you don’t want to
change anything please press and hold
button (until one of
the two letters appears on the display)
3. You switched to NaturalDry Control Menu, you could change
status of NaturalDry functionality by pressing button:
E – enabled d – disabled
To conrm the change and exit from the Control Menu please
press and hold
button (3 sec).
DELAY
The start time of the program may be delayed for a period
of time between 1 and 12 hours.
1. Press the DELAY button: the corresponding «h» symbol
appears on the display; each time you press the button,
the time (1h, 2h, etc. up to max. 12h) from the start of
the selected wash cycle will be increased.
2. Select the wash program, press the START/PAUSE
button and within 4 seconds close the door: the timer
will begin counting down.
3. Once this time has elapsed, the indicator light «h»
switches off and the wash cycle begins.
To adjust the delay time and select a shorter period of time,
press the DELAY button. To cancel it, press the button
repeatedly until the selected delayed start indicator light
«h» switches off.
The DELAY function cannot be set once a wash cycle
has been started.
FLEXI WASH
If there are not many dishes to be washed, a half loading
may be used in order to save water, electricity and
detergent.
Select the program and then press the FLEXI WASH button:
the symbol of the chosen rack will appear on the display.
By default the appliance washes dishes in all racks.
To wash only the specic rack, press this button repeatedly:
shown on the display (only lower rack)
shown on the display (only upper rack)
shown on the display (only cutlery rack)
shown on the display (option is OFF and the appliance will
wash dishes in all racks).
Remember to load the upper or lower rack only, and to
reduce the amount of detergent accordingly.
If upper rack is removed, please apply detergent
directly to tub instead of detergent dispenser.
SHORT TIME
This option can be used to reduce the duration of the main
programs while maintaining the same washing and drying
performance levels.
After selecting the program, press the SHORT TIME button
and the indicator light will switch on. To deselect the option,
press the same button again.
EXTRA DRY
To improve the drying of the dishes, after selecting the
program, press the EXTRA DRY button and the indicator
light comes on.
A higher temperature during the nal rinse and an extended
drying phase allow for improving drying. To deselect the
option, press the same button again. The EXTRA DRY
option results in the lengthening of the wash cycle.
OPERATION INDICATOR
A LED light projected on the oor indicates that the
dishwasher is working. One of the following operating
modes can be selected:
a) Disabled function.
b) When the cycle starts the light goes on for few seconds,
stays off during the cycle and ashes at the end of the
cycle.
c) The light stays on during the cycle and ashes at the
end of the cycle (default mode).
If the delayed start was set, the light goes on either for the
rst few seconds or the entire duration of the countdown,
based on whether mode b) or c) was set.
The light goes off every time the door is opened. To select
the mode you prefer, switch on the machine, hold down
button P until one of the three letters appears on the display,
press button P until you reach the desired letter (or mode),
hold down button P to conrm the selection.
Note: If NaturalDry is active and it opens the door, then
Operation Indicator will not ash at the end of cycle.
SPIA DI FUNZIONAMENTO
La luce di un LED proiettata sul pavimento segnala
che la lavastoviglie è in funzione. È possibile
selezionare una delle seguenti modalità di
funzionamento:
a) Funzione disattivata.
b) All’avvio del ciclo di lavaggio la spia si accende per
pochi secondi, rimane spenta per tutta la durata del
ciclo e lampeggia alla sua conclusione.
c) La spia rimane accesa durante il ciclo di lavaggio e
lampeggia alla sua conclusione (modalità predenita).
A seconda che sia stata impostata la modalità b)
oppure c), in caso di impostazione del programma
di avvio ritardato la spia si illumina rispettivamente
per pochi secondi e per l’intera durata del conto
alla rovescia. La spia si spegne a ogni apertura della
porta.
Per selezionare la modalità richiesta, azionare
la macchina e tenere premuto il tasto
ENGLISH
8
• Switch on the appliance by pressing the ON/OFF button.
• Switch off the appliance by pressing the ON/OFF button.
• Hold down button
for 5 seconds, until you hear a beep.
• Switch on the appliance by pressing the ON/OFF button.
•
•
The current selection level number and the salt indicator light
������
Press button to select the desired hardness level (see
WATER HARDNESS TABLE).
• Switch off the appliance by pressing the ON/OFF button.
Setting is complete!
Water Hardness Table
Level
°dH
German degrees
°fH
French degrees
1 Soft 0 - 6 0 - 10
2 Medium 7 - 11 11 - 20
3 Average 12 - 17 21 - 30
4 Hard 18 - 34 31 - 60
5 Very hard 35 - 50 61 - 90
Make sure the cap is screwed on tightly, so that no detergent can
get into the container during the wash program (this could damage
the water softener beyond repair).
As soon as this procedure is complete, run a program without
loading. The “Pre-Wash” program alone is NOT������
Residual saline solution or grains of salt can lead to corrosion,
irreparably damaging the stainless steel components.
The guarantee is not applicable if faults are caused by such
circumstances.
��������������������������������s.
��������������������������������
heating element may be damaged as a result.
Whenever you need to add salt, it is mandatory to complete
the procedure before the beginning of the washing cycle.
SETTING THE WATER HARDNESS
To allow the water softener to work in a perfect way, it is essential
that the water hardness setting is based on the actual water hard-
ness in your house. This information can be obtained from your local
water supplier. The factory setting is for average (3) water hardness.
FILLING THE RINSE AID DISPENSER
Rinse aid makes dish DRYING easier. The rinse aid dispenser A
should be lled when the RINSE AID REFILL indicator light
in the control panel is lit.
1. Open the dispenser B by pressing and pulling up the tab on
the lid.
2. Carefully introduce the rinse aid as far as the maximum
(110 ml) reference notch of the lling space - avoid spilling it.
If this happens, clean the spill immediately with a dry cloth.
3. Press the lid down until you hear a click to close it.
NEVER pour the rinse aid directly into the tub.
A
B
ADJUSTING THE DOSAGE OF RINSE AID
If you are not completely satised with the drying results, you can
adjust the quantity of rinse aid used.
• Switch the dishwasher on using the ON/OFF button.
• Switch it off using the ON/OFF button.
• Press button
three times - a beep will be heard.
• Switch it on using the ON/OFF button.
•
•
The current selection level number and rinse aid indicator light ash.
Press button to select the level of rinse aid quantity to be
supplied.
• Switch it off using the ON/OFF button.
Setting is complete!
If the rinse aid level is set to ZERO (ECO), no rinse aid will be
supplied. The LOW RINSE AID indicator light will not be lit if you
run out of rinse aid. A maximum of 5 levels can be set according to
the dishwasher model. The factory setting is specic to the model,
please follow instruction above to check this for your machine.
• If you see bluish streaks on the dishes, set a low number (1-2).
• If there are drops of water or limescale marks on the dishes,
set a high number (3-4).
FILLING THE DETERGENT DISPENSER
������������������������������
dishwashers.
To achieve the best washing and drying results, the combined
useof detergent, rinse aid liquid and rened salt is required.
We recommend using detergents that do not contain phosphates
or chlorine, as these products are harmful to the environment.
Good washing results also depend on the correct amount of
detergent being used.
Exceeding the stated amount does not result in a more effective
wash and increases environmental pollution.
The amount can be adjusted to the soil level. In the case of
normally soiled items, use approximately either 35g (powder
detergent) or 35ml (liquid detergent) and additional tea spoon of
detergent directly inside the tub. If tablets are used, one tablet
will be enough.
If the crockery is only lightly soiled or if it has been rinsed with
water before being placed in the dishwasher, reduce the amount
of detergent used accordingly (minimum 25 g/ml) e.g. skip the
powder/gel putted inside the tub.
To open the detergent dispenser
press button A.
Introduce the detergent into
the dry dispenser B only.
Place the amount of detergent
for pre-washing directly inside
the tub.
A
B
1.
2.
When measuring out the detergent refer to the mentioned ear-
lier information to add the proper quantity. Inside the dispenser
B there are indications to help the detergent dosing.
Remove detergent residues from the edges of the dispenser
and close the cover until it clicks.
3. Close the lid of the detergent dispenser by pulling it up until
the closing device is secured in place.
The detergent dispenser automatically opens up at the right time
according to the program. If all-in-one detergents are used, we
recommend using the TABLET button, because it adjusts the
program so that the best washing and drying results are always
achieved.
no
a visualizzare tre lettere sul display: premere
ripetutamente il tasto
ENGLISH
8
• Switch on the appliance by pressing the ON/OFF button.
• Switch off the appliance by pressing the ON/OFF button.
• Hold down button
for 5 seconds, until you hear a beep.
• Switch on the appliance by pressing the ON/OFF button.
•
•
The current selection level number and the salt indicator light
������
Press button to select the desired hardness level (see
WATER HARDNESS TABLE).
• Switch off the appliance by pressing the ON/OFF button.
Setting is complete!
Water Hardness Table
Level
°dH
German degrees
°fH
French degrees
1 Soft 0 - 6 0 - 10
2 Medium 7 - 11 11 - 20
3 Average 12 - 17 21 - 30
4 Hard 18 - 34 31 - 60
5 Very hard 35 - 50 61 - 90
Make sure the cap is screwed on tightly, so that no detergent can
get into the container during the wash program (this could damage
the water softener beyond repair).
As soon as this procedure is complete, run a program without
loading. The “Pre-Wash” program alone is NOT������
Residual saline solution or grains of salt can lead to corrosion,
irreparably damaging the stainless steel components.
The guarantee is not applicable if faults are caused by such
circumstances.
��������������������������������s.
��������������������������������
heating element may be damaged as a result.
Whenever you need to add salt, it is mandatory to complete
the procedure before the beginning of the washing cycle.
SETTING THE WATER HARDNESS
To allow the water softener to work in a perfect way, it is essential
that the water hardness setting is based on the actual water hard-
ness in your house. This information can be obtained from your local
water supplier. The factory setting is for average (3) water hardness.
FILLING THE RINSE AID DISPENSER
Rinse aid makes dish DRYING easier. The rinse aid dispenser A
should be lled when the RINSE AID REFILL indicator light
in the control panel is lit.
1. Open the dispenser B by pressing and pulling up the tab on
the lid.
2. Carefully introduce the rinse aid as far as the maximum
(110 ml) reference notch of the lling space - avoid spilling it.
If this happens, clean the spill immediately with a dry cloth.
3. Press the lid down until you hear a click to close it.
NEVER pour the rinse aid directly into the tub.
A
B
ADJUSTING THE DOSAGE OF RINSE AID
If you are not completely satised with the drying results, you can
adjust the quantity of rinse aid used.
• Switch the dishwasher on using the ON/OFF button.
• Switch it off using the ON/OFF button.
• Press button
three times - a beep will be heard.
• Switch it on using the ON/OFF button.
•
•
The current selection level number and rinse aid indicator light ash.
Press button to select the level of rinse aid quantity to be
supplied.
• Switch it off using the ON/OFF button.
Setting is complete!
If the rinse aid level is set to ZERO (ECO), no rinse aid will be
supplied. The LOW RINSE AID indicator light will not be lit if you
run out of rinse aid. A maximum of 5 levels can be set according to
the dishwasher model. The factory setting is specic to the model,
please follow instruction above to check this for your machine.
• If you see bluish streaks on the dishes, set a low number (1-2).
• If there are drops of water or limescale marks on the dishes,
set a high number (3-4).
FILLING THE DETERGENT DISPENSER
������������������������������
dishwashers.
To achieve the best washing and drying results, the combined
useof detergent, rinse aid liquid and rened salt is required.
We recommend using detergents that do not contain phosphates
or chlorine, as these products are harmful to the environment.
Good washing results also depend on the correct amount of
detergent being used.
Exceeding the stated amount does not result in a more effective
wash and increases environmental pollution.
The amount can be adjusted to the soil level. In the case of
normally soiled items, use approximately either 35g (powder
detergent) or 35ml (liquid detergent) and additional tea spoon of
detergent directly inside the tub. If tablets are used, one tablet
will be enough.
If the crockery is only lightly soiled or if it has been rinsed with
water before being placed in the dishwasher, reduce the amount
of detergent used accordingly (minimum 25 g/ml) e.g. skip the
powder/gel putted inside the tub.
To open the detergent dispenser
press button A.
Introduce the detergent into
the dry dispenser B only.
Place the amount of detergent
for pre-washing directly inside
the tub.
A
B
1.
2.
When measuring out the detergent refer to the mentioned ear-
lier information to add the proper quantity. Inside the dispenser
B there are indications to help the detergent dosing.
Remove detergent residues from the edges of the dispenser
and close the cover until it clicks.
3. Close the lid of the detergent dispenser by pulling it up until
the closing device is secured in place.
The detergent dispenser automatically opens up at the right time
according to the program. If all-in-one detergents are used, we
recommend using the TABLET button, because it adjusts the
program so that the best washing and drying results are always
achieved.
no a selezionare la lettera
(o la modalità) richiesta, quindi tenere premuto il
tasto
ENGLISH
8
• Switch on the appliance by pressing the ON/OFF button.
• Switch off the appliance by pressing the ON/OFF button.
• Hold down button
for 5 seconds, until you hear a beep.
• Switch on the appliance by pressing the ON/OFF button.
•
•
The current selection level number and the salt indicator light
������
Press button to select the desired hardness level (see
WATER HARDNESS TABLE).
• Switch off the appliance by pressing the ON/OFF button.
Setting is complete!
Water Hardness Table
Level
°dH
German degrees
°fH
French degrees
1 Soft 0 - 6 0 - 10
2 Medium 7 - 11 11 - 20
3 Average 12 - 17 21 - 30
4 Hard 18 - 34 31 - 60
5 Very hard 35 - 50 61 - 90
Make sure the cap is screwed on tightly, so that no detergent can
get into the container during the wash program (this could damage
the water softener beyond repair).
As soon as this procedure is complete, run a program without
loading. The “Pre-Wash” program alone is NOT������
Residual saline solution or grains of salt can lead to corrosion,
irreparably damaging the stainless steel components.
The guarantee is not applicable if faults are caused by such
circumstances.
��������������������������������s.
��������������������������������
heating element may be damaged as a result.
Whenever you need to add salt, it is mandatory to complete
the procedure before the beginning of the washing cycle.
SETTING THE WATER HARDNESS
To allow the water softener to work in a perfect way, it is essential
that the water hardness setting is based on the actual water hard-
ness in your house. This information can be obtained from your local
water supplier. The factory setting is for average (3) water hardness.
FILLING THE RINSE AID DISPENSER
Rinse aid makes dish DRYING easier. The rinse aid dispenser A
should be lled when the RINSE AID REFILL indicator light
in the control panel is lit.
1. Open the dispenser B by pressing and pulling up the tab on
the lid.
2. Carefully introduce the rinse aid as far as the maximum
(110 ml) reference notch of the lling space - avoid spilling it.
If this happens, clean the spill immediately with a dry cloth.
3. Press the lid down until you hear a click to close it.
NEVER pour the rinse aid directly into the tub.
A
B
ADJUSTING THE DOSAGE OF RINSE AID
If you are not completely satised with the drying results, you can
adjust the quantity of rinse aid used.
• Switch the dishwasher on using the ON/OFF button.
• Switch it off using the ON/OFF button.
• Press button
three times - a beep will be heard.
• Switch it on using the ON/OFF button.
•
•
The current selection level number and rinse aid indicator light ash.
Press button to select the level of rinse aid quantity to be
supplied.
• Switch it off using the ON/OFF button.
Setting is complete!
If the rinse aid level is set to ZERO (ECO), no rinse aid will be
supplied. The LOW RINSE AID indicator light will not be lit if you
run out of rinse aid. A maximum of 5 levels can be set according to
the dishwasher model. The factory setting is specic to the model,
please follow instruction above to check this for your machine.
• If you see bluish streaks on the dishes, set a low number (1-2).
• If there are drops of water or limescale marks on the dishes,
set a high number (3-4).
FILLING THE DETERGENT DISPENSER
������������������������������
dishwashers.
To achieve the best washing and drying results, the combined
useof detergent, rinse aid liquid and rened salt is required.
We recommend using detergents that do not contain phosphates
or chlorine, as these products are harmful to the environment.
Good washing results also depend on the correct amount of
detergent being used.
Exceeding the stated amount does not result in a more effective
wash and increases environmental pollution.
The amount can be adjusted to the soil level. In the case of
normally soiled items, use approximately either 35g (powder
detergent) or 35ml (liquid detergent) and additional tea spoon of
detergent directly inside the tub. If tablets are used, one tablet
will be enough.
If the crockery is only lightly soiled or if it has been rinsed with
water before being placed in the dishwasher, reduce the amount
of detergent used accordingly (minimum 25 g/ml) e.g. skip the
powder/gel putted inside the tub.
To open the detergent dispenser
press button A.
Introduce the detergent into
the dry dispenser B only.
Place the amount of detergent
for pre-washing directly inside
the tub.
A
B
1.
2.
When measuring out the detergent refer to the mentioned ear-
lier information to add the proper quantity. Inside the dispenser
B there are indications to help the detergent dosing.
Remove detergent residues from the edges of the dispenser
and close the cover until it clicks.
3. Close the lid of the detergent dispenser by pulling it up until
the closing device is secured in place.
The detergent dispenser automatically opens up at the right time
according to the program. If all-in-one detergents are used, we
recommend using the TABLET button, because it adjusts the
program so that the best washing and drying results are always
achieved.
per confermare la selezione impostata.
Nota: Se la funzione NaturalDry è attiva e apre la porta,
la spia di funzionamento non lampeggerà alla ne del
ciclo.
NATURALDRY
Il sistema NaturalDry è una funzione di asciugatura a
convezione che apre automaticamente la porta durante/dopo
la fase di asciugatura per garantire stoviglie perfettamente
asciutte dopo ogni lavaggio. La porta viene aperta quando la
temperatura è tale da non poter danneggiare i mobili della
cucina. Come ulteriore protezione dal vapore, la lavastoviglie
viene fornita con una speciale lamina di protezione aggiuntiva.
Per istruzioni sul montaggio della lamina protettiva, vedere le
(ISTRUZIONI DI MONTAGGIO).
La funzione NaturalDry può essere disabilitata come segue:
1. Accedere al menu della spia di funzionamento come
nell’ultimo passaggio, premere a lungo
ENGLISH
8
• Switch on the appliance by pressing the ON/OFF button.
• Switch off the appliance by pressing the ON/OFF button.
• Hold down button
for 5 seconds, until you hear a beep.
• Switch on the appliance by pressing the ON/OFF button.
•
•
The current selection level number and the salt indicator light
������
Press button to select the desired hardness level (see
WATER HARDNESS TABLE).
• Switch off the appliance by pressing the ON/OFF button.
Setting is complete!
Water Hardness Table
Level
°dH
German degrees
°fH
French degrees
1 Soft 0 - 6 0 - 10
2 Medium 7 - 11 11 - 20
3 Average 12 - 17 21 - 30
4 Hard 18 - 34 31 - 60
5 Very hard 35 - 50 61 - 90
Make sure the cap is screwed on tightly, so that no detergent can
get into the container during the wash program (this could damage
the water softener beyond repair).
As soon as this procedure is complete, run a program without
loading. The “Pre-Wash” program alone is NOT������
Residual saline solution or grains of salt can lead to corrosion,
irreparably damaging the stainless steel components.
The guarantee is not applicable if faults are caused by such
circumstances.
��������������������������������s.
��������������������������������
heating element may be damaged as a result.
Whenever you need to add salt, it is mandatory to complete
the procedure before the beginning of the washing cycle.
SETTING THE WATER HARDNESS
To allow the water softener to work in a perfect way, it is essential
that the water hardness setting is based on the actual water hard-
ness in your house. This information can be obtained from your local
water supplier. The factory setting is for average (3) water hardness.
FILLING THE RINSE AID DISPENSER
Rinse aid makes dish DRYING easier. The rinse aid dispenser A
should be lled when the RINSE AID REFILL indicator light
in the control panel is lit.
1. Open the dispenser B by pressing and pulling up the tab on
the lid.
2. Carefully introduce the rinse aid as far as the maximum
(110 ml) reference notch of the lling space - avoid spilling it.
If this happens, clean the spill immediately with a dry cloth.
3. Press the lid down until you hear a click to close it.
NEVER pour the rinse aid directly into the tub.
A
B
ADJUSTING THE DOSAGE OF RINSE AID
If you are not completely satised with the drying results, you can
adjust the quantity of rinse aid used.
• Switch the dishwasher on using the ON/OFF button.
• Switch it off using the ON/OFF button.
• Press button
three times - a beep will be heard.
• Switch it on using the ON/OFF button.
•
•
The current selection level number and rinse aid indicator light ash.
Press button to select the level of rinse aid quantity to be
supplied.
• Switch it off using the ON/OFF button.
Setting is complete!
If the rinse aid level is set to ZERO (ECO), no rinse aid will be
supplied. The LOW RINSE AID indicator light will not be lit if you
run out of rinse aid. A maximum of 5 levels can be set according to
the dishwasher model. The factory setting is specic to the model,
please follow instruction above to check this for your machine.
• If you see bluish streaks on the dishes, set a low number (1-2).
• If there are drops of water or limescale marks on the dishes,
set a high number (3-4).
FILLING THE DETERGENT DISPENSER
������������������������������
dishwashers.
To achieve the best washing and drying results, the combined
useof detergent, rinse aid liquid and rened salt is required.
We recommend using detergents that do not contain phosphates
or chlorine, as these products are harmful to the environment.
Good washing results also depend on the correct amount of
detergent being used.
Exceeding the stated amount does not result in a more effective
wash and increases environmental pollution.
The amount can be adjusted to the soil level. In the case of
normally soiled items, use approximately either 35g (powder
detergent) or 35ml (liquid detergent) and additional tea spoon of
detergent directly inside the tub. If tablets are used, one tablet
will be enough.
If the crockery is only lightly soiled or if it has been rinsed with
water before being placed in the dishwasher, reduce the amount
of detergent used accordingly (minimum 25 g/ml) e.g. skip the
powder/gel putted inside the tub.
To open the detergent dispenser
press button A.
Introduce the detergent into
the dry dispenser B only.
Place the amount of detergent
for pre-washing directly inside
the tub.
A
B
1.
2.
When measuring out the detergent refer to the mentioned ear-
lier information to add the proper quantity. Inside the dispenser
B there are indications to help the detergent dosing.
Remove detergent residues from the edges of the dispenser
and close the cover until it clicks.
3. Close the lid of the detergent dispenser by pulling it up until
the closing device is secured in place.
The detergent dispenser automatically opens up at the right time
according to the program. If all-in-one detergents are used, we
recommend using the TABLET button, because it adjusts the
program so that the best washing and drying results are always
achieved.
nché non
compare il menu.
2. Premere nuovamente
ENGLISH
8
• Switch on the appliance by pressing the ON/OFF button.
• Switch off the appliance by pressing the ON/OFF button.
• Hold down button
for 5 seconds, until you hear a beep.
• Switch on the appliance by pressing the ON/OFF button.
•
•
The current selection level number and the salt indicator light
������
Press button to select the desired hardness level (see
WATER HARDNESS TABLE).
• Switch off the appliance by pressing the ON/OFF button.
Setting is complete!
Water Hardness Table
Level
°dH
German degrees
°fH
French degrees
1 Soft 0 - 6 0 - 10
2 Medium 7 - 11 11 - 20
3 Average 12 - 17 21 - 30
4 Hard 18 - 34 31 - 60
5 Very hard 35 - 50 61 - 90
Make sure the cap is screwed on tightly, so that no detergent can
get into the container during the wash program (this could damage
the water softener beyond repair).
As soon as this procedure is complete, run a program without
loading. The “Pre-Wash” program alone is NOT������
Residual saline solution or grains of salt can lead to corrosion,
irreparably damaging the stainless steel components.
The guarantee is not applicable if faults are caused by such
circumstances.
��������������������������������s.
��������������������������������
heating element may be damaged as a result.
Whenever you need to add salt, it is mandatory to complete
the procedure before the beginning of the washing cycle.
SETTING THE WATER HARDNESS
To allow the water softener to work in a perfect way, it is essential
that the water hardness setting is based on the actual water hard-
ness in your house. This information can be obtained from your local
water supplier. The factory setting is for average (3) water hardness.
FILLING THE RINSE AID DISPENSER
Rinse aid makes dish DRYING easier. The rinse aid dispenser A
should be lled when the RINSE AID REFILL indicator light
in the control panel is lit.
1. Open the dispenser B by pressing and pulling up the tab on
the lid.
2. Carefully introduce the rinse aid as far as the maximum
(110 ml) reference notch of the lling space - avoid spilling it.
If this happens, clean the spill immediately with a dry cloth.
3. Press the lid down until you hear a click to close it.
NEVER pour the rinse aid directly into the tub.
A
B
ADJUSTING THE DOSAGE OF RINSE AID
If you are not completely satised with the drying results, you can
adjust the quantity of rinse aid used.
• Switch the dishwasher on using the ON/OFF button.
• Switch it off using the ON/OFF button.
• Press button
three times - a beep will be heard.
• Switch it on using the ON/OFF button.
•
•
The current selection level number and rinse aid indicator light ash.
Press button to select the level of rinse aid quantity to be
supplied.
• Switch it off using the ON/OFF button.
Setting is complete!
If the rinse aid level is set to ZERO (ECO), no rinse aid will be
supplied. The LOW RINSE AID indicator light will not be lit if you
run out of rinse aid. A maximum of 5 levels can be set according to
the dishwasher model. The factory setting is specic to the model,
please follow instruction above to check this for your machine.
• If you see bluish streaks on the dishes, set a low number (1-2).
• If there are drops of water or limescale marks on the dishes,
set a high number (3-4).
FILLING THE DETERGENT DISPENSER
������������������������������
dishwashers.
To achieve the best washing and drying results, the combined
useof detergent, rinse aid liquid and rened salt is required.
We recommend using detergents that do not contain phosphates
or chlorine, as these products are harmful to the environment.
Good washing results also depend on the correct amount of
detergent being used.
Exceeding the stated amount does not result in a more effective
wash and increases environmental pollution.
The amount can be adjusted to the soil level. In the case of
normally soiled items, use approximately either 35g (powder
detergent) or 35ml (liquid detergent) and additional tea spoon of
detergent directly inside the tub. If tablets are used, one tablet
will be enough.
If the crockery is only lightly soiled or if it has been rinsed with
water before being placed in the dishwasher, reduce the amount
of detergent used accordingly (minimum 25 g/ml) e.g. skip the
powder/gel putted inside the tub.
To open the detergent dispenser
press button A.
Introduce the detergent into
the dry dispenser B only.
Place the amount of detergent
for pre-washing directly inside
the tub.
A
B
1.
2.
When measuring out the detergent refer to the mentioned ear-
lier information to add the proper quantity. Inside the dispenser
B there are indications to help the detergent dosing.
Remove detergent residues from the edges of the dispenser
and close the cover until it clicks.
3. Close the lid of the detergent dispenser by pulling it up until
the closing device is secured in place.
The detergent dispenser automatically opens up at the right time
according to the program. If all-in-one detergents are used, we
recommend using the TABLET button, because it adjusts the
program so that the best washing and drying results are always
achieved.
per 6 secondi per accedere al menu
NaturalDry.
3. Accedendo al menu di controllo NaturalDry è possibile
cambiare lo stato della funzione premendo il tasto
ENGLISH
8
• Switch on the appliance by pressing the ON/OFF button.
• Switch off the appliance by pressing the ON/OFF button.
• Hold down button
for 5 seconds, until you hear a beep.
• Switch on the appliance by pressing the ON/OFF button.
•
•
The current selection level number and the salt indicator light
������
Press button to select the desired hardness level (see
WATER HARDNESS TABLE).
• Switch off the appliance by pressing the ON/OFF button.
Setting is complete!
Water Hardness Table
Level
°dH
German degrees
°fH
French degrees
1 Soft 0 - 6 0 - 10
2 Medium 7 - 11 11 - 20
3 Average 12 - 17 21 - 30
4 Hard 18 - 34 31 - 60
5 Very hard 35 - 50 61 - 90
Make sure the cap is screwed on tightly, so that no detergent can
get into the container during the wash program (this could damage
the water softener beyond repair).
As soon as this procedure is complete, run a program without
loading. The “Pre-Wash” program alone is NOT������
Residual saline solution or grains of salt can lead to corrosion,
irreparably damaging the stainless steel components.
The guarantee is not applicable if faults are caused by such
circumstances.
��������������������������������s.
��������������������������������
heating element may be damaged as a result.
Whenever you need to add salt, it is mandatory to complete
the procedure before the beginning of the washing cycle.
SETTING THE WATER HARDNESS
To allow the water softener to work in a perfect way, it is essential
that the water hardness setting is based on the actual water hard-
ness in your house. This information can be obtained from your local
water supplier. The factory setting is for average (3) water hardness.
FILLING THE RINSE AID DISPENSER
Rinse aid makes dish DRYING easier. The rinse aid dispenser A
should be lled when the RINSE AID REFILL indicator light
in the control panel is lit.
1. Open the dispenser B by pressing and pulling up the tab on
the lid.
2. Carefully introduce the rinse aid as far as the maximum
(110 ml) reference notch of the lling space - avoid spilling it.
If this happens, clean the spill immediately with a dry cloth.
3. Press the lid down until you hear a click to close it.
NEVER pour the rinse aid directly into the tub.
A
B
ADJUSTING THE DOSAGE OF RINSE AID
If you are not completely satised with the drying results, you can
adjust the quantity of rinse aid used.
• Switch the dishwasher on using the ON/OFF button.
• Switch it off using the ON/OFF button.
• Press button
three times - a beep will be heard.
• Switch it on using the ON/OFF button.
•
•
The current selection level number and rinse aid indicator light ash.
Press button to select the level of rinse aid quantity to be
supplied.
• Switch it off using the ON/OFF button.
Setting is complete!
If the rinse aid level is set to ZERO (ECO), no rinse aid will be
supplied. The LOW RINSE AID indicator light will not be lit if you
run out of rinse aid. A maximum of 5 levels can be set according to
the dishwasher model. The factory setting is specic to the model,
please follow instruction above to check this for your machine.
• If you see bluish streaks on the dishes, set a low number (1-2).
• If there are drops of water or limescale marks on the dishes,
set a high number (3-4).
FILLING THE DETERGENT DISPENSER
������������������������������
dishwashers.
To achieve the best washing and drying results, the combined
useof detergent, rinse aid liquid and rened salt is required.
We recommend using detergents that do not contain phosphates
or chlorine, as these products are harmful to the environment.
Good washing results also depend on the correct amount of
detergent being used.
Exceeding the stated amount does not result in a more effective
wash and increases environmental pollution.
The amount can be adjusted to the soil level. In the case of
normally soiled items, use approximately either 35g (powder
detergent) or 35ml (liquid detergent) and additional tea spoon of
detergent directly inside the tub. If tablets are used, one tablet
will be enough.
If the crockery is only lightly soiled or if it has been rinsed with
water before being placed in the dishwasher, reduce the amount
of detergent used accordingly (minimum 25 g/ml) e.g. skip the
powder/gel putted inside the tub.
To open the detergent dispenser
press button A.
Introduce the detergent into
the dry dispenser B only.
Place the amount of detergent
for pre-washing directly inside
the tub.
A
B
1.
2.
When measuring out the detergent refer to the mentioned ear-
lier information to add the proper quantity. Inside the dispenser
B there are indications to help the detergent dosing.
Remove detergent residues from the edges of the dispenser
and close the cover until it clicks.
3. Close the lid of the detergent dispenser by pulling it up until
the closing device is secured in place.
The detergent dispenser automatically opens up at the right time
according to the program. If all-in-one detergents are used, we
recommend using the TABLET button, because it adjusts the
program so that the best washing and drying results are always
achieved.
:
E – funzione abilitata d – funzione disabilitata
Per confermare la modica e uscire dal menu di controllo,
premere a lungo il tasto
ENGLISH
8
• Switch on the appliance by pressing the ON/OFF button.
• Switch off the appliance by pressing the ON/OFF button.
• Hold down button
for 5 seconds, until you hear a beep.
• Switch on the appliance by pressing the ON/OFF button.
•
•
The current selection level number and the salt indicator light
������
Press button to select the desired hardness level (see
WATER HARDNESS TABLE).
• Switch off the appliance by pressing the ON/OFF button.
Setting is complete!
Water Hardness Table
Level
°dH
German degrees
°fH
French degrees
1 Soft 0 - 6 0 - 10
2 Medium 7 - 11 11 - 20
3 Average 12 - 17 21 - 30
4 Hard 18 - 34 31 - 60
5 Very hard 35 - 50 61 - 90
Make sure the cap is screwed on tightly, so that no detergent can
get into the container during the wash program (this could damage
the water softener beyond repair).
As soon as this procedure is complete, run a program without
loading. The “Pre-Wash” program alone is NOT������
Residual saline solution or grains of salt can lead to corrosion,
irreparably damaging the stainless steel components.
The guarantee is not applicable if faults are caused by such
circumstances.
��������������������������������s.
��������������������������������
heating element may be damaged as a result.
Whenever you need to add salt, it is mandatory to complete
the procedure before the beginning of the washing cycle.
SETTING THE WATER HARDNESS
To allow the water softener to work in a perfect way, it is essential
that the water hardness setting is based on the actual water hard-
ness in your house. This information can be obtained from your local
water supplier. The factory setting is for average (3) water hardness.
FILLING THE RINSE AID DISPENSER
Rinse aid makes dish DRYING easier. The rinse aid dispenser A
should be lled when the RINSE AID REFILL indicator light
in the control panel is lit.
1. Open the dispenser B by pressing and pulling up the tab on
the lid.
2. Carefully introduce the rinse aid as far as the maximum
(110 ml) reference notch of the lling space - avoid spilling it.
If this happens, clean the spill immediately with a dry cloth.
3. Press the lid down until you hear a click to close it.
NEVER pour the rinse aid directly into the tub.
A
B
ADJUSTING THE DOSAGE OF RINSE AID
If you are not completely satised with the drying results, you can
adjust the quantity of rinse aid used.
• Switch the dishwasher on using the ON/OFF button.
• Switch it off using the ON/OFF button.
• Press button
three times - a beep will be heard.
• Switch it on using the ON/OFF button.
•
•
The current selection level number and rinse aid indicator light ash.
Press button to select the level of rinse aid quantity to be
supplied.
• Switch it off using the ON/OFF button.
Setting is complete!
If the rinse aid level is set to ZERO (ECO), no rinse aid will be
supplied. The LOW RINSE AID indicator light will not be lit if you
run out of rinse aid. A maximum of 5 levels can be set according to
the dishwasher model. The factory setting is specic to the model,
please follow instruction above to check this for your machine.
• If you see bluish streaks on the dishes, set a low number (1-2).
• If there are drops of water or limescale marks on the dishes,
set a high number (3-4).
FILLING THE DETERGENT DISPENSER
������������������������������
dishwashers.
To achieve the best washing and drying results, the combined
useof detergent, rinse aid liquid and rened salt is required.
We recommend using detergents that do not contain phosphates
or chlorine, as these products are harmful to the environment.
Good washing results also depend on the correct amount of
detergent being used.
Exceeding the stated amount does not result in a more effective
wash and increases environmental pollution.
The amount can be adjusted to the soil level. In the case of
normally soiled items, use approximately either 35g (powder
detergent) or 35ml (liquid detergent) and additional tea spoon of
detergent directly inside the tub. If tablets are used, one tablet
will be enough.
If the crockery is only lightly soiled or if it has been rinsed with
water before being placed in the dishwasher, reduce the amount
of detergent used accordingly (minimum 25 g/ml) e.g. skip the
powder/gel putted inside the tub.
To open the detergent dispenser
press button A.
Introduce the detergent into
the dry dispenser B only.
Place the amount of detergent
for pre-washing directly inside
the tub.
A
B
1.
2.
When measuring out the detergent refer to the mentioned ear-
lier information to add the proper quantity. Inside the dispenser
B there are indications to help the detergent dosing.
Remove detergent residues from the edges of the dispenser
and close the cover until it clicks.
3. Close the lid of the detergent dispenser by pulling it up until
the closing device is secured in place.
The detergent dispenser automatically opens up at the right time
according to the program. If all-in-one detergents are used, we
recommend using the TABLET button, because it adjusts the
program so that the best washing and drying results are always
achieved.
(3 sec).
APERTURA PORTA
Eco 50° dopo 165 min
AUTO 50°- 60° 80-170 min*
Intensivo 65° ne ciclo
Lavaggio veloce 30’ 50° N/A
Lavaggio e asciugatura veloci 50° ne ciclo
Vetro 45° ne ciclo
Silenzioso 50° (programma notte) ne ciclo
Igienizzante 65° N/A
Prelavaggio N/A
Auto-pulizia 65° N/A
* a seconda delle impostazioni
Funzioni
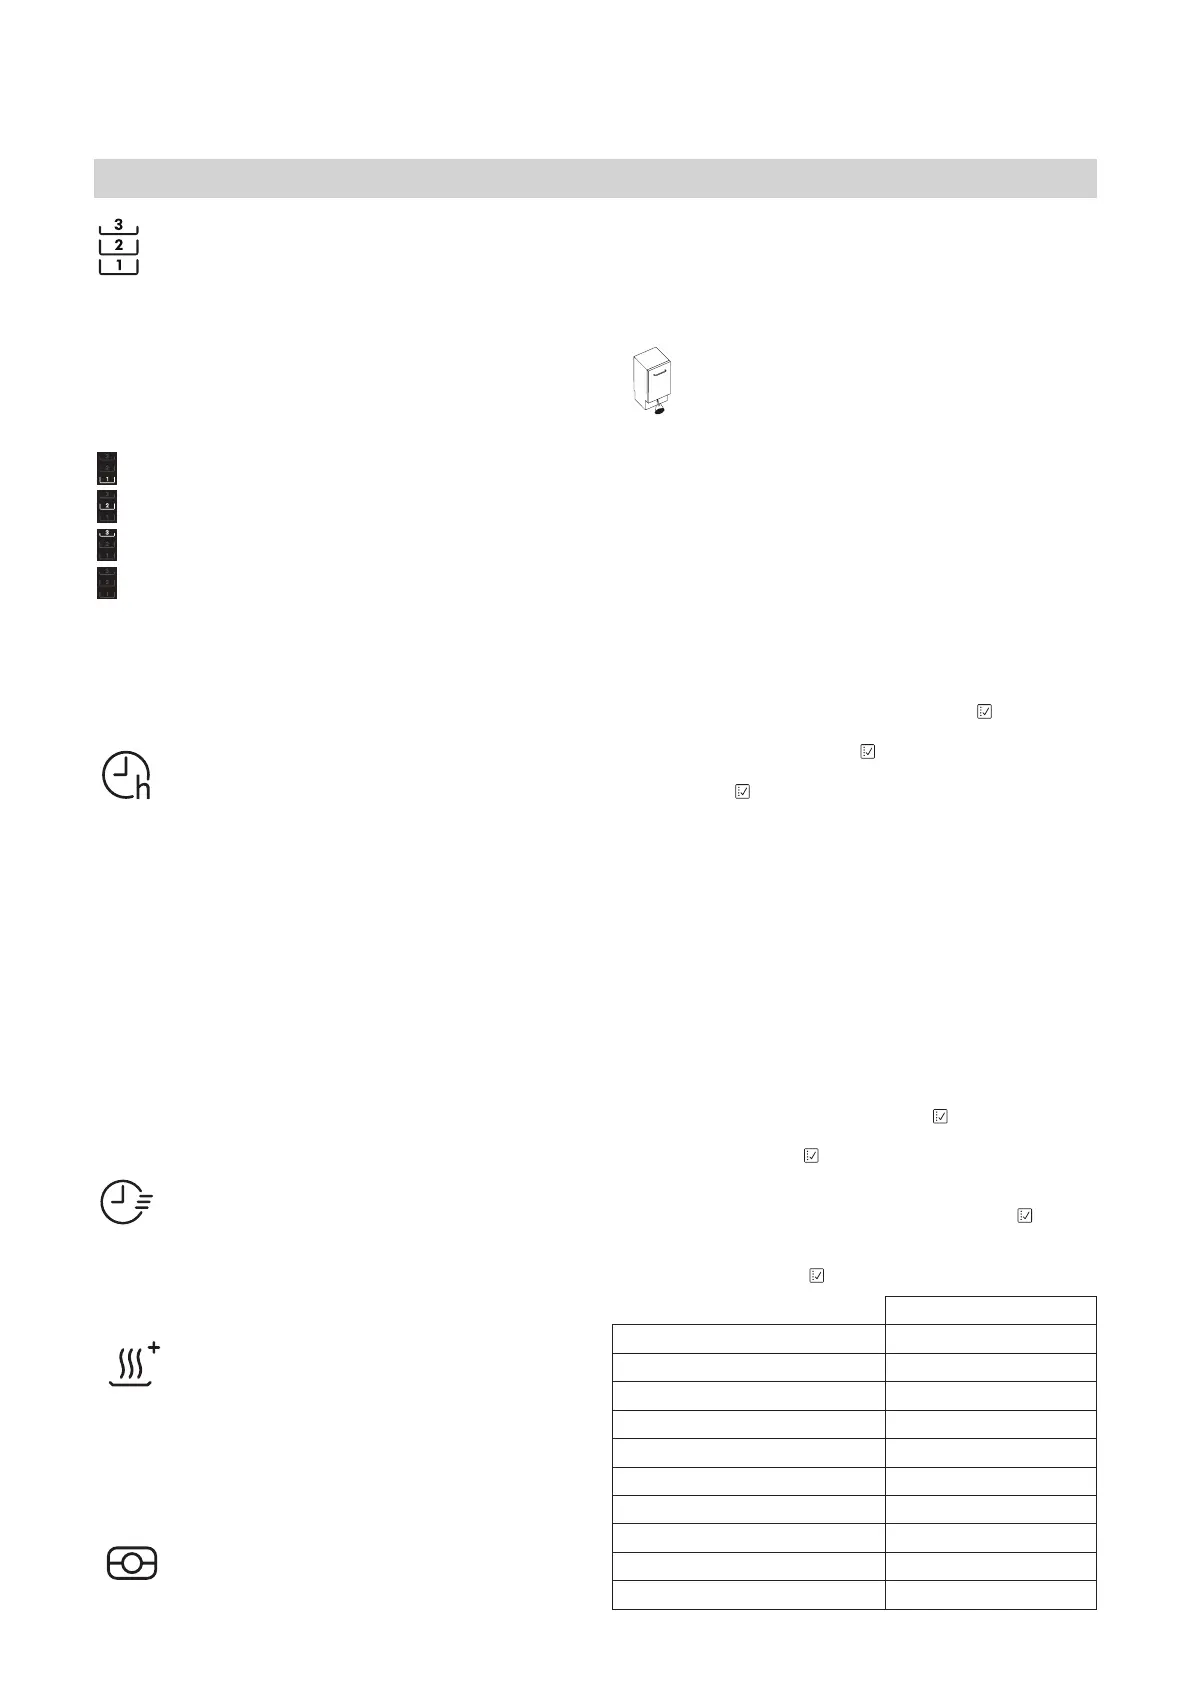 Loading...