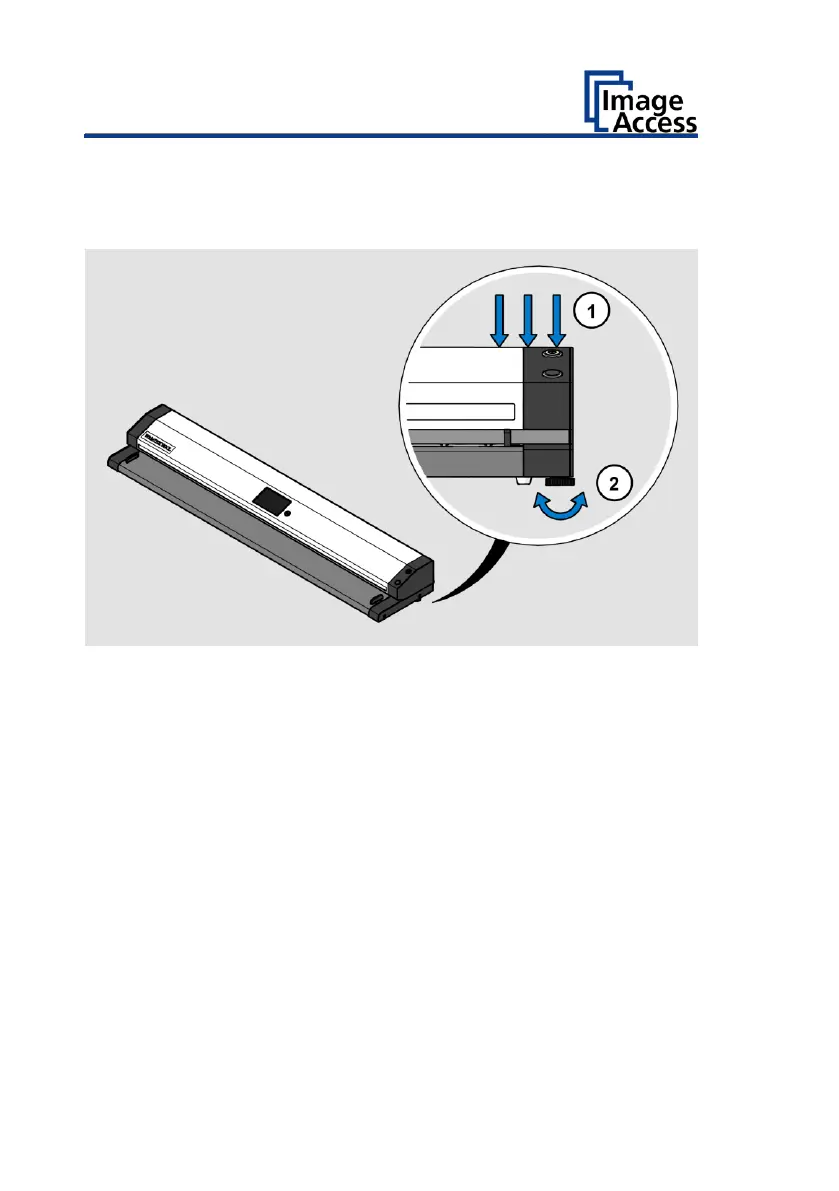
Loosening the height adjustment
Stand sideways, to the right, next to the device.
➢ Press down the upper unit from above, at the right outer edge, with one
hand (1) and hold the pressure.
➢ Please make sure that the upper unit is not tilted in the front or rear
transport direction.
➢ With your other hand, loosen the right, orange, adjusting screw (2) until
the upper unit has moved to the highest position (approx. 10mm).
➢ Carry out the same steps on the left side.
Adjusting the height setting to the thickness of the object
➢ Push the object right-justified through the scanner until it protrudes
from the back.
➢ Press down the upper unit from above, at the right outer edge, with one
hand (1) until it is in contact with the object.
➢ Fix this position with the orange adjusting screw (2).
➢ Slide the object through the scanner flush left and follow the same
steps.