EasyManua.ls Logo

Image Access WideTEK 25 - User Manual

Image Access WideTEK 25
108 pages
Print Icon
To Next Page IconTo Next Page
Loading...
Operation Manual
This device is compliant.

Table of Contents

Other manuals for Image Access WideTEK 25

Questions and Answers

  • K
    Krystal RosarioSep 23, 2025
    How to fix Image Access Scanner touch panel not showing stand-by message?
    • E
      Elizabeth BaileySep 23, 2025
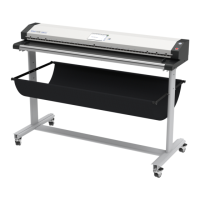
      If the touch panel on your Image Access Scanner isn't displaying the stand-by message, it could be a power issue. Check the main outlet, power cord, and the power-on switch located on the left side of the device to ensure everything is properly connected and powered.
  • W
    wfreyAug 23, 2025
    What to do if the Image Access WideTEK 25 Scanner image is brighter than expected?
    • U
      umorrisAug 25, 2025
      If the image from your Image Access Scanner is brighter than expected, the document might be much brighter than the target used for white balance. You should go to the Adjustments function and modify the Brightness Correction setting.
  • A
    Ashley CastilloAug 25, 2025
    Why does my Image Access WideTEK 25 Scanner image have horizontal stripes or streaks?
    • J
      Jeffrey GoodmanAug 26, 2025
      Horizontal stripes or streaks in your Image Access Scanner image are caused by improper white balance. To fix this, perform the White Balance procedure.
  • R
    rodney33Aug 27, 2025
    How to correct a red tint in Image Access WideTEK 25 images?
    • W
      wperezAug 27, 2025
      A red tint in Image Access Scanner images can occur if the target used for white balance is more blue than the scanning target. To correct this, go to the RGB adjustments and lower the gain on red.
  • M
    Mr. Donald WilliamsAug 27, 2025
    Why is my Image Access WideTEK 25 image showing a blue tint?
    • M
      michellejimenezAug 27, 2025
      A blue tint in Image Access Scanner images can happen if the target used for white balance is more red than the scanning target. You can fix this by going to the RGB adjustments and lowering the gain on blue.
  • T
    Tina GarciaSep 15, 2025
    What to do if my Image Access Scanner image shows a color shift towards red (tint)?
    • M
      Michael FoxSep 15, 2025
      If your Image Access Scanner image has a red tint, it might be because the scanner is receiving significant amounts of infrared light (like sun or spot lights) that aren't visible to the human eye. Try changing the scanner's position, closing blinds, or dimming/shutting off any bright spotlights.
  • M
    Mary BradleySep 12, 2025
    Why is my Image Access Scanner image darker than expected?
    • H
      Heather LarsonSep 12, 2025
      If your Image Access Scanner produces images that are darker than expected, it might be due to the target used for white balance being much brighter than the actual scanning target. To correct this, go to the Adjustments function and modify the Brightness Correction setting.
  • K
    karen92Sep 14, 2025
    Why is my Image Access Scanner image brighter than expected?
    • A
      anthonybradshawSep 14, 2025
      If you find that your scanned images are too bright, it could be because the document you're scanning is much brighter than the target used for white balance. You can adjust this by going to the Adjustments function and modifying the Brightness Correction setting.
  • C
    Charles HughesSep 5, 2025
    Why does my Image Access Scanner image show a color shift towards red (tint)?
    • T
      tmillerSep 5, 2025
      If your Image Access Scanner image shows a color shift towards red, it could be because the target used for white balance is more blue than the scanning target. To correct this, go to the RGB adjustments and lower the gain on red.
  • B
    brooksjuliaSep 2, 2025
    What to do if Image Access Scanner image is brighter than expected?
    • R
      Robert BellSep 2, 2025
      If the image from your Image Access Scanner is brighter than expected, the document might be much brighter than the target used for white balance. To resolve this, go to the Adjustments function and modify the Brightness Correction setting.

Summary

A Hardware

A.1 Safety Notes

Read and understand safety notes for user and device protection.

A.4 Safety Precautions

Precautions for safe operation, preventing personal injury and device damage.

A.10 Connecting to the Power Source

Checks and procedures for safely connecting the scanner to the electrical outlet.

A.11 Powering up the WideTEK 25

Procedure for switching on the scanner from stand-by mode using the main power switch.

A.12 WideTEK 25 Touch Panel

Overview of the integrated touch panel for scanner parameter control.

A.12.1 Starting the WideTEK 25 from Stand-By Mode

Steps to start the scanner from stand-by mode by tapping the touch panel.

A.12.2 Turning-off the WideTEK 25 by the Touch Panel

Procedure for safely powering down the scanner using the touch panel's Stop button.

A.12.6.2 White Balance

Procedure for calibrating scanner colors using a white reference sheet.

A.12.9 Image Control Screen

Adjusting image parameters like brightness, contrast, and gamma for scanned documents.

A.12.9.2 Image Control 2

Advanced image controls including threshold, despeckle, invert, and stitching.

A.12.9.3 Image Control 3

Controls for exposure correction and thresholding for black values.

A.12.10 Format Control Screen

Setting document format, rotation, mirroring, and splitting options.

A.12.10.2 Format Control 2

Adjusting auto margin, auto density, and auto skew for scanned documents.

A.12.11 File Control Screen

Selecting file formats (JPEG, TIFF, PNM, PDF) and their associated compression settings.

B Software

B.1 Start Screen

Accessing the scanner's web-based user interface via a browser.

B.2 The Main Screen

Overview of the main screen of the integrated web user interface.

B.2.1 The Options Screen

Configuration options for document mode, preview, quality, and scan mode.

B.2.2 The Properties Screen

Setting file format, color mode, stitching, and other properties for scanning.

B.2.3 The Camera Screen

Adjusting camera settings like resolution, brightness, contrast, and sharpness.

Exposure

Setting threshold for black cut or auto exposure, with options for 'No', 'Black Cut', or 'Auto'.

B.3 Output Options

Overview of ten available output options for scanned images.

B.3.1 Output Option Save

Saving scanned images to a local or network disk drive, with options to set file name and directory.

B.3.3 Output Option Multipage

Saving scanned images in container formats like ZIP or Multipage PDF.

B.3.4 Output Option Print

Printing scanned images directly to a locally configured printer.

B.3.5 Output Option Copy

Printing scanned images directly to a previously installed network printer.

B.3.6 Output Option FTP Upload

Directly scanning and uploading files to an FTP server.

FTP Server

Configuring FTP server parameters, including proxy, authentication, and upload path.

B.3.7 Output Option Mail

Sending scanned images directly via e-mail.

B.3.8 Output Option Network

Storing scanned images directly in a network directory using SMB protocol.

B.3.8.1 SMB Configuration

Configuring SMB network parameters like port, network type, authentication, and path.

B.3.9 Output Option Web

Storing files and images in cloud storage services via web services.

B.3.9.1 Web Service Configuration

Configuring web services like WebDAV, Google Docs, or Google Picasa for cloud storage.

B.3.10 Output Option USB

Direct scanning to USB storage devices.

B.5 The Setup Screen

Accessing different system levels (User, Poweruser, Admin) via password protection.

B.5.2 Access Level User

Navigating the User access level screen to view information and settings.

B.5.2.3 User Settings Screen

Accessing and setting user-specific parameters like language and power saving.

C Tests and Troubleshooting

C.1 Troubleshooting Matrix

Table of common problems, their causes, and recommended actions for troubleshooting.

C.2 Error Codes

List and descriptions of error codes reported by the scanner.

Image Access WideTEK 25 Specifications

General IconGeneral
Optical Resolution600 dpi
Resolution600 x 600 dpi
Color Depth48-bit
InterfaceUSB 3.0
TechnologyCIS
Scanning Width25 inch
Scanning Speed3.5 inches per second
Power Consumption15W (standby)
Operating System CompatibilityWindows, macOS

Related product manuals