Manual Page 31
A.12.6.7 Stitch Test
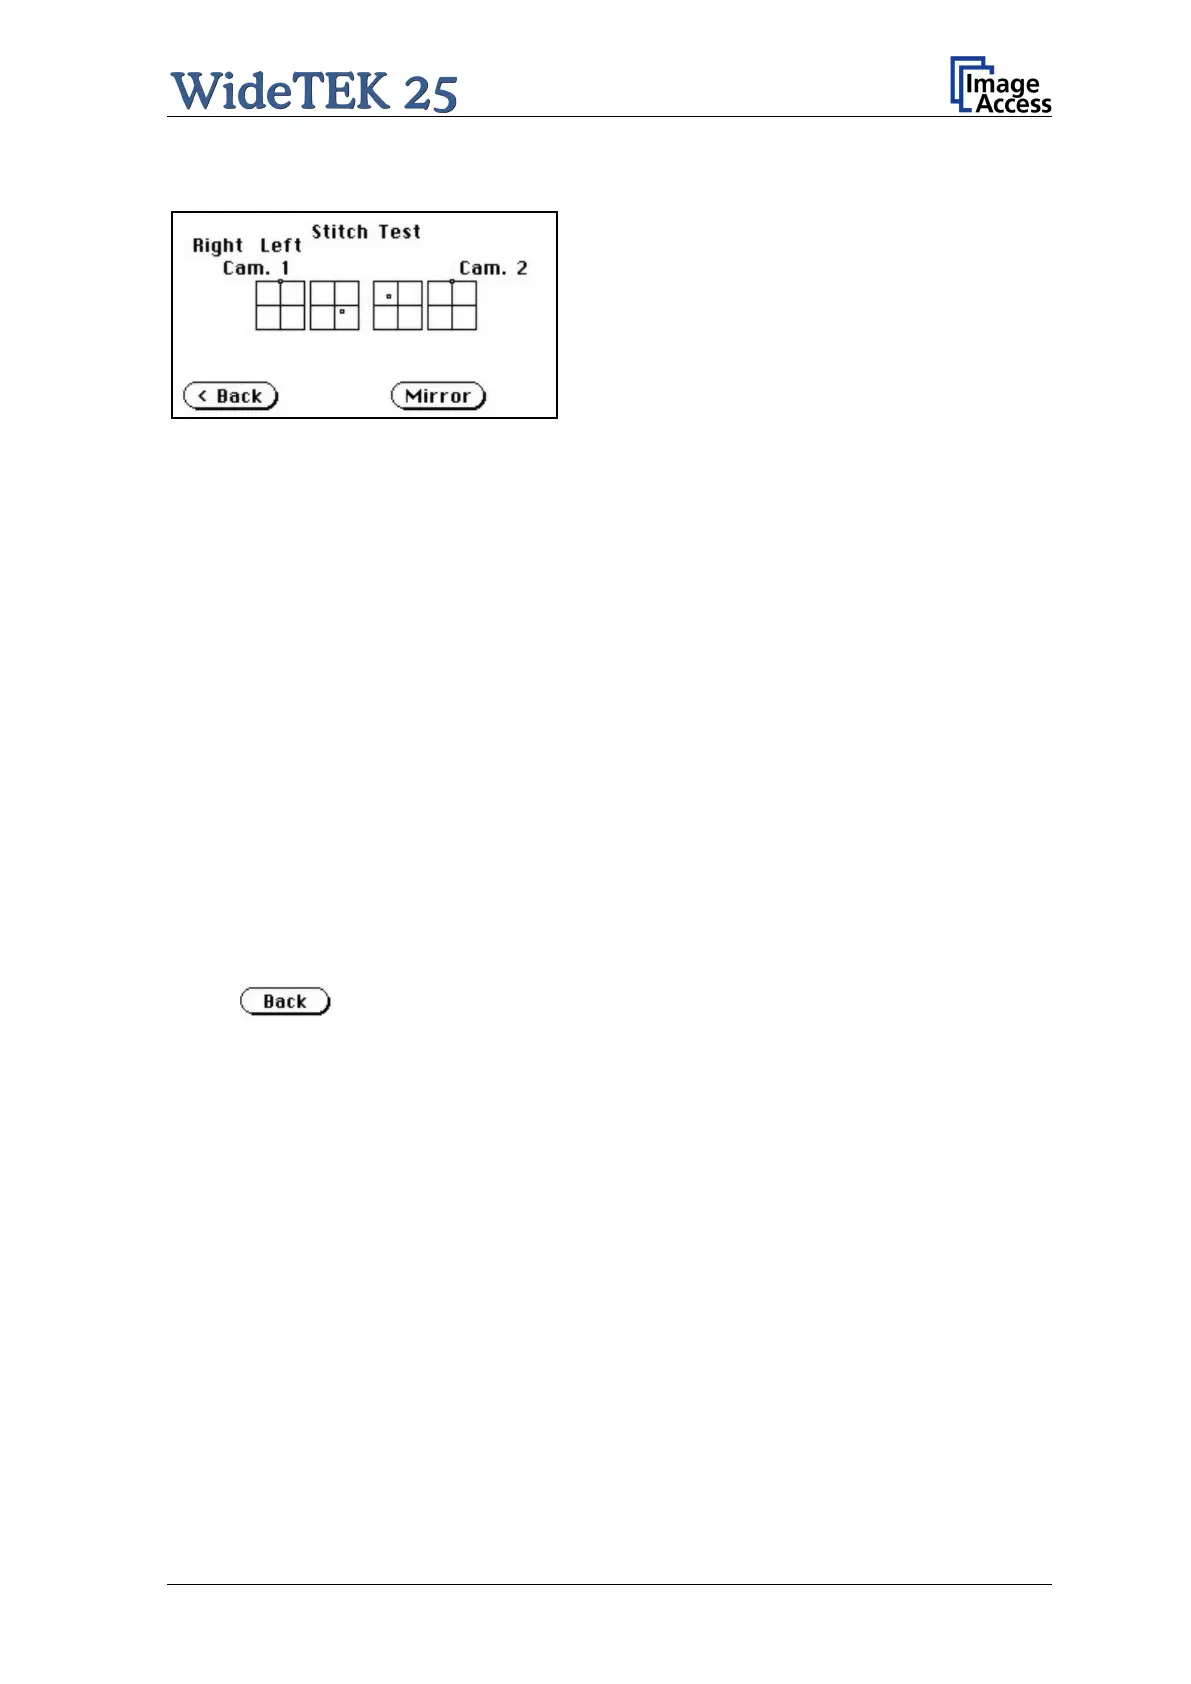
Picture 20: Stitch Test screen
Press the Stitch Test button to start the stitch test. This starts a program in which you can
see an automatically updated view of the stitching indicators for each camera. The
measurement will be executed continuously, once every second.
The cameras left and right are identified as the left and right cameras when looking at the
scanner from the operator’s view (i.e. from the front of the scanner). Each camera has a
set of two stitching coordinate boxes. A stitching coordinate box consists of four
quadrants.
Picture 20 shows a typical situation of the stitching indicators. That means that all camera
settings are within the specified tolerances.
Ideally, the stitching indicators (the small dots inside the four-quadrant boxes) should be
positioned close to the center of the crosshairs.
If a stitching adjustment is necessary, it must be done by a trained technician.
A.12.6.8 EMV Test
This function is used for Electromagnetic Compatibility (EMC) tests.
After inserting a test document into the scanner, the scan sequence is repeated until the
button is pressed.
A.12.6.9 Shutdown Scanner
Switches the WideTEK 25 scanner off.