Troubleshooting
You don’t know how to reassign a drive letter to the SuperDisk
drive.
Solution:
Perform the following:
1) Click on Start>Settings>Control Panel.
2) In the Control Panel, double-click on System.
3) Click on the Device Manager tab.
4) Click on Disk Drives and then double-click on
SuperDisk drive.
5) Click on Settings and set the desired drive letter.
6) Restart your computer when prompted.
When running SETUP.EXE to install the device driver, you get an
error message stating your system already has support for the
drive.The install program aborts without finishing the install, but
your SuperDisk drive does not work.
Solution:
The last step the install program performs is to look
at the date stamp of the ESDI_506.PDR file. If the file is
newer than July 1995, the install program aborts. Edit the
registry to change it from ESDI_506.PDR to ATAPI.MPD.
Your SuperDisk drive letter is greater than C, and you still see your
removed floppy drive as an A drive. How do you establish a
bootable drive?
Solution 1:
Because your SuperDisk drive is not bootable, reinstall
your floppy drive
.
Solution 2:
Upgrade your BIOS to make the SuperDisk drive
bootable.
20
5) Touch the metal frame of your computer to discharge any static
electricity built up in your body and reduce the chance of electric
shock.
6) Familiarize yourself with the inside of your computer
(motherboard). To determine where to install your new
SuperDisk drive you need to know if it will replace your floppy
as a bootable drive or act as an additional, non-bootable drive.
Consult the "checking system configuration" section of your
system owner’s manual for further detail.
If your SuperDisk drive:
• replaces your floppy drive and your BIOS version supports
SuperDisk drives, install the SuperDisk drive into the floppy
drive slot. This means the SuperDisk drive will run from
your A drive.
• acts as an additional drive, install the SuperDisk drive into an
available bay. This means the SuperDisk drive will run from
the next available drive.
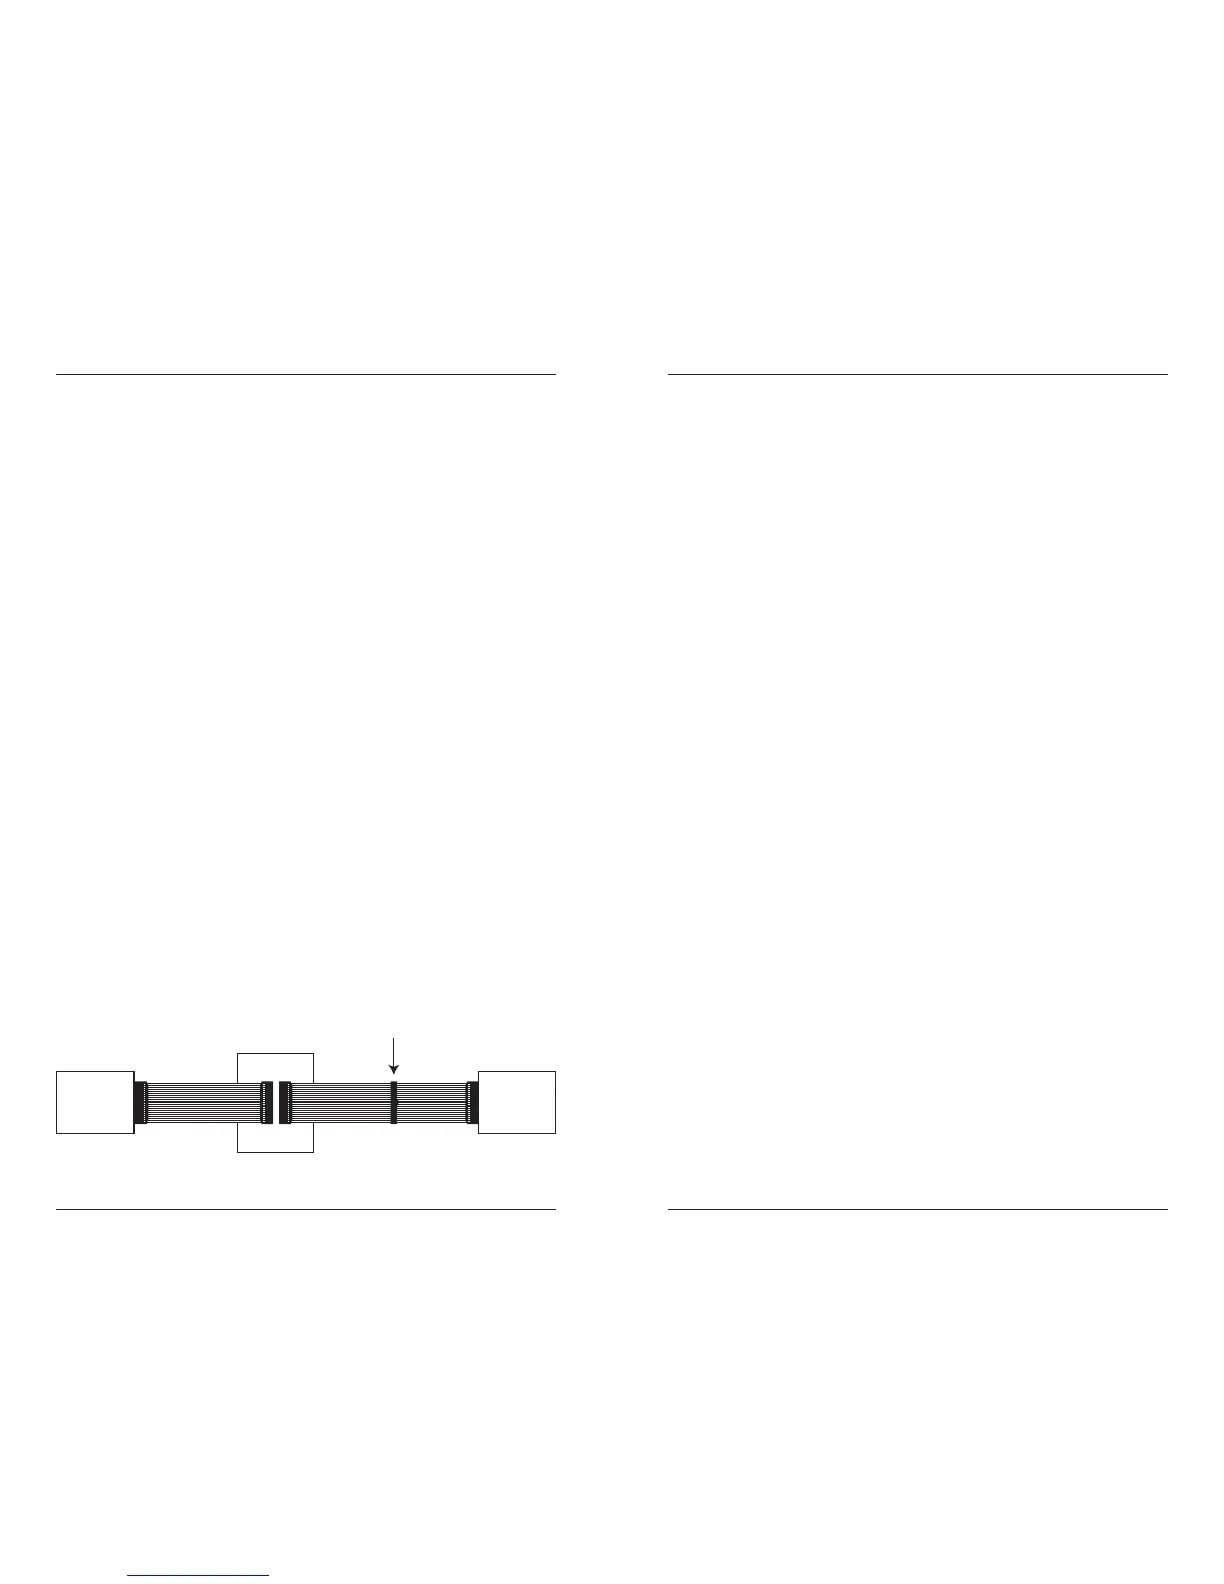
7) Determine where you will connect the supplied IDE cable. The
IDE cable attaches from the motherboard to the rear of your
SuperDisk drive. On new motherboards, there are two IDE cable
connectors—one for the primary IDE channel and another for a
secondary IDE channel. To find these connectors, locate your
hard drive. It is the Master drive on the primary channel. We
recommend that you connect your SuperDisk drive on the
secondary channel.
Note that you have three connectors on your IDE cable: one in
the middle of the cable and one at each end. Your SuperDisk
drive can be attached to either the middle or end connector. The
following illustration shows typical IDE cabling to your hard
drive, SuperDisk drive, and CD-ROM. Consider the example
below to help locate the appropriate connector best suited to
your system’s configuration.
Hardware Installation Procedure
7