MS Backup
MS Backup does not support the SuperDisk drive for Windows 95
and earlier. If you need to use a backup program, upgrade to
Windows 98 or use a third party backup utility.
Booting from the Drive
120MB diskettes are not bootable to DOS. If you create a DOS
system disk on a 120MB diskette, the system will try to boot it, but
will freeze up after you restart your computer.
To Uninstall the Device Driver
For Windows, enter the SETUP.EXE install program and check the
Uninstall SuperDisk Device Driver & Utility button. Run the de-
installation process as you would an installation.
For DOS, do a search for these lines in the CONFIG.SYS file:
c:\atlas\atapimgr.sys and c:\atlas\mkels120.sys. Delete these lines
everywhere they occur.
Maintenance
Clean your SuperDisk Drive after every 40 to 80 hours of operation,
depending on the cleanliness of your operating environment. Head
cleaning is an easy and effective way to prevent data loss. This does
not mean the drive won’t work if it isn’t clean; it is only
recommended to ensure optimum drive performance. Think of head
cleaning as preventive maintenanceæclean heads mean less trouble
later on.
WARNING!
Use only Imation’s LS-120 SuperDisk Head Cleaning Kit. Because of
potential damage to the drive’s head, use of any other head cleaning
kit voids your warranty.
DO NOT use standard diskette head
cleaning kit.
The Imation LS120 SuperDisk Head Cleaning Kit is available through
your retailer or Imation Internet store (US only): www.imation.com
18
Maintenance
9) Remove the plastic front plate and any shielding from the bay
where you plan to install the SuperDisk drive.
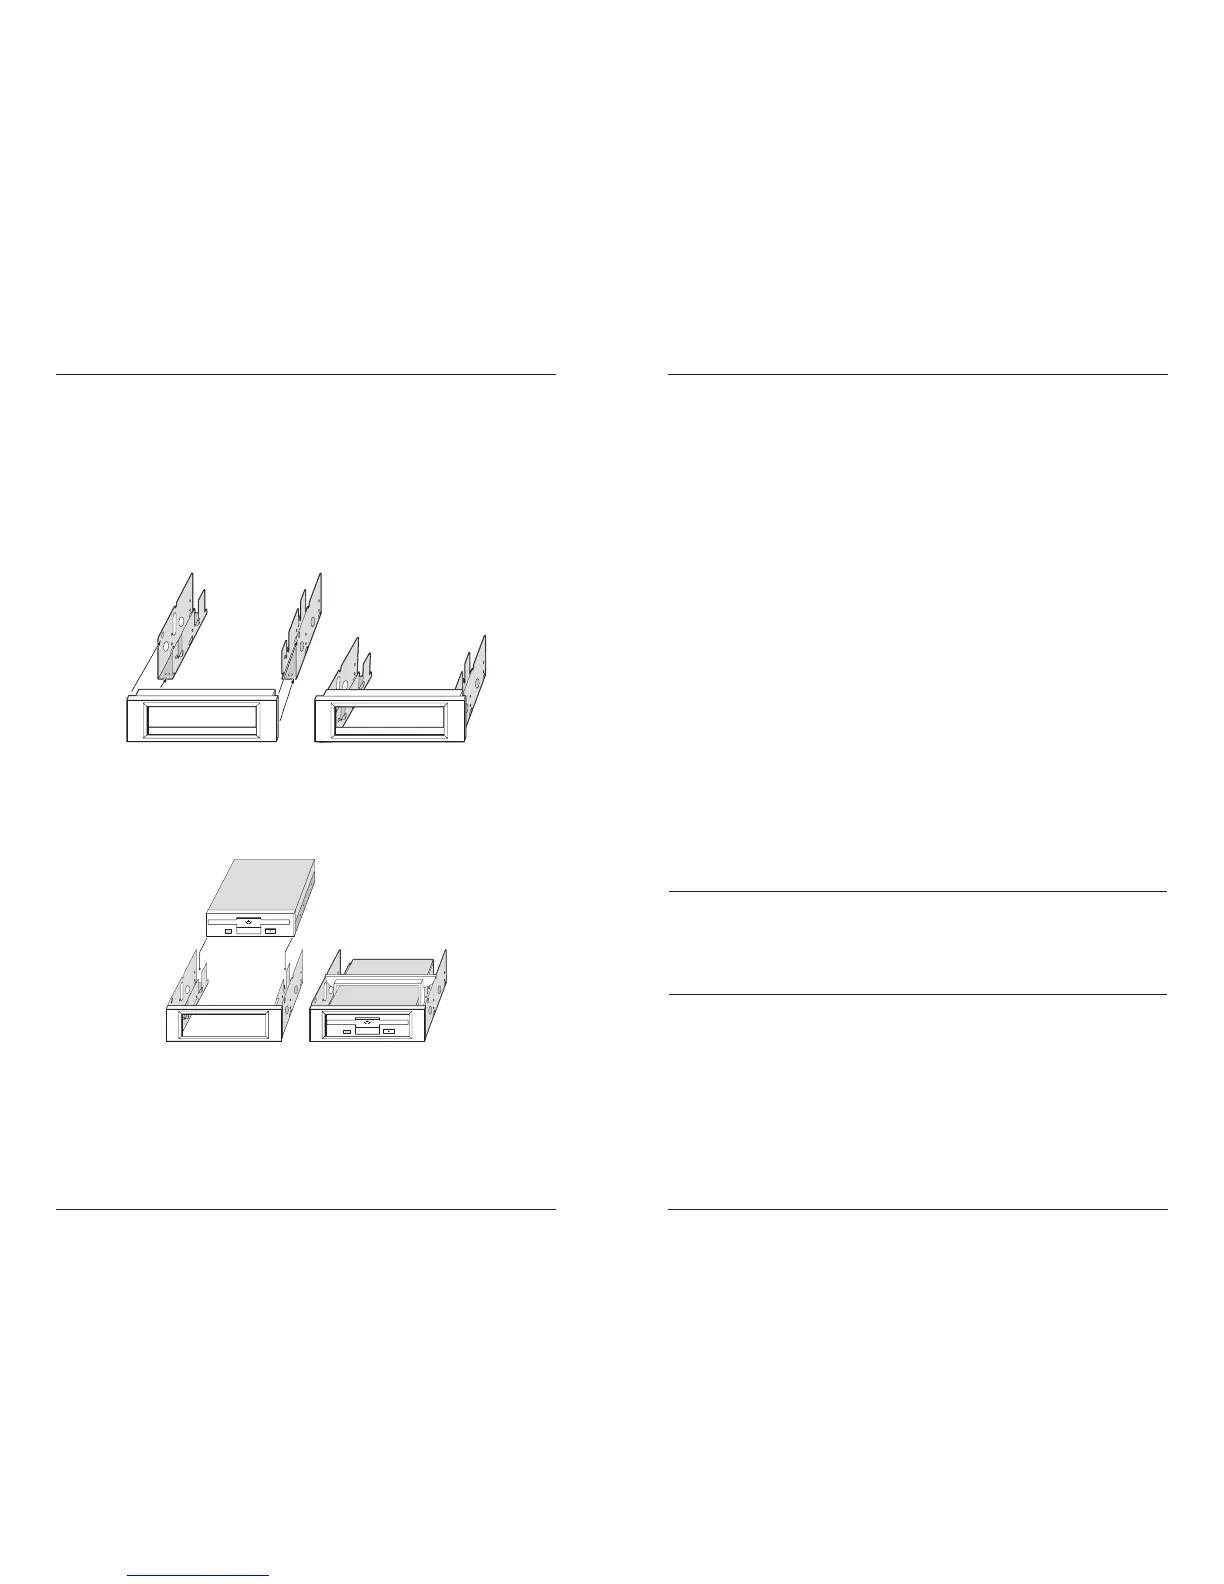
10) If you are installing the SuperDisk drive into a 5.25" bay, use the
3.5" Universal Installation Kit to prepare your SuperDisk drive.
Perform the following steps:
a) Attach the face plate to the brackets (kit rails) one side at a
time. The face plate snaps into place with two clips on either
side. The clips on the plate should face the sides and bottom
of the brackets.
b) Position the drive on the four pins located on the inside of
the brackets. Snap the drive retaining clip into place over the
top of the drive and brackets.
Hardware Installation Procedure
9