BOOSTER
WITH LAP-SASH SEAT BELT
CONVERTING TO A CHILD BOOSTER
SET UP
Figure 1
Figure 2
Figure 3
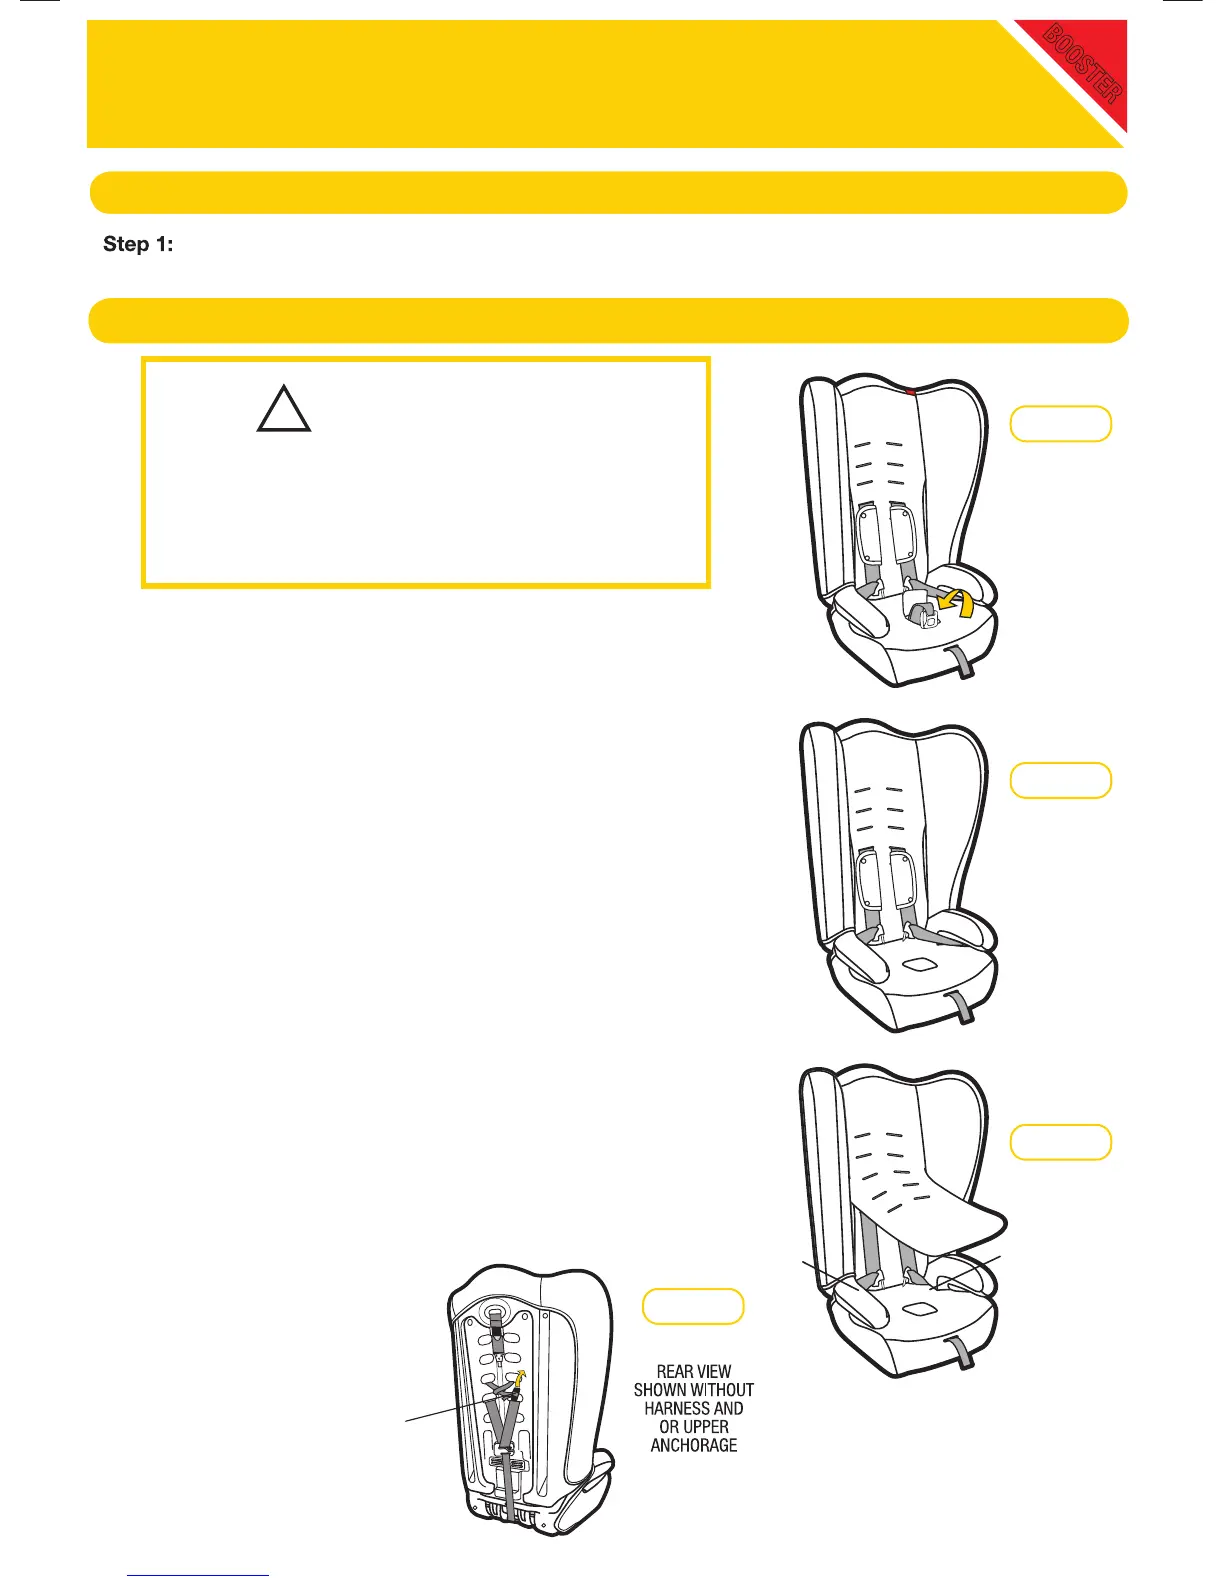
Disengage the buckle, undo the cover ap located
between the leg straps, remove buckle pad and place
the buckle in the recessed section of the plastic base.
Close the ap in the cover (refer to in Figure 1 & 2).
Disengage shoulder straps from “G” connecting plate
as shown on page 12 (refer to section “Shoulder Slot
Height” - Step 1 & 2). Remove and store Shoulder
Pads & Buckle Pad. Lift the front ap of the seat
cover (see Figure 3).
UNDER FLAP
Thread the harness strap back through the top
shoulder slots and reconnect the ”G” plate as per
page 12 (refer to section “Shoulder Slot Height” -
Step 3 & 4).
Tightening the harness with harness adjuster strap
located at the front of the seat.
Place the two buckle tongues in the recess in the
plastic base at point (A) in Figure 3.
Resecure front ap of seat cover.
Select the appropriate shoulder slots that are above
the child’s shoulder (refer page 17 & 18). Attach the
sash guide through the shoulder slots, pass the sash
guide through the slots so that it is positioned at the
front of the restraint.
FOR USE OF THIS RESTRAINT AS A BOOSTER
SEAT THE HARNESS MUST BE STORED BEHIND
THE COVER. FOLLOWING STEPS EXPLAIN HOW
THIS IS TO BE DONE.
Step 1:
Step 2:
Step 3:
Step 4:
Determine whether your child requires the additional padding provided with this restraint, to
ensure a safe and snug t in the restraint. Refer to page 10 for suggested padding combinations.
SELECTION OF APPROPRIATE PADDING COMBINATIONS
IMPORTANT
!
Figure 4
BLACK SASH
GUIDE
(A)
(A)
The restraint is
now ready as a
booster seat.
20

 Loading...