The Infineon 3D Magnetic Sensor 2 Go (TLE493D-A2B6) is a compact evaluation kit designed to familiarize users with the TLE493D-A2B6 low-power 3D Hall sensor, featuring an I²C interface. This kit enables quick setup and execution of 3D magnetic measurements.
Function Description:
The 3D Magnetic Sensor 2 Go kit serves as an evaluation platform for the TLE493D-A2B6 sensor. It allows users to measure magnetic fields in three dimensions (X, Y, and Z components) and evaluate the sensor's performance in various operating modes. The kit includes an EvalBoard, which is a ready-to-use printed circuit board (PCB) based on the XMC2Go-Kit, and a standalone block magnet. The EvalBoard integrates the TLE493D-A2B6 sensor with an XMC1100 microcontroller (ARM Cortex-M0 at 48 MHz) for low-level communication with the sensor, and an XMC4200 microcontroller (ARM Cortex-M4 at 144 MHz) for debugging and USB communication.
The kit's primary function is to provide a user-friendly interface for configuring the sensor, acquiring magnetic field data, and visualizing the measurements. The Graphical User Interface (GUI) allows users to select different sensor modes, which vary in update rate and current consumption. It also provides graphical representations of the magnetic field data, including graph views, joystick views, and polar coordinate displays.
Important Technical Specifications:
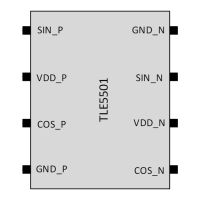
- Sensor: TLE493D-A2B6 Low Power 3D Hall Sensor with I²C Interface.
- Microcontrollers:
- XMC1100 (ARM Cortex-M0, 48 MHz) for sensor communication.
- XMC4200 (ARM Cortex-M4, 144 MHz) for debugging and USB communication.
- Power Supply: Supplied via micro USB cable (5V DC). Can also be powered externally.
- Voltage Regulator: Shifts voltage to 3.3V for microcontrollers and the 3D magnetic sensor.
- Current Consumption: Typically draws about 75 mA with pre-programmed application and on-board debugger in operation (can be delivered by PC USB plug, specified up to 500 mA).
- Maximum Current Output (on-board voltage regulator): 150 mA.
- Connectivity: Micro USB connector for power supply and communication with PC. Pin headers (X1, X2, X3) for extending the evaluation board, performing measurements on the XMC1100, and direct access to 3D magnetic sensor pins.
- User Interface: Graphical User Interface (GUI) compatible with Windows 7 and Windows 10 (32-bit and 64-bit systems).
- USB Protocol: Compatible with USB 2.0 and USB 3.0 (defined by Segger driver).
- Sensor Modes:
- Low power mode: Cyclic sensor measurements with a configurable update rate (default 770 Hz typ.), with the sensor entering power-down mode between measurements to reduce power consumption.
- Fast mode: Continuous sensor measurements at the fastest update rate.
- Master controlled mode: Sensor measurements triggered by the microcontroller, offering high flexibility.
- Magnetic Heads (Optional):
- Joystick magnet head: Uses an axial magnetized ferrite magnet (class Y35) with a remanence of 400-410 mT, 5 mm diameter, and 5 mm thickness.
- Rotation knob magnet head: Uses a diametrically magnetized Neodymium Iron Boron (NdFeB) magnet (class N45) with Nickel coating, 4 mm diameter, and 10 mm thickness.
Usage Features:
- Plug-and-Play Evaluation: The kit is designed for quick setup; simply connect the EvalBoard to a PC via a micro USB cable.
- Intuitive GUI: The software provides a Graphical User Interface for easy configuration and visualization of magnetic field data.
- Real-time Data Display: The GUI's Graph View displays real-time magnetic field measurements (X, Y, Z components) and temperature, with data presented in histograms and a table.
- Data Export: Measurement data can be exported to a .csv file for further analysis.
- Interactive Visualization:
- Joystick View: Offers a virtual representation of a joystick with an attached magnet, allowing users to visualize the sensor's response to joystick movements.
- Polar Coordinates View: Displays calculated spherical coordinates (radius r, angles Phi and Theta) of the magnetic field, along with a graphical representation of a rotary knob. This view supports a virtual rotation knob that mirrors the movement of a physical rotary knob attachment.
- Flexible Sensor Configuration: Users can select between different sensor modes (Low Power, Fast, Master Controlled) to optimize for update rate or power consumption.
- Expandability: Pin headers (X1, X2, X3) allow for external connections, enabling users to extend the EvalBoard or perform measurements with an oscilloscope or external microcontroller.
- Modular Design: The 3D magnetic sensor can be separated from the rest of the EvalBoard by cutting along a designated break line.
Maintenance Features:
- Driver Installation: The necessary SEGGER J-Link USB driver is included in the GUI installer and automatically starts during installation. Users can also download the latest driver version directly from the SEGGER homepage if needed.
- Firmware Update: Upon initial connection, the EvalBoard automatically downloads the required firmware to the XMC1100 microcontroller.
- Software Updates: The latest software versions (GUI and firmware) can be downloaded from the Infineon website.
- Troubleshooting: The Debug LED on the EvalBoard indicates power supply status and connection to the PC. Blinking indicates firmware download, while constant illumination signifies a successful connection with correctly installed drivers.
- Documentation: A comprehensive user manual provides detailed descriptions of the board components, software installation process, and GUI usage. Technical documents for the XMC2Go-Kit are also available online.