5
M L X 3 0 0 W A T T X E N O N L I G H T S O U R C E
OVERVIEW
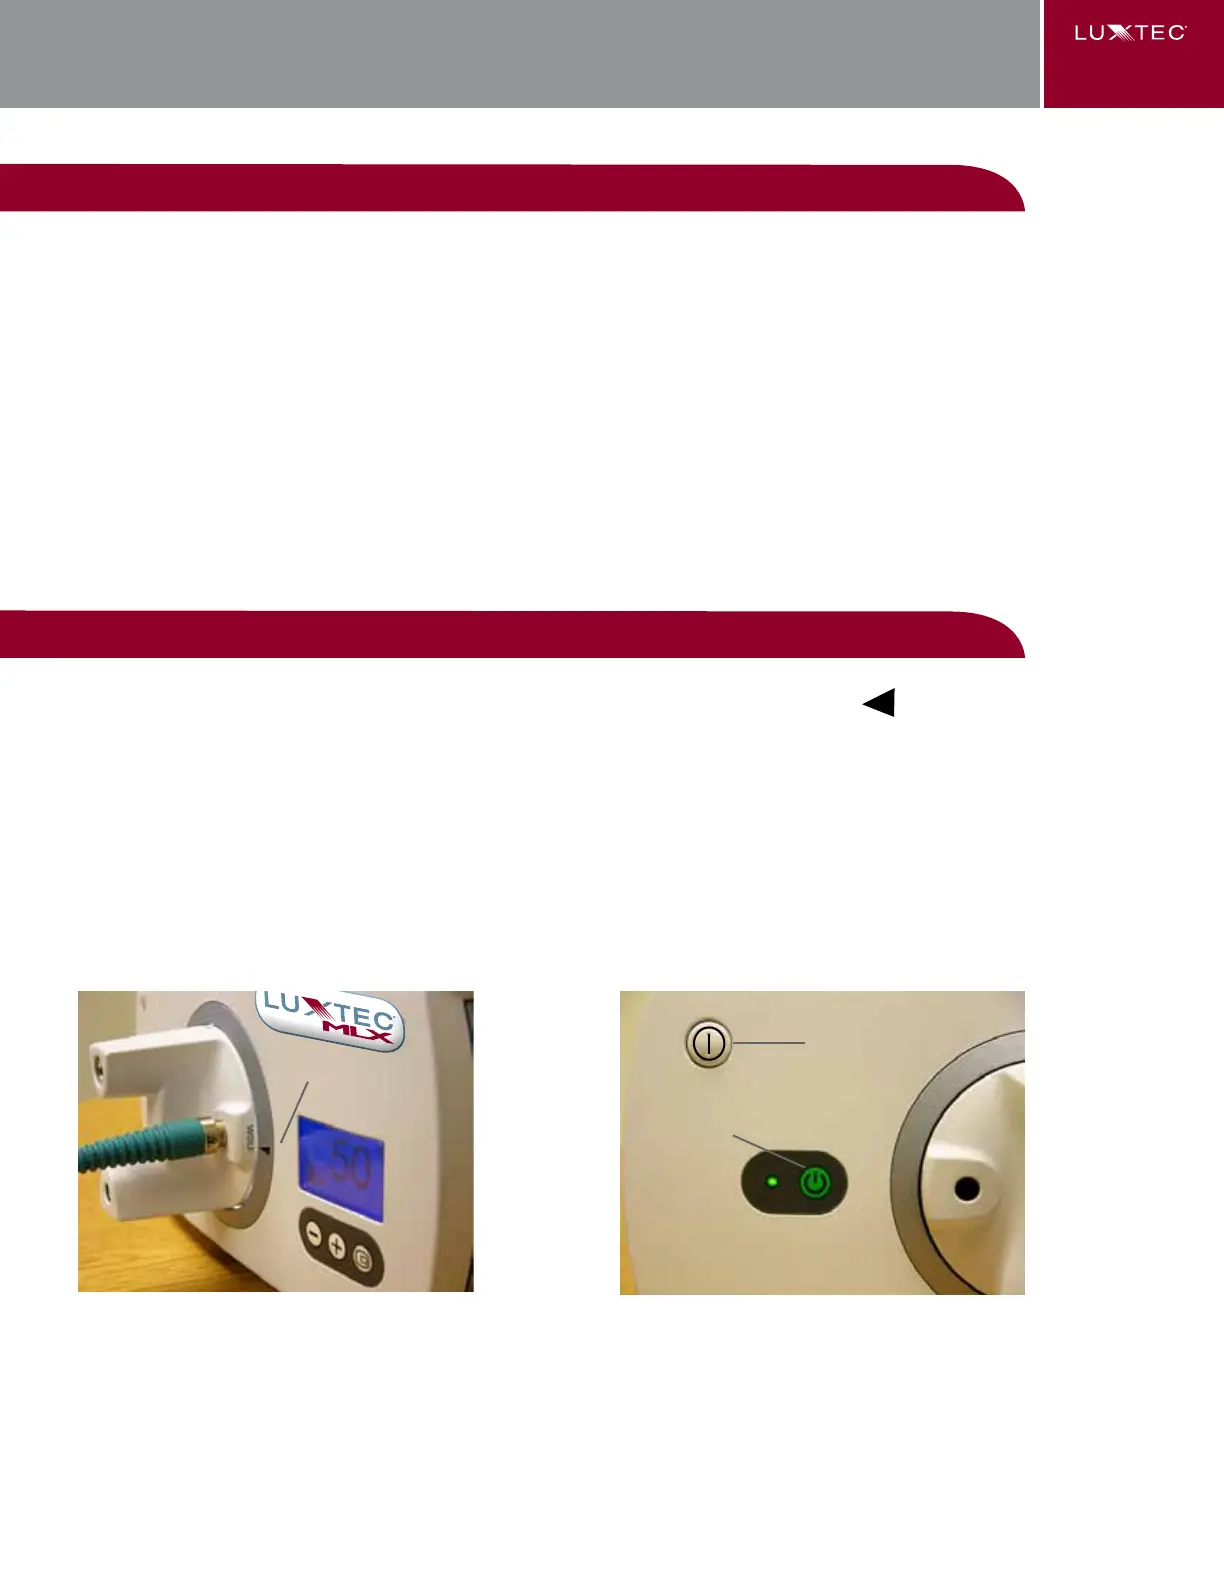
1.Insertaberopticcableintheproperportintheturret.Theactiveportisindicatedbyaon the front panel
(See Figure 1). Available ports are ACMI, Olympus, Storz and Wolf cable-compatible. All ports areidentied
appropriately.
2. Press the Power Switch in the upper left corner of the front panel (See Figure 2).
3. When the Power Switch is pressed the Stand-by Light (Figure 2) will blink and there will be a 3 – 4 second delay
before the Xenon Lamp illuminates while the system does a self-diagnostic check.
4. Press the Stand-by Button.
TheMLXlightsourcedelivers300sparewattsofcoolwhiteinfrared(IR)lteredlight.Thelampishousedinalamp
module that can be easily serviced without special tools.
Set Up and Inspection Before Use
The light source comes with the hospital grade power cord packaged separately. Verify that both components are in good
condition.
Before turning power on to the light source, make sure the unit is plugged into any standard 100VAC to 240VAC 47-
63Hz (as appropriate) outlet. Grounding reliability is guaranteed only when connected to a “hospital grade” receptacle.
Allowaminimumof2inches(5.08cm)clearanceattherearandsidesoftheunitforcoolingairow.Ensurethatthe
unit is not near air exhaust or against other equipment.
WARNING: The MLX light source monitors air intake temperature and will turn off if ambient temperature is > 40
O
C
OPERATION
Figure 1
Active Point
Power Switch
Stand-by Button
Figure 2
PRECAUTIONS