38 TruVision Series 3 IP Camera FW3.1 Configuration Manual
6. Move the Sensitivity slider to set the sensitivity of the detection. All areas will
have the same sensitivity level.
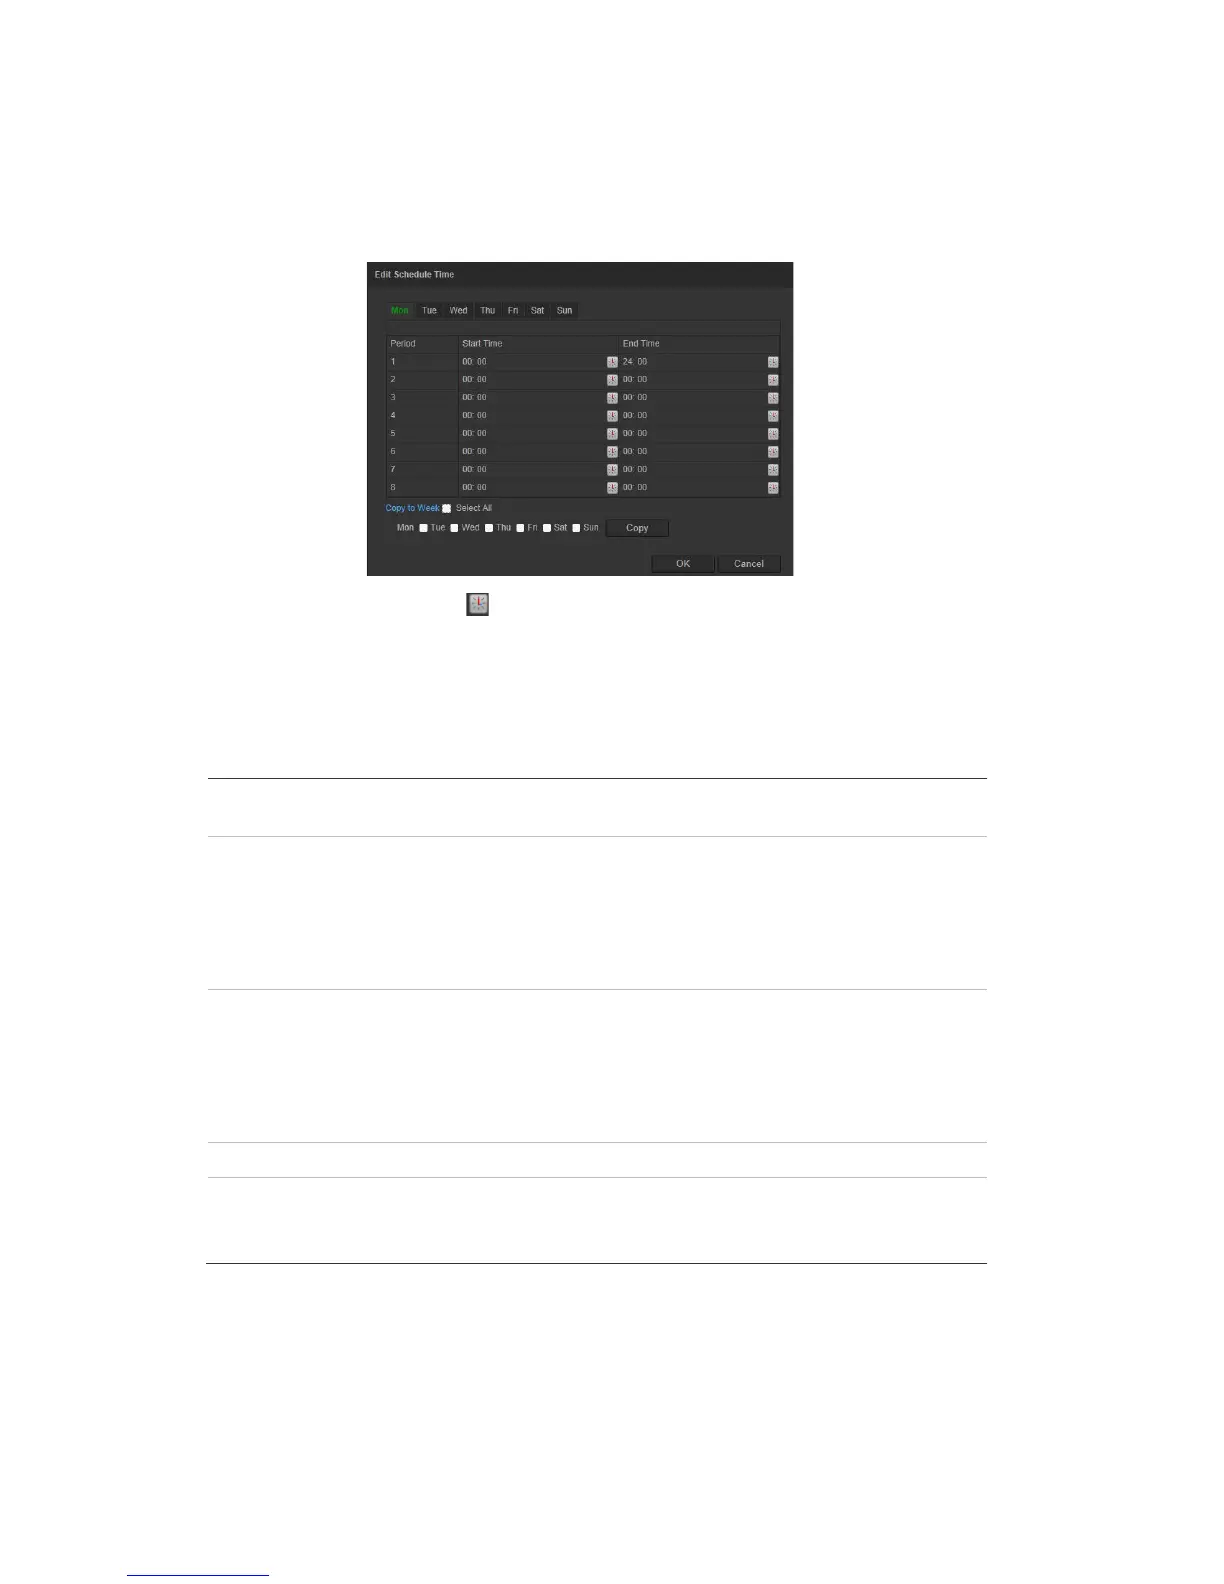
7. Click Edit to edit the arming schedule. See the picture below for the editing
interface of the arming schedule.
8. Choose the day and click to set the detailed time period. You can copy the
schedule to other days.
9. Click OK to save changes.
10. Specify the linkage method when an event occurs. Check one or more
response methods for the system when a motion detection alarm is triggered.
Send an exception or alarm signal to remote management
software when an event occurs.
Email Sends an email to a specified address when there is a motion
detection alarm.
Note: You must configure email settings before check this
option. See “To set up the Email parameters:” on page 23. If
you want to send the event snapshot together with the email,
you should check the Attached Snapshot option.
Capture the image when an alarm is triggered and upload the
picture to NAS or FTP server.
Note: If you want to upload the snapshot to NAS, you must
configure NAS settings, If you want to upload the snapshot to
FTP, you must configure the FTP settings. Please ensure that
the Upload Type option is enabled.
Channel Triggers the recording to start in the camera.
Trigger external alarm outputs when an event occurs.
Note: This option is only supported by cameras that support
alarm output.
11. Click Save to save changes.
When you choose Advanced mode, you can set different sensitivities and
proportions on different areas. If you choose Auto-Switch or Schedule-Switch,
you can also set different settings for day and night or different periods.