13
Testing
After connecting the transducer to the Advantage display, a
test of installation should be conducted. After becoming
familiar with the Advantage’s performance at speeds of 5 to 6
knots, gradually increase your boat’s speed. As the boat speed
increases, there will be a gradual degradation of the
transducer’s performance because flow of water over the
transducer generates acoustic noise. If you’re in the manual
gain mode (not Auto Gain), you may have to increase the gain
setting to get a clear bottom reading. When aeration of the
transducer occurs, the degradation is usually not gradual, but
sudden. If this occurs, note the boat’s speed and gain setting at
the onset of the degradation. Remove the boat from the water
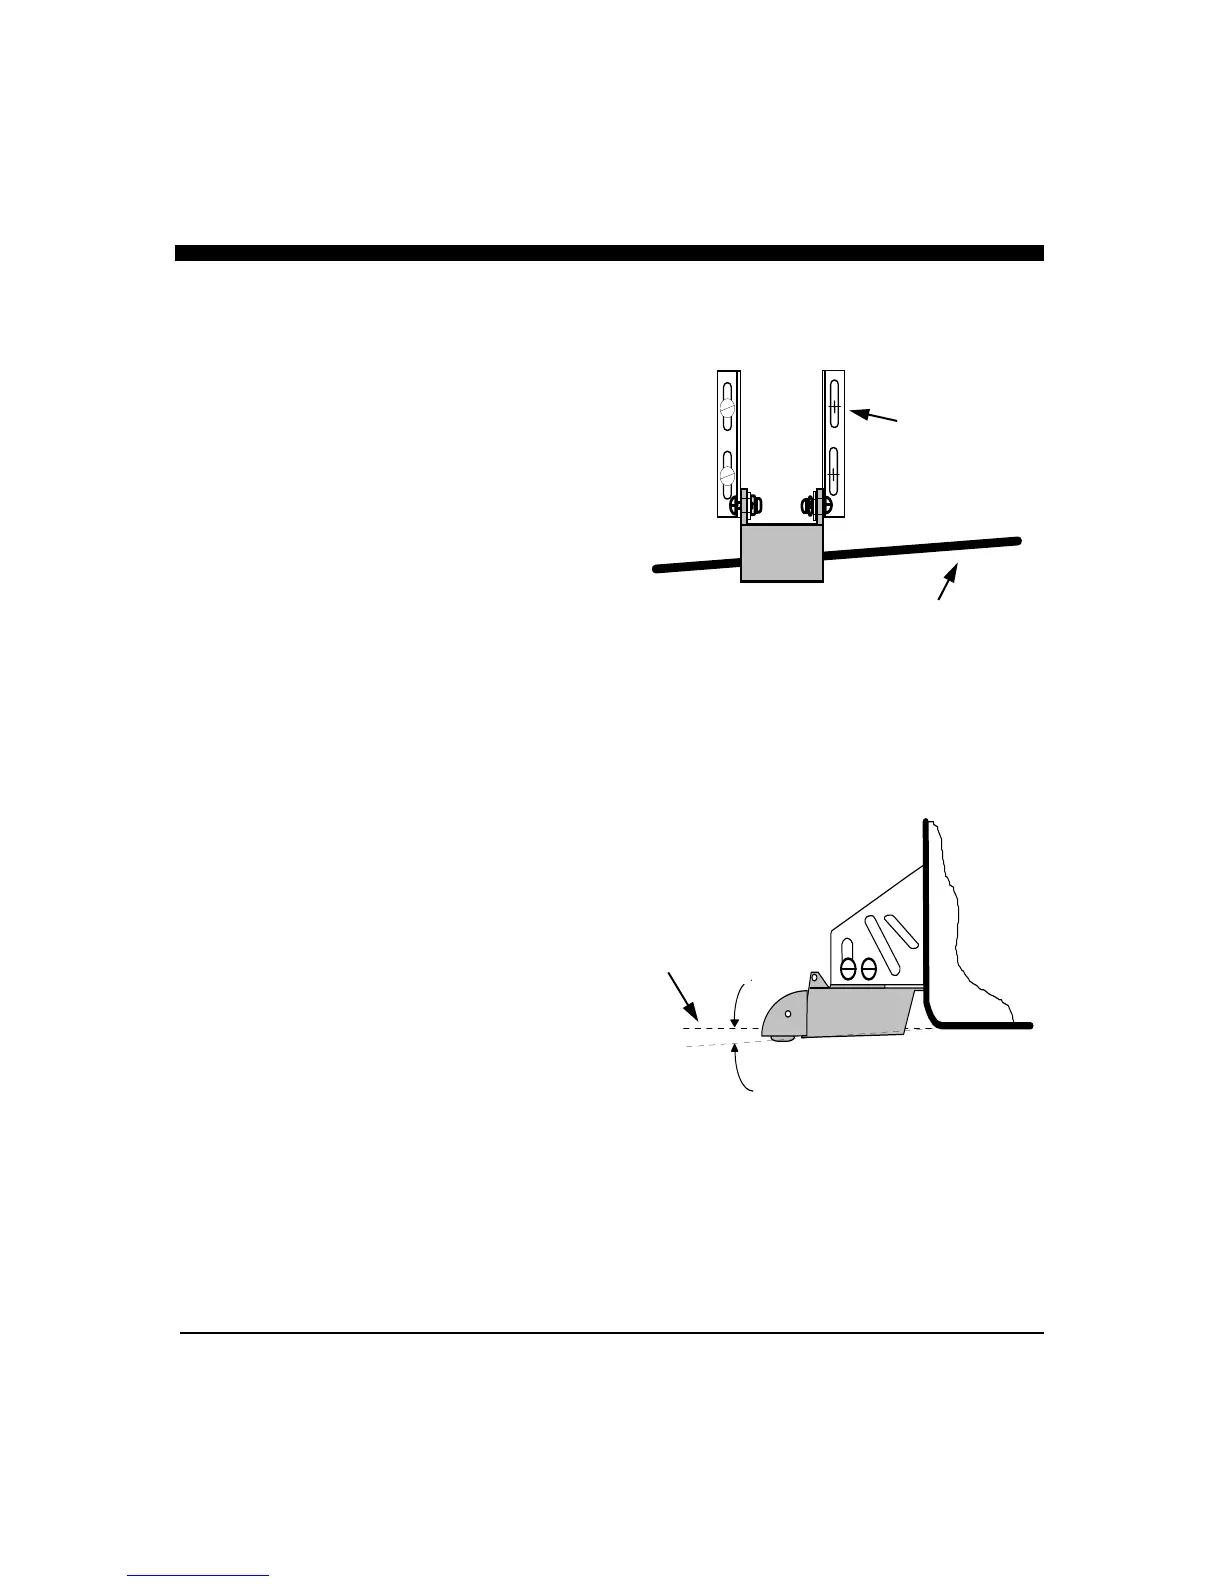
and recheck the alignment of the transducer. If necessary,
readjust the bracket to make sure the rear of the transducer is
approx. 3 to 5 degrees (1/8”) below the front as shown in the
sketch at bottom right. If the transducer alignment is correct,
then lower the transducer 1/4” further below the hull and
repeat the test. If still unsatisfactory, try a new location closer
to the center keel where aeration is usually less pronounced.
Remember to fill unused screw holes with sealant.
To overcome the effect of surface roughness on aluminum
boats, it may be necessary to move the transducer down so that
it projects 1/2” to 3/4” below the transom. On a few hull types
specifically designed to direct air under the hull, moving the
transducer away from the keel can improve performance.
3 degrees
Line of Hull
Attach Brackets To Stern Of Boat
Bottom of Boat’s
Hull
Angle Rear of Transducer Slightly (3 to 5
degrees) Below Front.
Mark Hull
Before Drilling