344
PO
S AVE THESE INSTRUCTIONS
(344PO) SPA (JET + BUBBLE) ENGLISH 7.5” X 10.3” PANTONE 295U 07/20/2019
English
Page 10
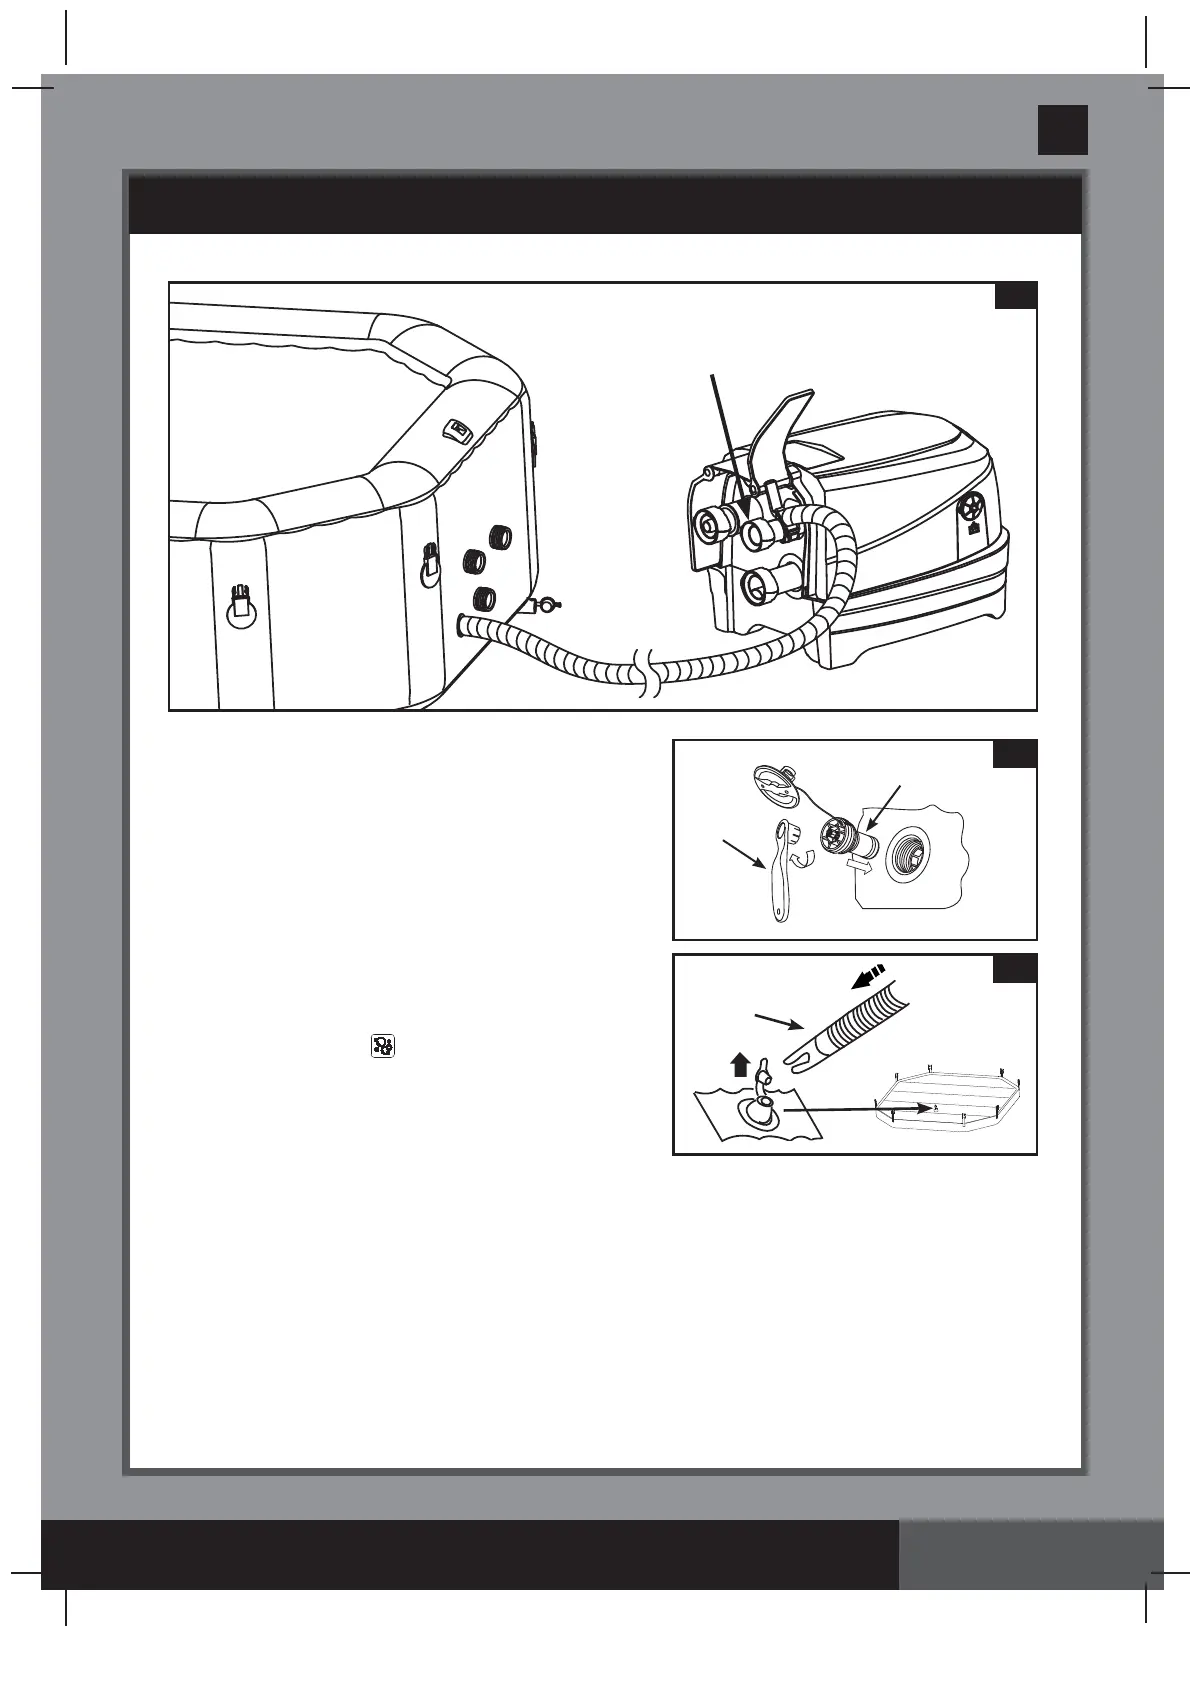
SET UP (continued)
6.
Replace the air valve cap back.
The cap is designed to be screwed on and off. Never
exert force as this could cause the complete internal
infl ation system of the valve to come loose. See “Spa
Tub Air Valve Fastening” for valve maintenance.
NOTE:
If there is a need to replace the spa tub air pressure
release valve core
(5)
due to wear and tear, use the included
wrench
(22)
to unscrew the core from the valve base. Insert
the replacement core and tighten with the wrench. Make sure
the core is securely tightened
(see drawing 7)
.
Infl ate the Spa Cover Air Bladder
1.
Open the infl ation valve and insert the infl ation hose
(7)
into the valve; press
to infl ate until it is fi rm to the
touch but not hard
(see drawing 8)
.
2.
Disconnect the infl ation hose
(7)
from the air blower
infl ation outlet and the valve.
3.
Replace the control base infl ation latch back; close
and recess the infl ation valve.
NOTE:
If there is a need to add some air to the spa tub wall
or spa cover air bladder after they have been setup, refer to above “Infl ate the Spa Tub Wall” and “Infl ate
the Spa Cover Air Bladder” sections. The cover air bladder is preinstalled inside the spa cover. If it needs to
be reinstalled, place the uninfl ated air bladder inside the spa cover lip before infl ating the bladder.
7
22
5
8
7
6
IMPORTANT:
To prevent damage to the air
blower motor never block the air blower outlet
opening during infl ation.
 Loading...