CAMERA BUTTONS AND INTERFACE continued
7
DUB
M
N
O P
Q
R
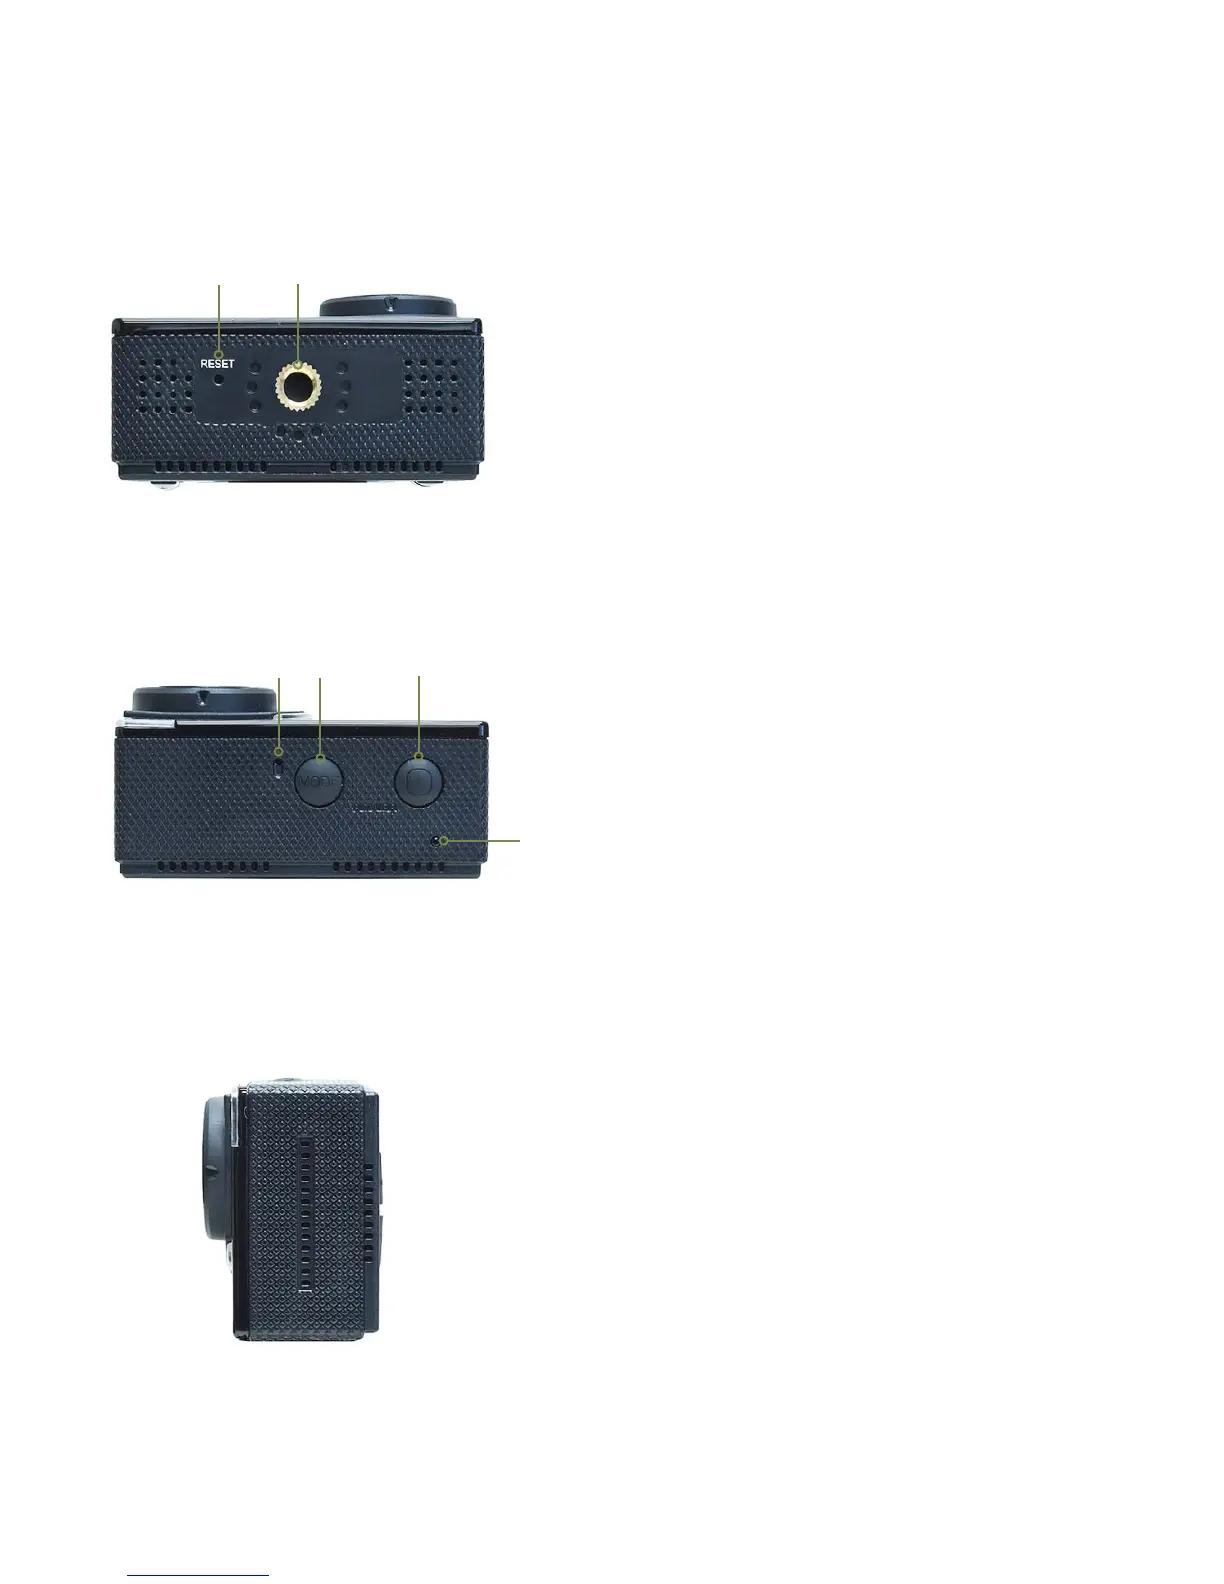
M. RESET
>>If camera stops operating (becomes frozen),
insert the end of a paper clip into the RESET hole
and carefully and slowly push to press the internal
switch until you feel it “click” to reset the camera.
N. ¼-20 Mount
>>Allows the camera to be mounted on a tripod
or other mounts that have a standard 1/4” 20
tripod screw.
O. Microphone
>>Built-in microphone for capturing audio
during video recording. For better audio on
land/in air, use the camera outside of the
housing.
P. MODE, MENU Toggle Button
>>Select Video/Photo/View mode (quick press).
>>Quickly press and release the button when in
the video, photo or playback menu (and there is
no menu item/function highlighted in blue) to
switch (toggle) to SETTINGS menu (gear icon)
and back to the video, photo or playback menus.
Q. POWER and SHUTTER button
>>Power camera on/o (press & hold 2 seconds).
>>Video mode: press to start/stop recording.
>>Photo mode: press to take photo.
R. Indicator LED
>>LED is red and stays ON while charging
and OFF when charging is complete.
>>LED is blue when camera is turned ON.
>>LED is blue and blinking when video is
being recorded.