GETTING STARTED
9
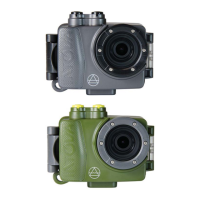
DUB
OPENING THE HOUSING
>>Unlock Housing: Flip the housing lock (marked by OPEN) away from the housing and unhook the latch
from the back door. Push the thumb press mechanism (on the opposite side of the word “OPEN” to pop
open backdoor if there is a vacuum seal.
>>Lock Housing: Close back door, hook latch and push lock towards housing.
CHARGING LI-ION BATTERY
>>Prior to charging, remove the camera from its housing.
>>Charge the battery by connecting the camera to a computer or other USB charging adapter using the
included micro USB cable. When the camera turns on, press the power button to turn camera o. The LED
indicator light on top of the camera changes from blue to red to indicate that the battery is charging and
turns o when charging is complete.
>>When charging with a computer, be sure that the computer is connected to a power source.
>>The camera does not come fully charged. No damage occurs to the camera or battery if used without a
full charge.
INSERT MICRO SD CARD
>>The DUB camera requires a microSD memory card (not included) up to 32GB maximum size and class 10
(10 MB/s) speed minimum for recording 1080p video.
>>Insert the microSD card: Slide the memory card into the card slot with the label facing the front of the
camera. When fully inserted, the card clicks into place. To remove the microSD card, place your ngernail
against the edge of the memory card and lightly press it further into the camera. The card springs out far
enough to be removed.
>>Use care when handling memory cards. As a precaution, power o the camera before inserting or
removing the card.
POWER ON/OFF
>>Power-on: press and hold POWER button for 2 seconds to turn camera ON.
>>Power-o: press and hold POWER button for 2 seconds to turn camera OFF.
CHOOSE MODE
>>The camera is equipped with three modes: video, photo and playback. The default mode is video.
>>To change between modes, quickly press and release the MODE button.
TAKE AN IMAGE
>>Press SHUTTER button while in either video or photo mode to start/stop video recording or take a photo.
TRANSFERRING IMAGES TO A COMPUTER
>>Plug the camera with inserted microSD card that has images into a computer using the supplied micro
USB cable. The LCD will show “MSDC” with an exclaimation mark in a blue triangle. A pop-up box will be
displayed on the computer showing the JPG (photo les) and VIDEO les folders (Windows OS) or a program
such as iPhoto will be activated to transfer images to the computer (Mac OS).
ALERTS & IMPORTANT MESSAGES
>>MicroSD card not inserted: No Card! error message indicates that there is no memory card inserted. A
microSD card (not included) is required to capture videos, photos and to playback images. Insert microSD
card while the camera is OFF.
>>Operation indicator: The LED light on top and front of camera illuminates blue when the camera is
turned on, connected to a computer to download images, and blinks when recording video.
>>LED Battery Charging indicator:
Put camera into charge mode by connecting camera via supplied micro USB cable to a computer’s USB port.
Camera will turn on and LED battery charging indicator on top of the camera will be blue. Turn camera OFF
by pressing POWER ON/OFF button. LED should turn red to indicate that the battery is being charged and
go OFF when the battery is fully charged. Charge time can be up to 6 hours.