Installation and Maintenance
69
Service Manual
118
Installation and Maintenance
Service Manual
a
b
c
ProcedureStep
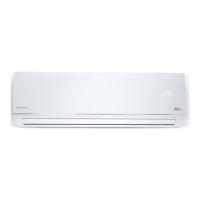
Loosen the connection clasps between
shield cover of electric box sub-assy and
electric box, and then remove the shield
cover of electric box sub-assy.
Remove the screw xing electric box assy .
①
Take off the water retaining sheet.
Remove the cold plasma generator by
screwing off the locking screw on the
generator.
②
Take off the indoor tube temperature
sensor.
③
Screw off 1 grounding screw.
④
Remove the wiring terminals of motor and
stepping motor.
⑤
Remove the electric box assy.
Twist off the screws that are locking
each lead wire and rotate the electric
box assy.
Twist off the screws that are locking the
wire clip. Loosen the power cord and
remove its wiring terminal. Lift up the
main board and take it off.
7. Remove electric box assy
Electric box
Electric box assy
Clasps
Shield cover of electric
box sub-assy
Cold plasma
generator
Water retaining
sheet
Grounding screw
Screw
Power cord
Wire clip
Screw
Main board
Screw
Indoor tube
temperature
sensor
Wiring
terminal
of motor
Wiring
terminal
of stepping
motor
Screw
119
Installation and Maintenance
Service Manual
a
c
d
b
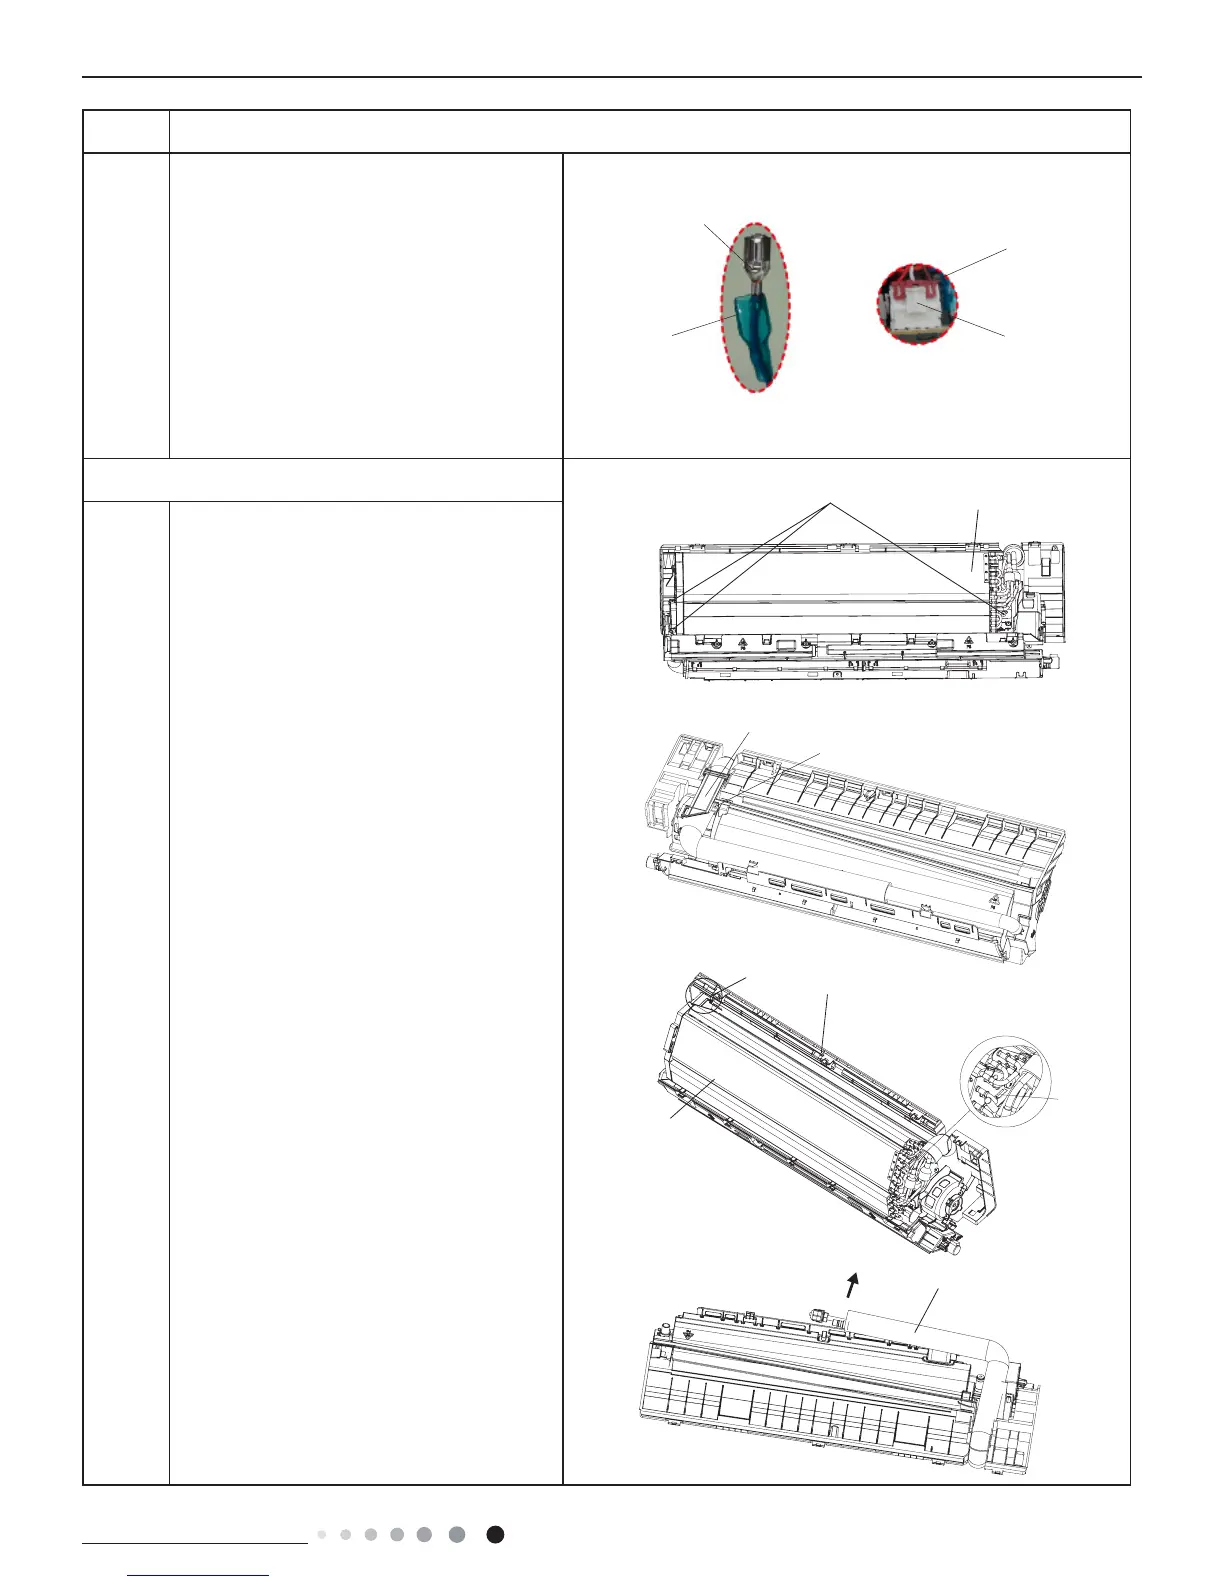
First remove the left side of the evaporator
from the groove of bottom case and then
remove the right side from the clasp on
the bottom case.
Instruction: Some wiring terminal of this
product is with lock catch and other devices.
The pulling method is as below:
1.Remove the soft sheath for some terminals
at rst, hold the circlip and then pull out the
terminals.
2.Pull out the holder for some terminals at
rst (holder is not available for some wiring
terminal), hold the connector and then pull the
terminal.
circlip
soft sheath
holder
connector
ProcedureStep
Remove 3 screws xing evaporator assy.
8. Remove evaporator assy
Screws
Connection pipe clamp
Evaporator assy
Evaporator assy
Screw
Groove
Bottom case
Clasp
Connection pipe
At the back of the unit, remove the
screw xing connection pipe clamp and
then remove the connection pipe clamp.
Adjust the position of connection pipe
on evaporator slightly and then lift the
evaporator upwards to remove it.
 Loading...