SYSTEM OVERVIEW
7
Pulsar extractor fan | Installation and operation instructions
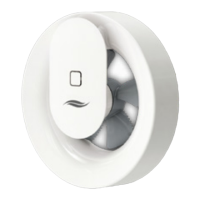
Figure 1: Pulsar extractor fa
2.1 Function
The Pulsar extractor fan is programmed to suit most
installations.
The following factory settings are pre-programmed:
• Automatic control by light exposure:
When the lighting conditions change, lights are switched
on, shadows change or when a person enters the room,
the fan starts with an air ow rate of about 60 m³/h and
runs for 15 minutes. After that, the Pulsar switches o
again.
• Automatic humidity monitoring:
If the air humidity rises sharply, for example when the
shower is used, the air ow rate increases to a maxi-
mum of 95 m³/h. When the humidity has been reduced,
the Pulsar switches o again.
When the Pulsar is switched on for the rst time, the
factory settings are active.
Further control and set-up of the Pulsar is done using the
inVENTer Mobile application software.
If required, the Pulsar can also be used as an overow
fan for ventilating and heating neighbouring rooms without
heating facilities. The Pulsar switches on when the selec-
ted temperature limit is exceeded. It switches o again
when the temperature in the room falls below the selected
limit value.
The extractor fan is controlled and set up using the
inVENTer Mobile App.
The App can be downloaded for free in
Google Play Store (Android) or in the
App Store (iOS).
Technical Requirements:
• Mobile devices with Android or iOS operating system
• Bluetooth LE
The following additional settings and functions can be
changed via the inVENTer Mobile App:
• Air ow volume adjustment
• Humidity sensor sensitivity
• Light sensor sensitivity
• Run-on function
• Switch-on delay
• Boost function
• Intelligent pause function
• Interval operation
• Continuous ventilation settings
• Temperature settings when used as overow fan
1 Rubber seal
2 Fan housing
3 Fan
4 Fan unit
1
2
3
4