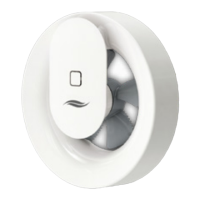
The inVENTer Pulsar is an innovative extractor fan designed for contemporary ventilation needs, primarily aimed at improving basic ventilation and reducing humidity and odors in wet rooms such as WCs, bathrooms, shower rooms, and laundry rooms. It can also function as an overflow fan for ventilating and heating adjacent rooms.
Function Description:
The Pulsar operates as an extractor fan, moving air out of a room. It is programmed with factory settings for automatic control based on light exposure and humidity monitoring.
- Automatic Control by Light Exposure: The fan activates with an airflow rate of approximately 60 m³/h for 15 minutes when lighting conditions change, lights are switched on, shadows shift, or a person enters the room. After this period, it switches off.
- Automatic Humidity Monitoring: If the air humidity rises sharply (e.g., during a shower), the airflow rate increases to a maximum of 95 m³/h. Once humidity is reduced, the fan switches off.
- Overflow Fan Functionality: When used as an overflow fan, the Pulsar activates when a selected temperature limit is exceeded and switches off when the room temperature falls below that limit. In this mode, light and humidity sensors are inactive.
The fan's control and setup are primarily managed through the inVENTer Mobile App, available on Google Play Store (Android) and App Store (iOS). The app requires a mobile device with Android or iOS operating system and Bluetooth LE connectivity. Direct pairing via Bluetooth LE is not recommended as it can lead to installation errors.
App-Controlled Functions and Settings:
The inVENTer Mobile App extends the Pulsar's functionality, allowing users to customize various settings:
- Air Flow Volume Adjustment: Control the fan output in percent, revolutions per minute, or liters per second.
- Humidity Sensor Sensitivity: Adjust sensitivity across three stages: Low, Medium, High, and set limit values.
- Light Sensor Sensitivity: Adjust sensitivity across three stages: Low, Medium, High, and set limit values.
- Run-on Function: Set the fan to continue running for a specified period (5 to 60 minutes) after being switched off.
- Switch-on Delay: Configure a delay between 5 and 10 minutes before the fan activates.
- Boost Function: Temporarily increase fan power for rapid ventilation.
- Intelligent Pause Function: Allows for a daily, freely selected period where the Pulsar runs either OFF (if continuous ventilation is not set) or at minimum power (if continuous ventilation is active).
- Interval Operation: If activated, the Pulsar runs once every 12 hours for 30, 60, or 90 minutes at maximum speed. Sensors have priority, so if activated by sensors, the interval shifts accordingly.
- Continuous Ventilation Settings: Configure the fan for continuous operation.
- Temperature Settings (Overflow Fan): Set temperature limits in the range of 15 to 35 °C for overflow fan usage.
Electrical Connection Options:
The Pulsar can be connected directly to a 230 V AC mains supply or operated with a safe extra-low voltage (SELV) 12 V DC. An optional power supply unit (PSU) is available for DC 12 V operation.
- AC 230 V Connection:
- Sensor-controlled, with continuous ventilation: Requires app setting, provides 30 m³/h continuous ventilation, with increased power when humidity or light sensors are activated.
- Sensor-controlled, without continuous ventilation: Factory setting for on-demand ventilation, switches on/off automatically based on humidity or light sensor activation.
- Use as an overflow fan: App-selected, temperature-based operation, light and humidity sensors inactive.
- Switch-controlled, without run-on function: App-selected, controlled by an external switch, sensors disabled, fan switches off immediately when the external switch is turned off.
- Switch-controlled, with run-on function: App-selected, controlled by an external switch, sensors disabled, fan continues to run for a set run-on time after the external switch is turned off.
- DC 12 V Connection:
- Sensor-controlled, with continuous ventilation: Requires app setting, provides 30 m³/h continuous ventilation, with increased power when humidity or light changes influence it.
- Sensor-controlled, without continuous ventilation: Factory setting for required ventilation, switches on/off automatically with changes in humidity or light.
- Use as an overflow fan: App-selected, temperature-based operation, light and humidity sensors inactive.
- Switch-controlled, without run-on function: App-selected, controlled by an external switch, sensors deactivated.
Important Electrical Safety Notes:
- Never connect 230 V AC and 12 V DC simultaneously to the Pulsar, as this will damage the device.
- Do not lay the AC 230 V mains cable over the circuit board cover, as this can damage the board and impair function.
- Installation must be carried out by qualified personnel, observing VDE 0100 regulations, especially in damp rooms. The Pulsar must be installed outside protection area 0, or in protection zone 1 where direct contact with splash water or direct jets of water is not possible. Light switches/buttons must be outside protection areas 0 to 2.
Important Technical Specifications:
- Dimensions (Pulsar extractor fan): Depth 81 mm, Diameter 177 mm.
- Wall Mounting Sleeve (aV100): Wall thickness 115 mm.
- Wall Sleeve DN 100: Wall thickness 100 mm.
- Flush-mounted box PSU: Depth 66 mm, Diameter 68 mm.
- Cavity wall box PSU: Depth 61 mm, Diameter 68 mm.
- PSU (DC 12 V): Depth 32 mm, Diameter 54 mm.
- Input Voltage: AC 230 V or DC 12 V.
- Extract Air Flow (free-blowing): 110 m³/h.
- Power Consumption: 4 W.
- Sound Emission (evaluated): 17-20 dB(A).
- Ambient Temperature: 5-50 °C.
- Supply Air: Without aggressive gases, dusts, and oils.
- Protection Class: II.
- Protection Type: IP44.
- Flush-mounted power supply unit NT16:
- Input Voltage: 230 V AC, 50 Hz.
- Output Voltage: 12 V DC.
- Power Consumption: 12 W.
- Operating Temperature: 5-50 °C.
- Dimensions: 54 x 32 mm.
- Protection Class: II.
- Protection Type: IP20.
- Bluetooth LE: -12dBm EIRP (63μW), nominal 2450 MHz.
Usage Features:
- Installation: Can be installed in ceilings, exterior walls, or interior walls (as an overflow fan). Requires a wall sleeve with a diameter of 100-140 mm.
- Positioning: Should be installed in the room's airflow for optimum moisture removal and reliable humidity sensor readings. Avoid placing it over heating units, room thermostats, or delicate furniture. Ensure sufficient air supply (e.g., a gap under the door).
- LED Display:
- Blue or White LED: Indicates an active Bluetooth connection to a mobile terminal. Lights up when operating or configuring the fan.
- Red LED: Indicates a fault (power supply failure when intelligent pause function is set up). Resetting is possible by synchronizing the app.
- Multi-device Operation: One Pulsar can be set up on multiple mobile devices, but only one device can operate it at a time. The first device to establish a connection takes control.
- PIN Code: A PIN code/serial number is required to activate the inVENTer Mobile app, found on the back of the documentation or on the right foot of the fan unit.
Maintenance Features:
The Pulsar is designed to be almost maintenance-free, with cleaning and maintenance tasks performable by the user after a brief introduction.
- Cleaning Agents: Use commercial liquid soap in warm water. Avoid cleaning agents containing sand, soda, acid, or chlorine, as the plastic surface is sensitive to scratches.
- Cleaning Procedure:
- Disconnect Power Supply: For AC 230 V, switch off the fan at the integrated switch (position 0). For DC 12 V, interrupt power at the mains fuse or external switch.
- Remove Fan Unit: Reach behind the fan unit with both hands and pull it forward off the fan housing. Hold it firmly to prevent it from falling.
- Clean Components: Clean the wall sleeve, fan housing, and fan unit with a damp cloth. The fan unit itself should not be sprayed or immersed in water and should not be dismantled for cleaning.
- Reinsert Fan Unit: Carefully insert the fan unit into the guides on the fan housing. Do not tilt to avoid damaging contacts. An audible click confirms correct insertion.
- Recommended Cleaning Intervals:
- Monthly: Clean the surface of the fan housing with a damp cloth.
- Semiannual: Clean the fan unit.
- Condensation Prevention: The wall sleeve should be inserted with a slope of 1-2° towards the exterior wall to prevent condensation water accumulation. If using a DN100 wall sleeve, it should protrude 5 mm into the room, and an appropriate non-return valve must be provided by the customer.
Warranty and Guarantee:
inVENTer GmbH provides a five-year warranty on the Pulsar extractor fan, covering premature product wear. Warranty claims are handled by the distributor or factory representative. Failure to observe intended use invalidates warranty claims.