14
WARNING: To avoid gear slippage, DO NOT rock the counterweight shaft rigorously and
make sure the Tension Adjuster is set properly. Worm system damage due to user operation
error will not be covered by warranty.
WARNING: The new Gear Switch will allow you to have most precise weight balance. This
also means the mount or OTA will swing FREELY when the Gear Switch is disengaged.
Always hold the OTA or mount when release Gear Switch or adjust gear tension.
NOTE: The mount is shipped with latitude setting at high range (35º ~ 60º). If your site latitude is lower than
35º, please switch the latitude range before using it.
STEP 1. Remove the mount from the package:
The mount is shipped with R.A. gear disengaged to protect the worm/gear system. Carefully remove
the mount from the shipping box and familiarize yourself with the components shown in Figure 1. Turn the
Gear Switch 90° to lock the R.A. gear system. Make sure DEC is locked as well.
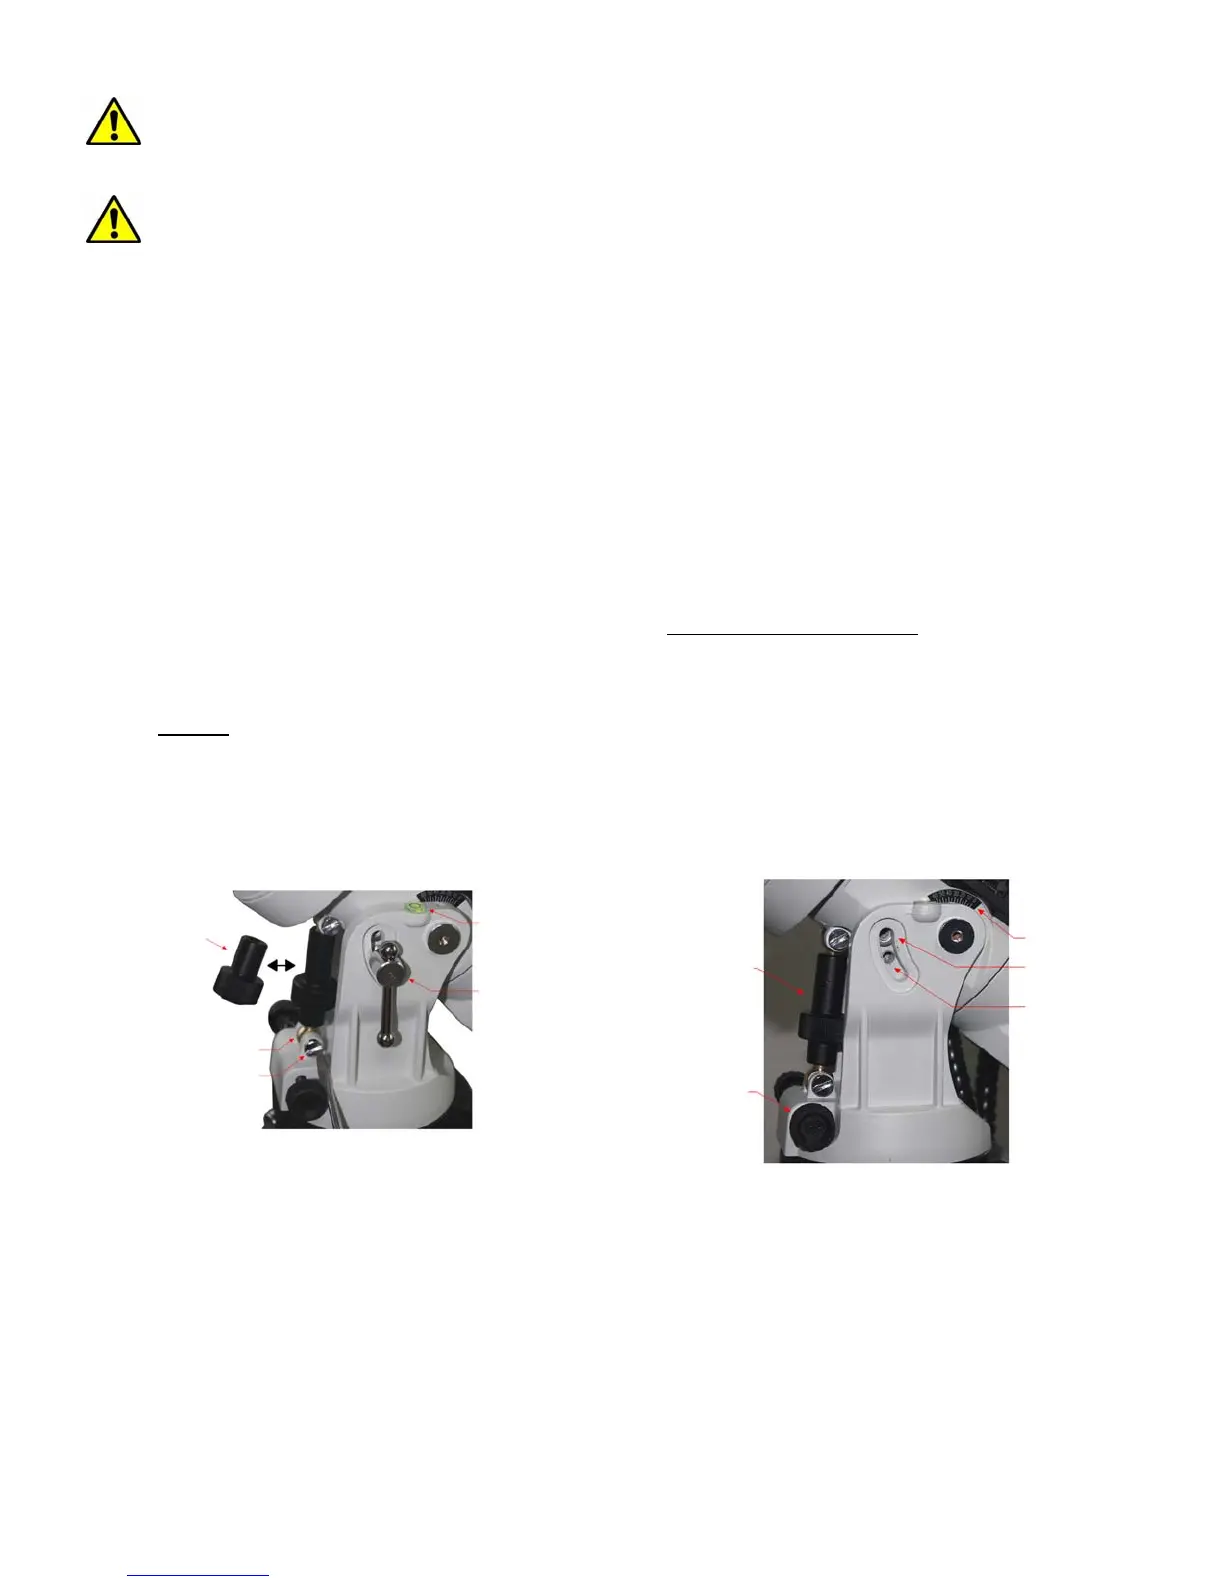
STEP 2. Select Mount Latitude Range
The mount is by default shipped with the Long Latitude Adjustment Knob installed (for 35-60º). At
lower latitudes of 0-35º, the Short Latitude Adj. Knob needs to be used. To change this knob:
(1) Remove the Latitude Locking T-bolts on both sides (do not lose the 4 washers
).
(2) Unscrew bottom post Locking Screw to free the Brass Bottom Latitude Adj. Post and remove the
Latitude Adj. Knob (Figure 8a).
(3) Evenly
thread in the Short Latitude Adj. Knob to the brass Top and Bottom Latitude Adjustment
Posts.
(4) Reinstall and tighten bottom Locking Screw.
(5) Lastly, with all 4 washers properly placed, insert and tighten Latitude Locking T-bolts into the upper
threaded holes (Figure 8b).
Short Lat. Adj. Knob
Locking Screw
Bottom Lat. Adj. Post
Level Bubble
Lat. Locking T-bolt
(a)
Long Lat. Adj. Knob
Azi. Adj. Knob
Latitude Indicator
For Low Latitude
For High Latitude
(b)
Figure 8. Switching latitude adjustment knob
STEP 3. Tripod Setup
Expand the tripod legs. Adjust the tripod height by unlocking and re-locking the Tripod Leg Locks to
desired height. Position the tripod so that the Alignment Peg faces north, if you are located at northern
hemisphere. If you are located in southern half, face the Alignment Peg south. Thread the tripod center rod
into the tripod head and install the Accessory Tray and tread the Tray Locking Knob onto it. Do not fully
tighten the Tray Locking Knob.