21
(4) Look through the polar scope to find the Polaris. Using Azimuth Adjustment Knob and Latitude
Adjustment Knob to adjust the mount in altitude and azimuth directions and put the Polaris in the
same position on the Polar Scope Dial as indicated on the HC LCD. In this case, the Polaris will be
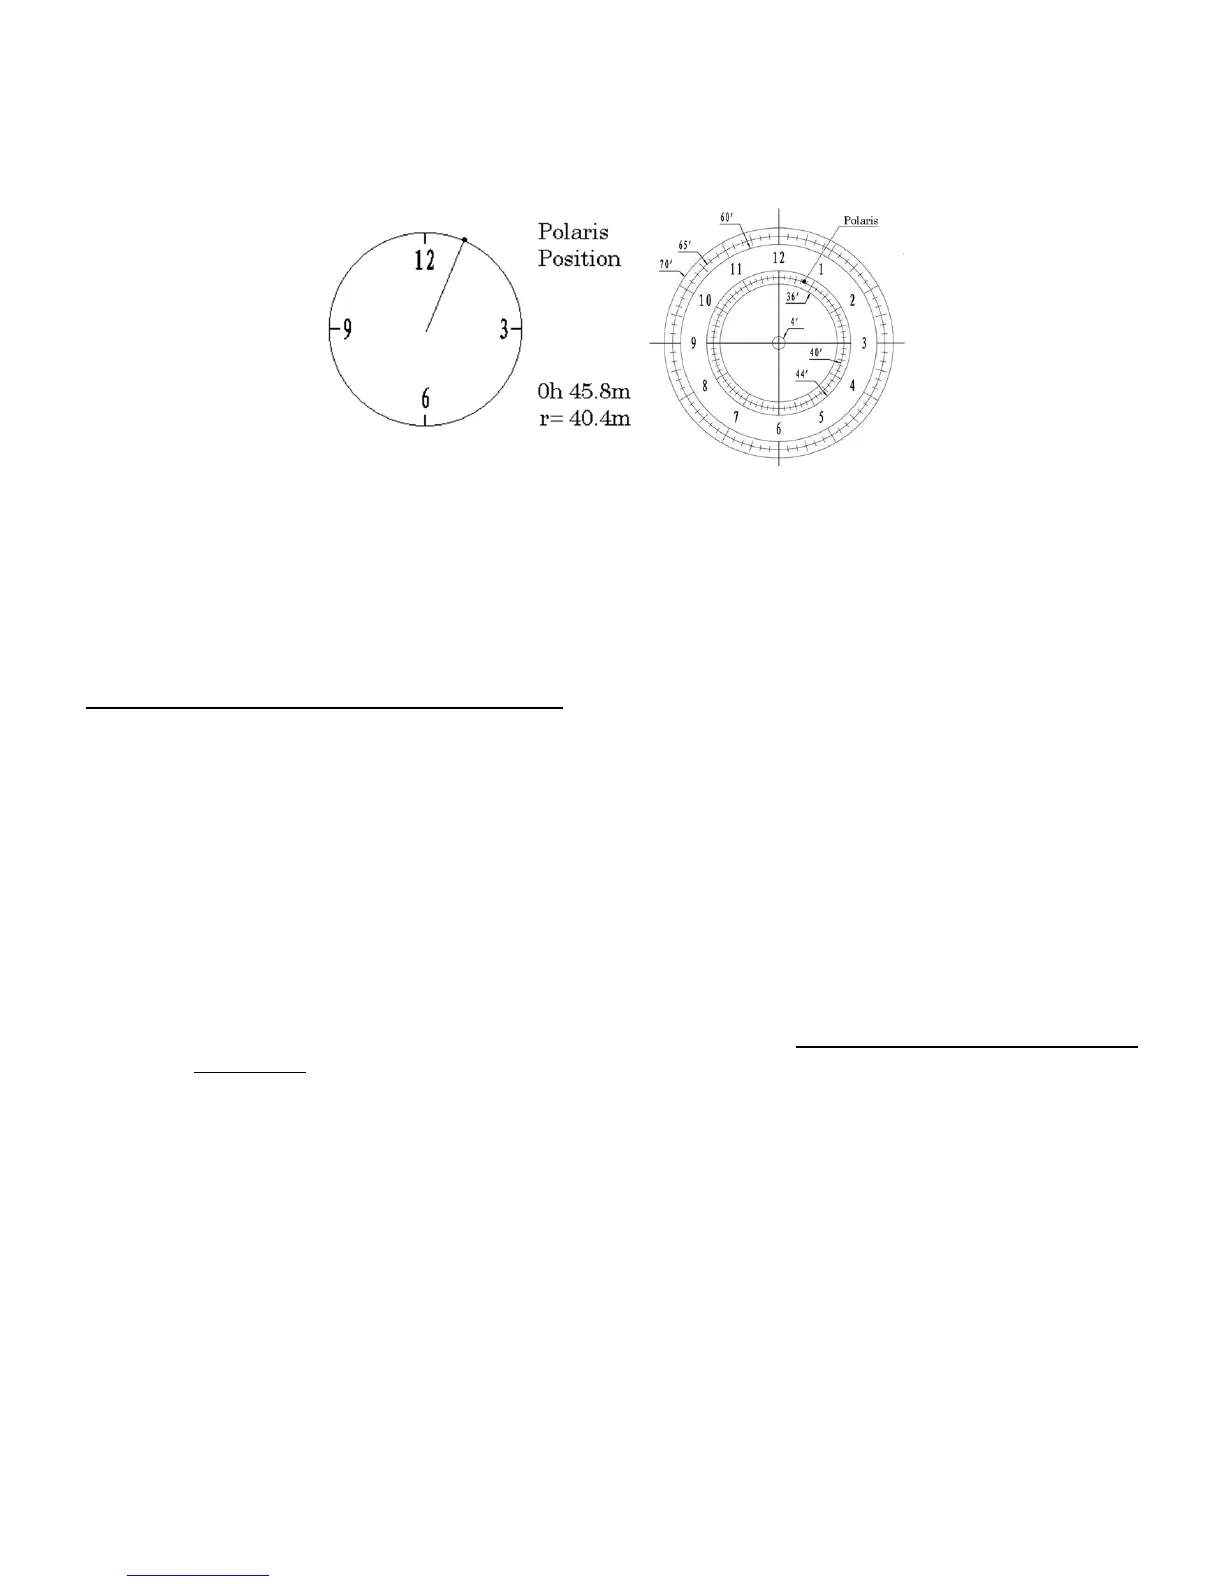
located at a radius of 40.4’ and an angle of 0 hour 45.8 minute, as shown in Figure 20b.
(a) (b)
Figure 20. Polaris Position shown on HC (a) and where to put on polar scope dial (b)
NOTE: If you are located in southern hemisphere, Sigma Octantis will be chosen for Polar
Alignment. For example, on May 20, 2010, 20:00:00 in Sydney, Australia (Lat S33º51’36” and Long
E151º12’40”), 600 min ahead of UT, the Sigma Octantis Position is 1hr21.8m and 64.4m.
BrightStar Polar Alignment/Polar Iterate Align
BrightStar Polar Alignment allows you to polar align the mount even if you cannot view the
Celestial Pole.
(1) Level the CEM25 mount and set it at Zero Position. Make sure the telescope is parallel to the
pole axis (R.A. axis) of the mount. If a finder scope is used, adjust it to be parallel to the
telescope optical axis. Turn the mount power on. Set correct R.A. and DEC backlash numbers.
An eyepiece with cross hairs is needed.
(2) Pressing MENU=>“Alignment”=>“Polar Iterate Align”. The HC will display the azimuth and
altitude position of several bright stars near meridian. Select one that is visible with high altitude
as Alignment Star A. Follow the HC instruction to move the Star A to the center of the eyepiece
with the combination of Latitude Adjustment Knob and “◄” or “►” button. Press ENTER to
confirm. Next, select a bright star that is close to the horizon as the Alignment Star B. Center it
using the Azimuth Adjustment Knob and “◄” or “►” button (The “▲” and “▼” buttons are not
used here). Press ENTER to confirm.
(3) The telescope will now slew back to Star A to repeat above steps. The iteration can be stopped
when it is determined that the alignment error is at the minimum. Press BACK button to exit
alignment procedure.
NOTE: The movement of the alignment star in your eyepiece may not be perpendicular but crossed,
depends on its location in the sky.
STEP 11. Return Mount to Zero Position
After polar alignment and balancing OTA, return the mount to Zero Position, as shown in Figure 21.
The Zero Position is the position with the CW shaft pointing toward the ground, OTA at the highest position
with its axis parallel to the polar axis and the OTA pointing to the Celestial Pole.
You need to set the Zero Position when the mount is used first time, or firmware upgrade is
performed. To set the mount to Zero Position, press MENU=>”Zero Position”=>”Set Zero Position”.