20
Polar Axis Cover
Polar Scope Cover
Polar Axis (R.A. axis)
Azi. Adj. Knob
Lat. Adj. Knob
Lat. Locking T-bolt
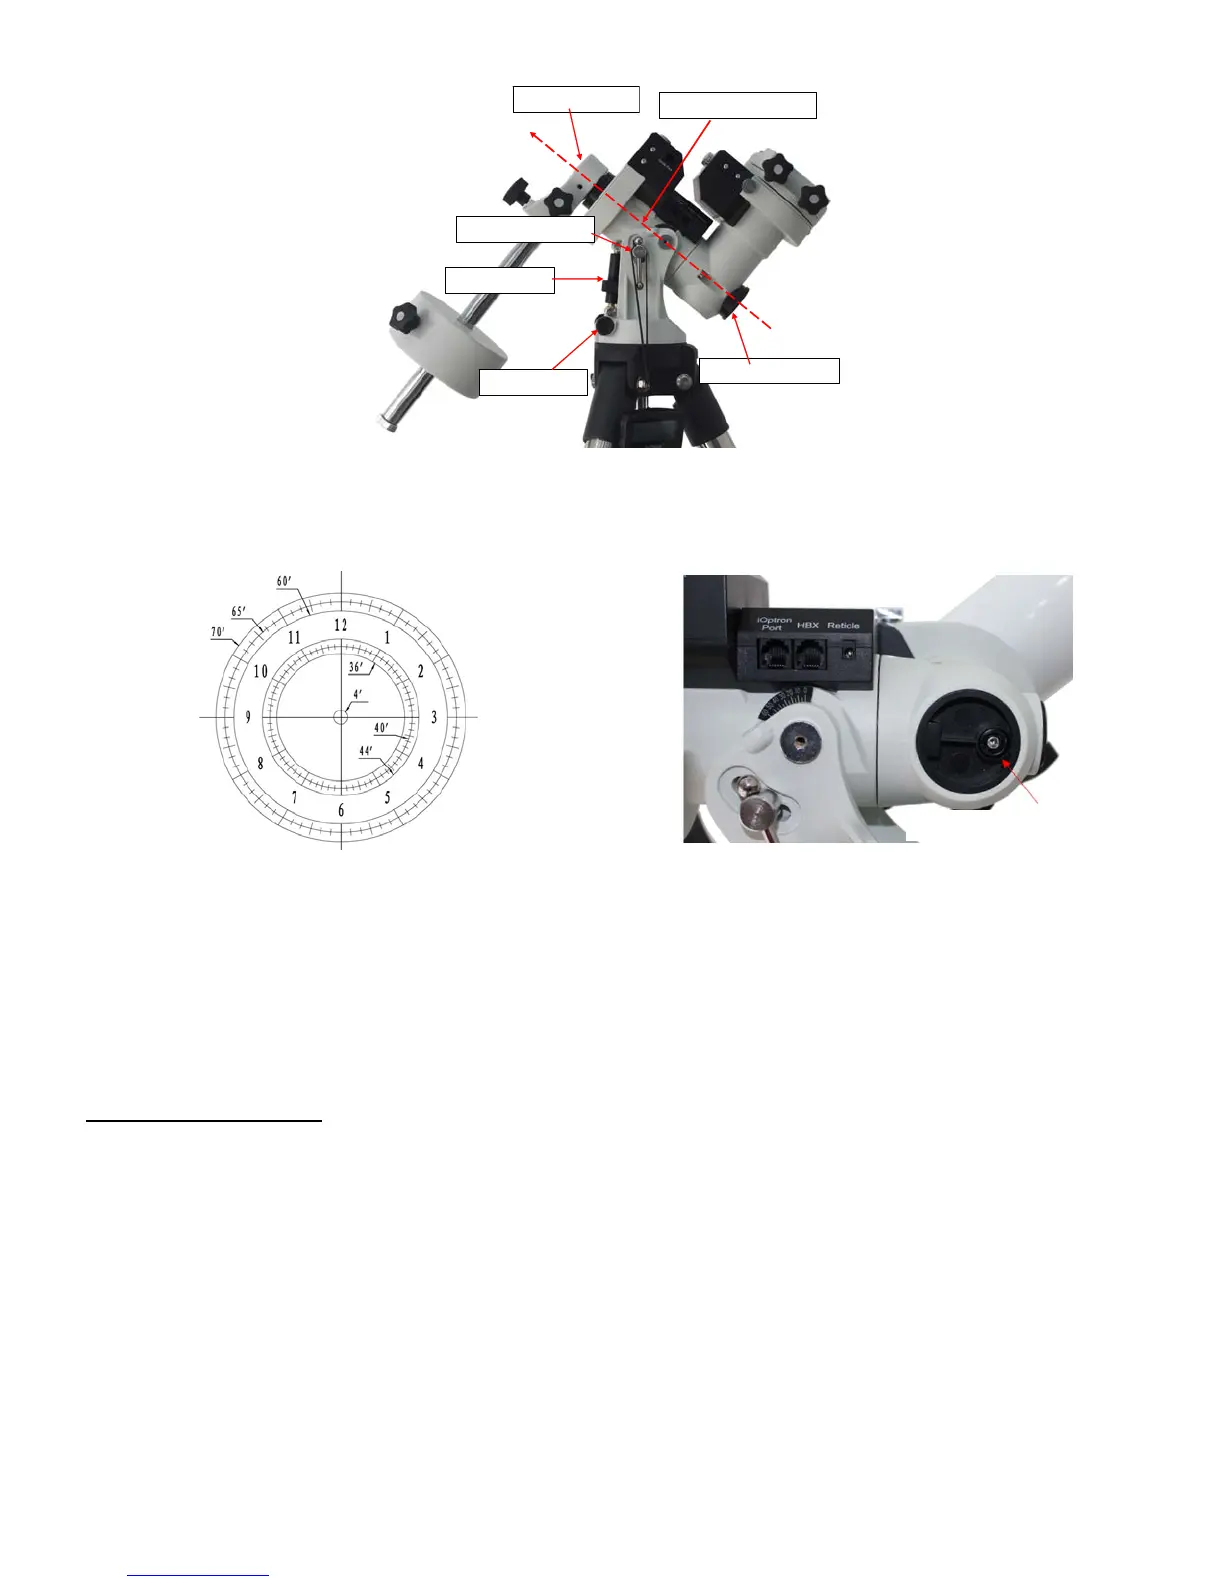
Figure 17. Polar alignment
The CEM25 mount equipped with an iOptron’s AccuAlign
TM
polar scope. You can do a fast and
accurate polar axis alignment with iOptron’s Quick Polar Alignment procedure.
Figure 18. Polar Scope
Polar Scope LED
Figure 19. Polar Scope LED
As indicated in Figure 18, the Polar Scope reticle has been divided into 12 hours along the angular
direction with 10 minute tics. There are 6 concentric circles in 2 groups of 3 marked from 36’ to 44’ and 60’
to 70’, respectively. The 36’ to 44’ concentric circles are used for polar alignment in the Northern
Hemisphere using Polaris, while the 60’ to 70’ circles are used for polar alignment in Southern Hemisphere
using Sigma Octantis.
Quick Polar Alignment
(1) Level the CEM25 mount. Make sure the telescope is parallel to the pole axis (R.A. axis) of the
mount. If a finder scope is used, adjust it to be parallel to the telescope optical axis. You may
check the parallelness during daytime with a distance object.
(2) Take off the Polar Axis Cover and Polar Scope Cover. Connect polar scope LED cable between
Reticle plug located on the main unit and the LED socket at the bottom of the DEC axle, as shown
in Figure 19. Turn on the mount power by pressing the On/Off switch on the main unit. The light
intensity can be adjusted using the HC via MENU=>”Settings”=>“Set Eyepiece Light” function
under “Set Up Controller” menu.
(3) Make sure that the time and site information of the hand controller is correct. Press the MENU
=>“Alignment”=>“Pole Star Position” to display the current Polaris position. For example, on
June 22, 2014, 20:19:42 in Boston, US (alt N42º30’32” and long W71º08’50”), UTC -300 minutes,
DST:Y, the Polaris Position is 0h45.8m and 40.4m,.as shown in Figure 20a.