4-10 Configuring Ethernet Models 640e & 650e 947291 640 & 650 Series
STEP 6 - Configure Device Network Settings using DaqIPConfig
Applies only to a LAN (Local Area Network), which has a no DHCP server.
Never set the TCP/IP for the device to be the same as the host computer’s IP address!
Each computer and each device on a dedicated network must have a unique IP address!
If using a LAN (Local Area Network), which has a DHCP server, skip this section and continue
with STEP 7 - Configure and Test the System using the Daq Configuration Applet (page 4-11).
Multiple devices on a LAN are each identified by their unique (device-specific) serial number.
Ensure that the serial number displayed for the unit [being configured] agrees with the serial
number on the MAC label, located on the rear panel of the device.
The DaqIPConfig applet is designed for 32-bit Windows/2000/XP/Vista systems. You can use DaqIPConfig to
change the IP address of the device to be compatible with networks that require fixed IP addresses. As a
precaution, you should always consult with your IT administrator before using the applet to ensure that each
device and host computer connected to the network maintains a unique IP address. The applet is located in the
program group for the associated device and can be accessed from the Windows Desktop via the start menu.
Reference Note:
Appendix A contains general information regarding how to use the Daq Configuration Applet.
1. Locate the DaqIPConfig Applet.
Locate the DaqIPConfig applet by navigating from the
Windows’ Desktop as follows:
Start Menu
Programs
IOtech Application Software; for example:
IOtech eZ-Analyst Software, IOtech eZ-TOMAS Software, etc.
DaqIPConfig
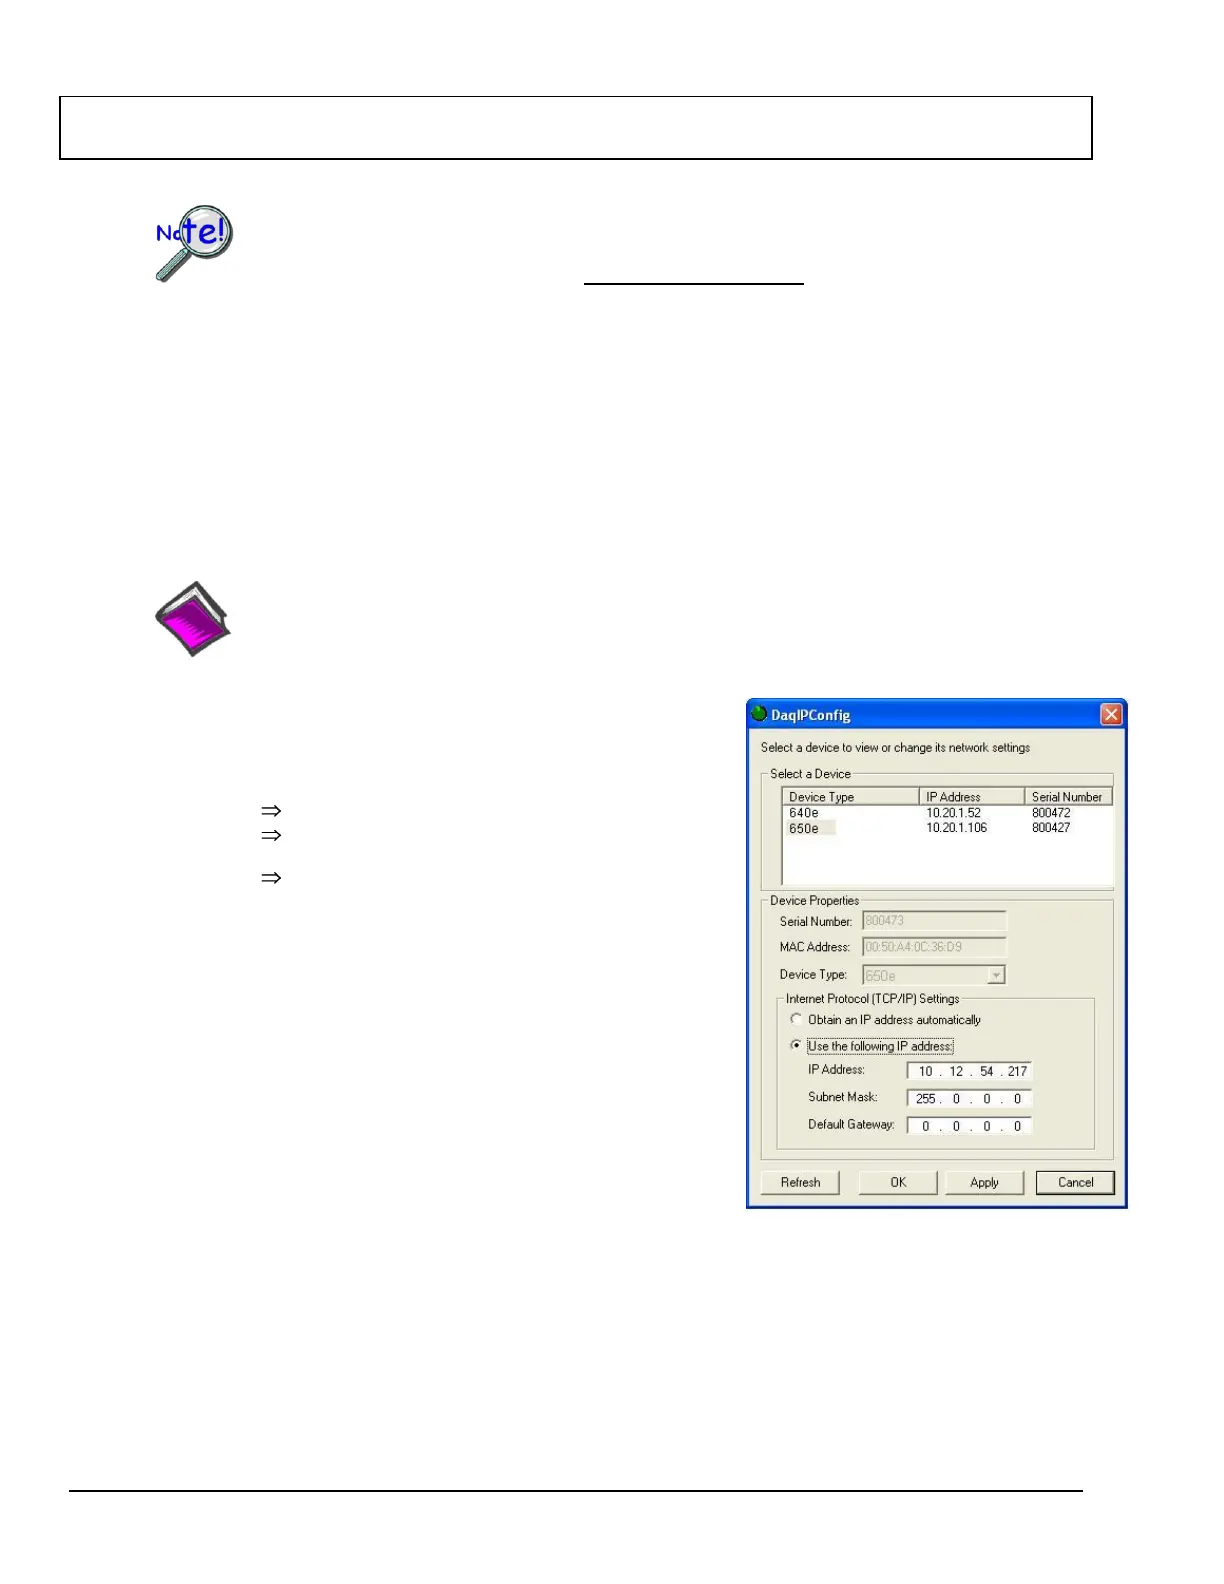
2. Open the DaqIPConfig Applet.
Click on the DaqIPConfig selection to open the applet.
3. Select the Device Type that is to have the address
change.
Note: In the figure to the right 650e is selected.
4. Set the internet protocol (TCP/IP) settings to be
compatible with host computer.
(a) Select the radio button labeled “Use the following IP
address.”
(b) Enter the new internet protocol settings. If needed,
consult your network administrator for acceptable
numbers.
Do not set the TCP/IP to the computer’s IP address!
(c) Click the <OK> button.
5. Reboot the device.
The new IP address will not take affect until the device has been powered-off, then powered back on.
6. Repeat steps 3, 4, and 5 for other devices in the system.
After configuring the network settings for all devices, proceed to Step 7.