99
Step 1: Configure VLAN Interface
1. Log in to the web UI of the AC and go to Network Setting > Network Setting > Interface Settings.
2. Click Add.
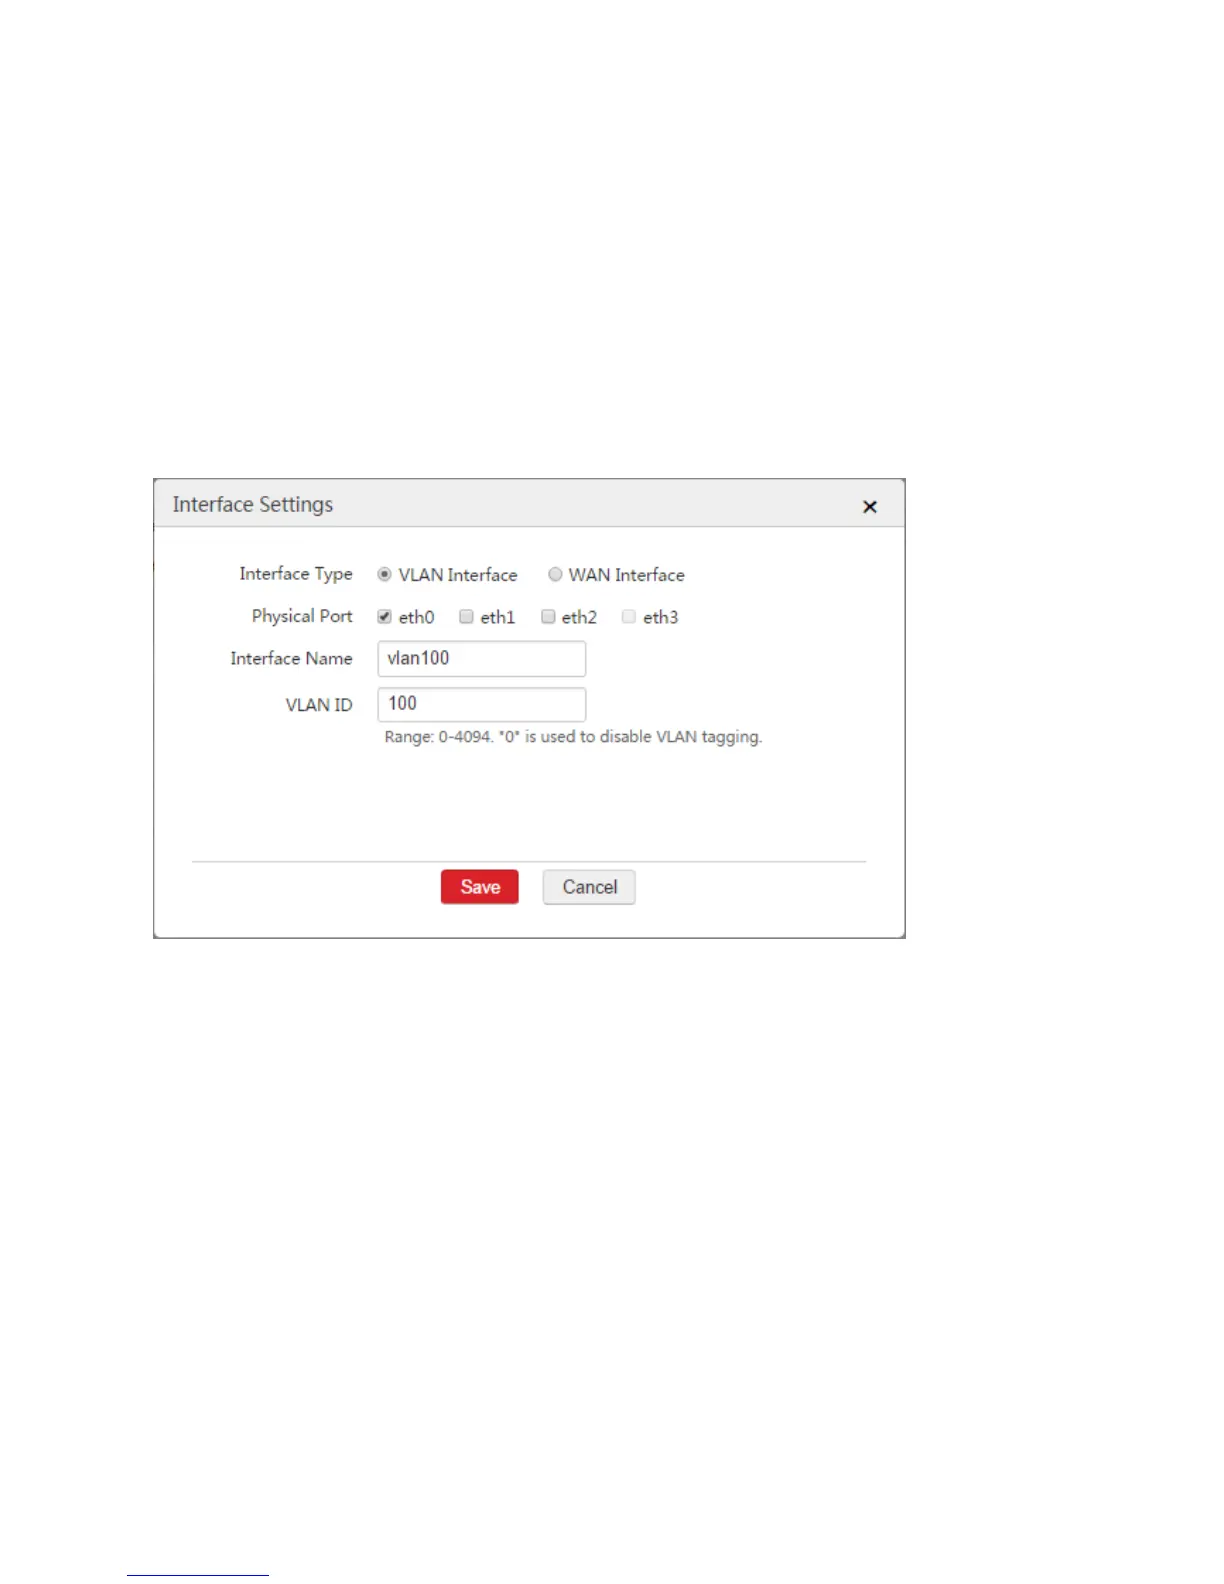
3. Configure the parameters in the window.
Interface Type: Select "VLAN Interface".
Physical Port: Select the port connected to the switch, which is "eth0".
Interface Name: Set a name for the VLAN interface, such as "vlan100".
VLAN ID: Enter the VLAN ID of the LAN network of Router1 , which is "100" in this example.
4. Click Save.
Step 2: Configure Interface and DHCP Server
1. Log in to the web UI of the AC and go to Network Setting > Network Setting > Interface and
DHCP Server.
2. Click Add.
3. Configure the parameters in the window.
VLAN Interface: In this example, select "vlan100".
IP Address: Set an IP address for the VLAN interface, such as "192.168.100.1".
Subnet Mask: You can keep the default value.
DHCP Server: Select "Enable".
Assign IP to: Select "User".
Remark: Set a name for the DHCP server, such as "user".
Gateway: Enter the IP address of the VLAN interface, which is "192.168.100.1".