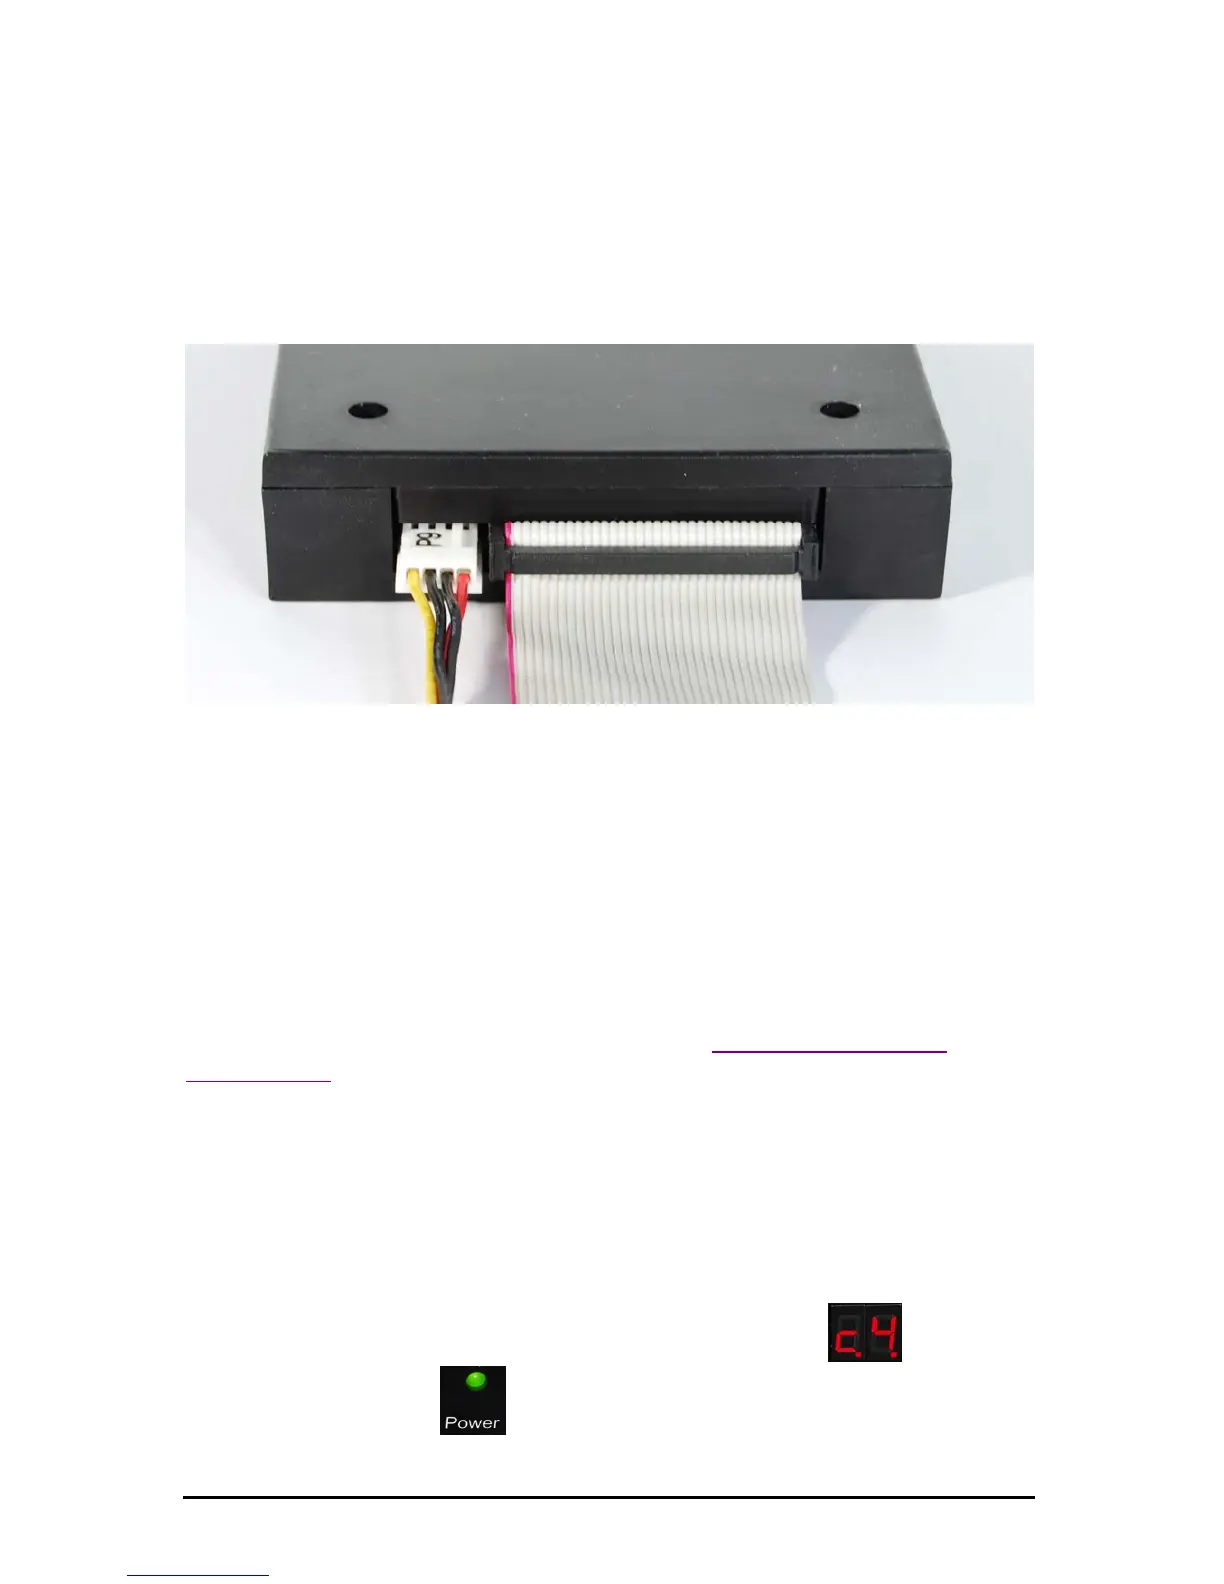
On modern flatcables the 34-pin plugs have a gib at the bottom.
When connecting, the gib has to settle into the corresponding
sliding notch at the drive housing below the header.
Also make sure the correct pin sequence is observed (Wire 1 on Pin
1, etc.). Wire 1 is usually indicated by color at the floppy cable
(often red or blue).
Illustration of a connected disk drive
Caution: If the connection cable is attached incorrectly the drive
disk will not function properly and may also be damaged thereby.
6. Installation
Connect the disk drive as described under Back – description,
connections.
7. One USB Stick replaces one floppy
You have just installed the disk drive and switched on your
machine/system.
The display of the USB Floppy Disk Emulator shows
(c4), the
power LED lights up
(green).
Subject to change without prior notice Date: 09-03-10
ipcas GmbH USB Floppy Disk Emulator – USB Floppy v0.2 Page 7 of 17