10
SETTING THE CURRENT TIME AND DATE
Before you can program the controller for automatic watering, you must set the controller
clock to the current time and date. This controller features a 365-day calendar with
automatic leap year compensation. Once the date is set, the controller keeps track of
the date and enables trouble-free, odd-even day of the month watering required in some
locations. The time and date apply to all programs. To set the time and date, follow the
steps below.
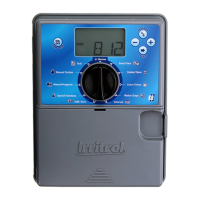
1. Turn the Function Dial to the Current Time & Date position.
The Hour digits and AM/PM will fl ash.
2. Press the + button to increase or – button to decrease the hour digit.
NOTE: Continuous pressure on the + or – buttons, causes the display to change
rapidly.
3. Press the
NEXT button to select the minutes digits.
Use the + and/or – buttons to set the current minute.
4. Press the NEXT button to select the year digits.
Use the
+ and/or – buttons to set the current year.
5. Press the
NEXT button to select the month.
Use the + and/or – buttons to set the current month.
6. Press the NEXT button to select the day digit(s).
Use the + and/or – buttons to set the current calendar day.
7. Return the Function Dial to the RUN position when the current time
and date have been set.
ERASING ANY PRIOR PROGRAMS
This process enables you to easily clear the controller memory of all user-defi ned watering
program information within an individual program. This is an optional procedure and can
be skipped if you wish to retain previous program operating information or the controller
has not yet been programmed.
Erasing a program resets the memory to factory conditions: No station time, program start
time or active water days. Season Adjust is set to 100% and Master Valve/Pump Start is set
to be “On.”
NOTE: This process is program independent and resets only the information for the
selected program.
To erase program information for a selected program:
1. Select Program A, B, C or D with the program switch.
2. Turn the function dial to the
Program Erase position.
The display will show “ERASE”.
3. Press and hold the
OFF button until “DONE” is displayed.
4. Repeat this procedure for each program you wish to erase.