14
REPLACEMENT EAR CUSHIONS
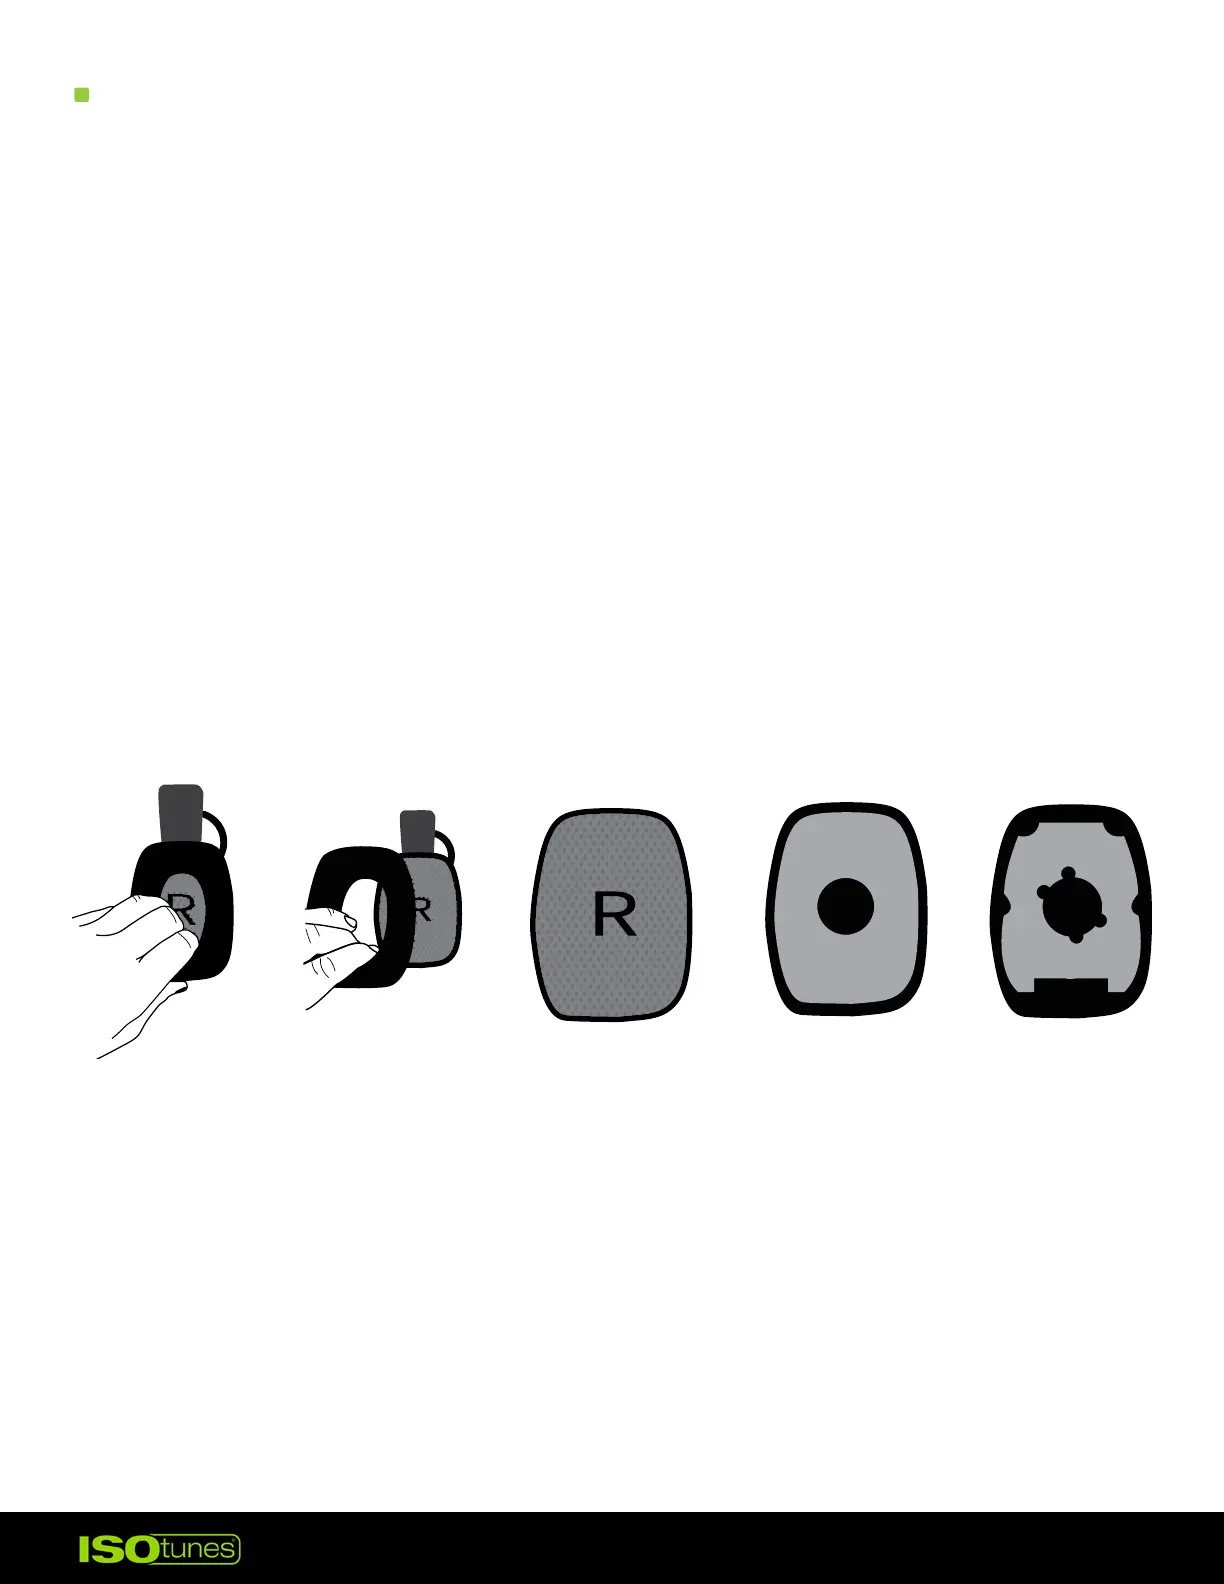
1. Firmly reach into one earcup and tug on the plastic plate behind the ear
cushion (Figure 1)�
2. Pull with force until the ear cushion is removed from the earcup. Do not
twist, shear, or cut o. The cushions are secured with a strong snap t
(Figure 2)�
3. Remove the R or L indicating fabric and 2 layers of foam (Figure 3-5).
4. Insert one new foam layer with notches. Align notches to the earcup.
5. Insert second new foam layer (Figure 4).
6. Insert the new R or L indicating fabric (Figure 3).
7. Place the new ear cushion on and listen for a snap sound. Check that
the cushion is secure on all sides.
8. Repeat with the other earcup
Figure 1 Figure 2 Figure 3 Figure 4 Figure 5