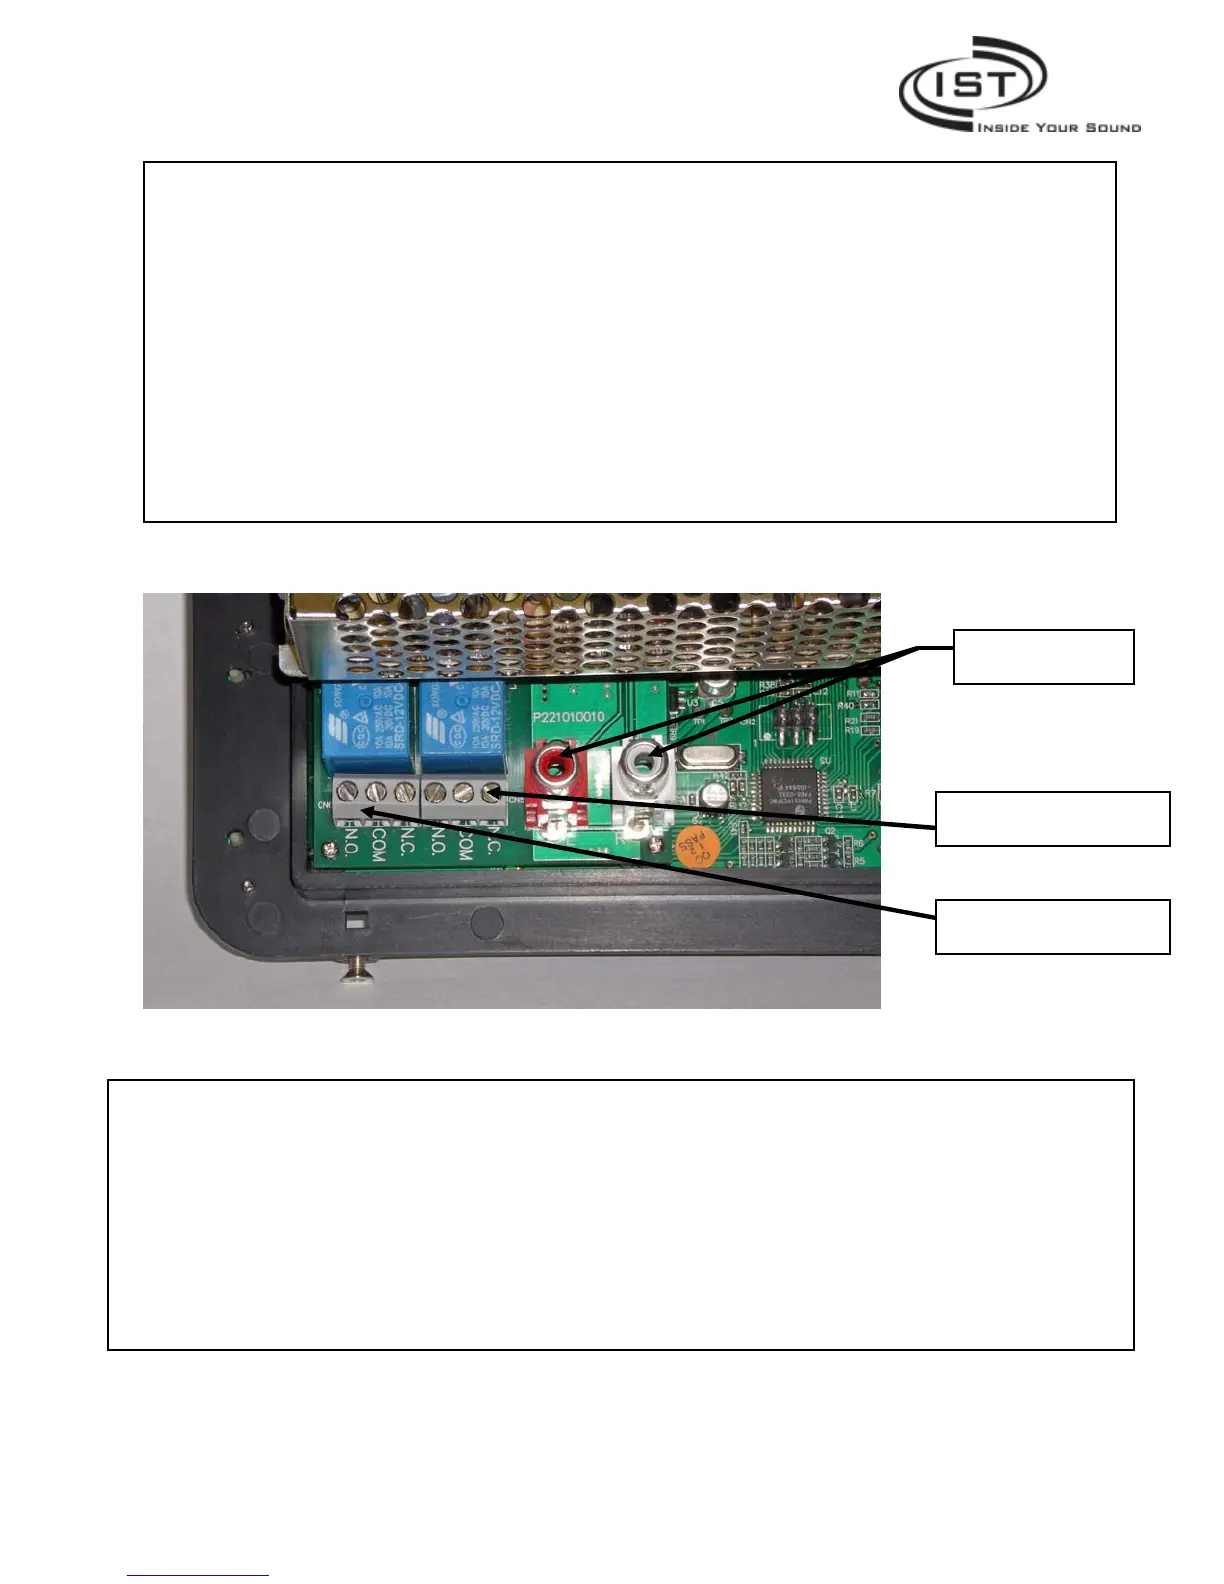
AUX Input
If you are installing the optional auxiliary input wall plate, you need to plug the wires
from the AUX wall plate into the two (red & white) phono jacks on the back of the
master printed circuit board.
Door Release Connection
If you are connecting to an electronic door release mechanism, connectors CN5 and CN6
provide both “Normally Open” and Normally Closed” contacts for this function. The most
common use is the normally open contacts that would close and allow power from the
bell transformer to activate the release mechanism. Make the appropriate connections at
CN5 for door 1 and CN6 for door 2.
Auxiliary input
acks
Connect door 1 to CN5
Connect door 2 to CN6
Installing the Master in the Wall Housing
Before installing the master, check that all wires are connected, there are no wires touching
or close to each other that could cause shorts, there are no strands loose that could cause
shorts and any unused existing wires are safely covered and moved out of the way.
Place the Intrasonic Technology master over the rough-in box and align the two mounting
holes over the holds in the rough-in housing. Insert one of the 2 inch mounting screws
provided and proceed to tighten for 2 to 5 turns. Once started insert the second mounting
screw and proceed to tighten. Tighten both mounting screws firmly but do not over tighten.
Intrasonic Technology, Inc. l 610 presidential Dr. Suite 104 l Richardson, Texas 75081 877-435-0670
Page 9 of 18
 Loading...