9
The configuration steps:
Step 1: Connect the terminal and the computer installed with the terminal configuration tool
program by the network wire, Plug in the power until the termianl power indicator is on.
Step 2: double-click to open the shortcut icon of “ terminal configuration tool”, select the network
card first, and left-click the “query” button in the window, to query the terminal’s original IP
address. Please pay attention to: local IP address of the computer should be set in the same
network segment as the terminal, because the default IP of terminal is : 192.168.168.166, so
the computer's local IP address should also be set to: 192.168.168.X, otherwise it maybe not
match the IP terminal address.
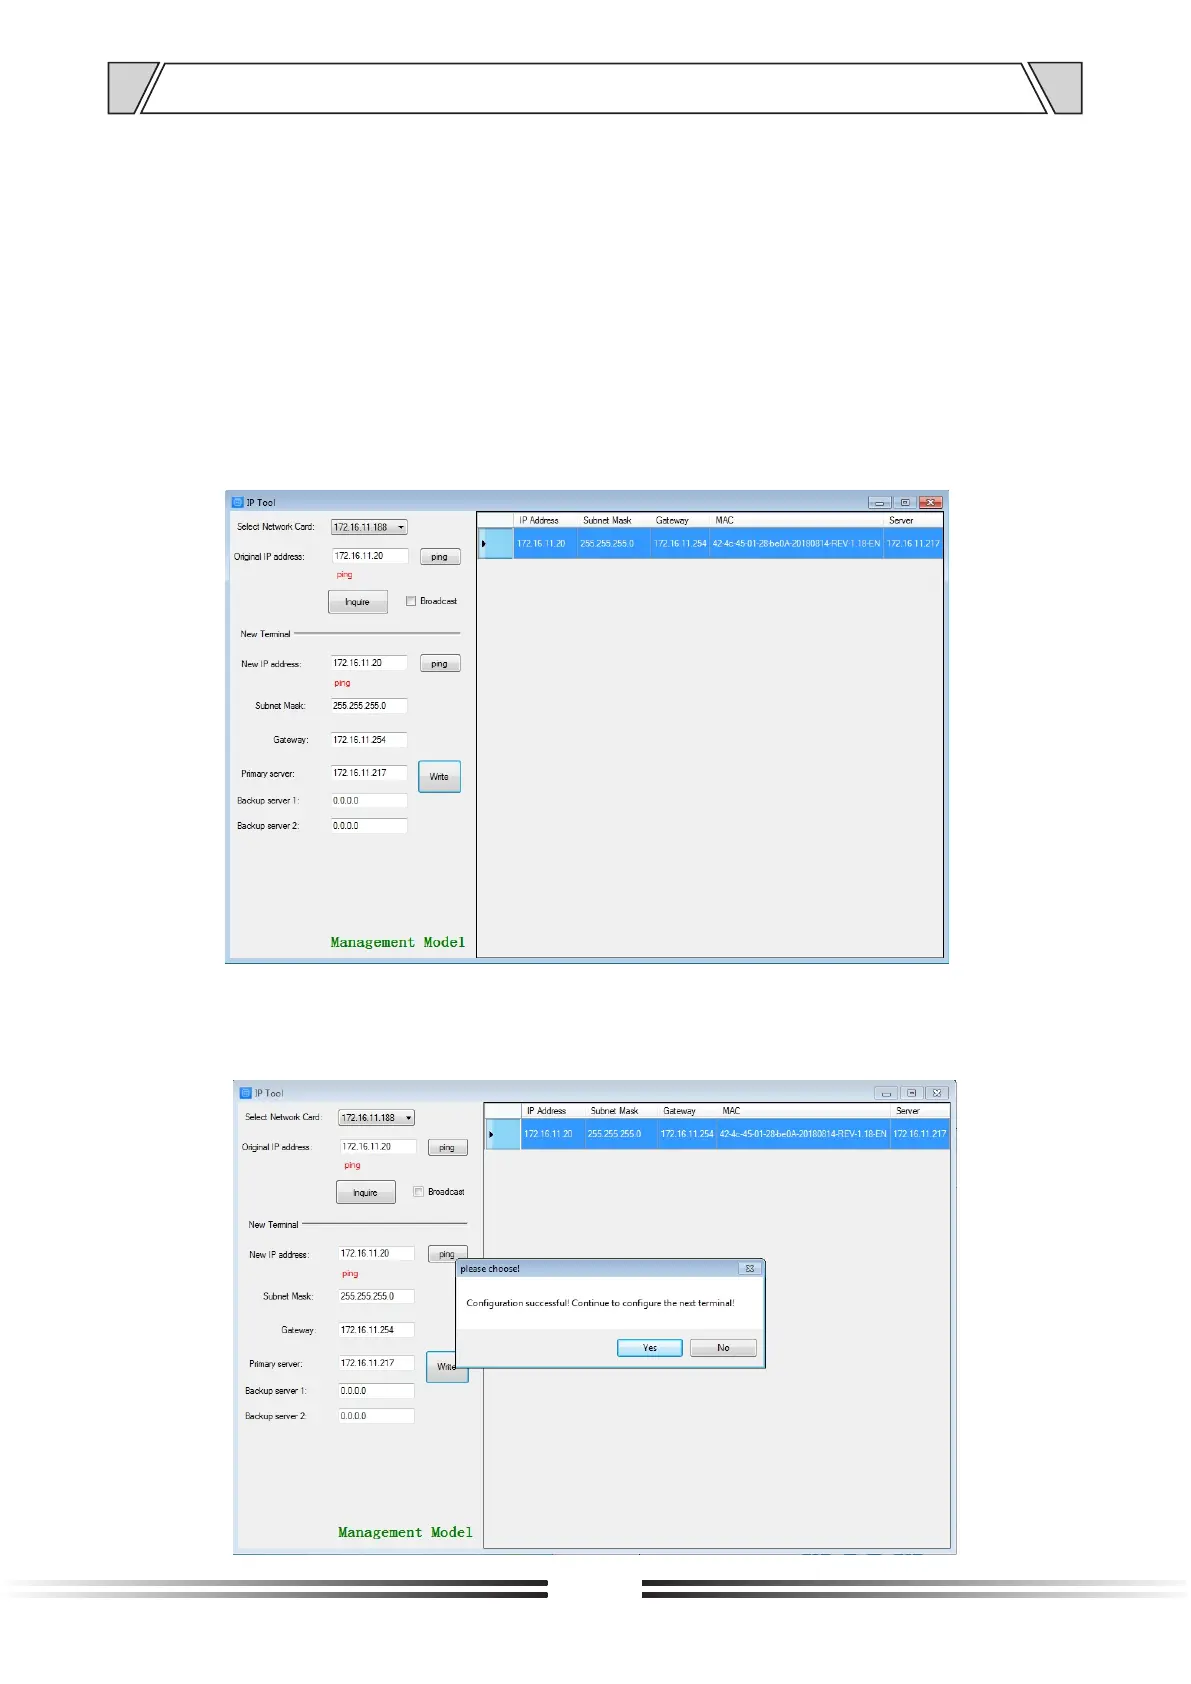
Step 3: In the window of “Terminal Configuration Tool” , fill in correct “IP address”, “Subnet
mask”, “Gateway IP” and “Server IP”, as below :
Step 4: left click on the “write” button, there will be a window prompt after the successful
configuration; after that, left click on the “query” button, the parameters of the terminal will be
re-read by the configuration program, if it display as the same as entered one, means that
the configuration was successful.
5. TERMINAL CONFIGURATION OPERATING INSTRUCTIONS