Quick Start
Copyright © ITECH Electronic Co., Ltd. 23
When any load is applied on the AC/DC electronic load and the input
voltage setting is more than the minimum value, the current and CF value
should be adjusted according to the present load operation; otherwise, under
voltage protection of the AC/DC electronic load will be enabled and no load can
be applied.
1. Connect the basic measurement circuit according to the connection method
specified in 1.4 Connecting Test Lines.
2. Set the output voltage and current at the power supply end.
3. Press [Set] to set the on-load current, resistance or power at present at the
load end.
NOTE
For details of the current, resistance or power settings in various operating modes, refer to
chapter 4 Load Functions.
4. Press [Enter] to confirm.
5. Press [On] to enable the load input. The current is absorbed at the
beginning of on-load operation.
Replace the Fuse
During normal use of the instrument, you need to replace a blown fuse where
necessary by following the procedures below. The fuse of IT8615/IT8615L and
IT8616/IT8617 side plate structure can be replaced by yourself, but the fuse of
other models needs to be replaced by professional.
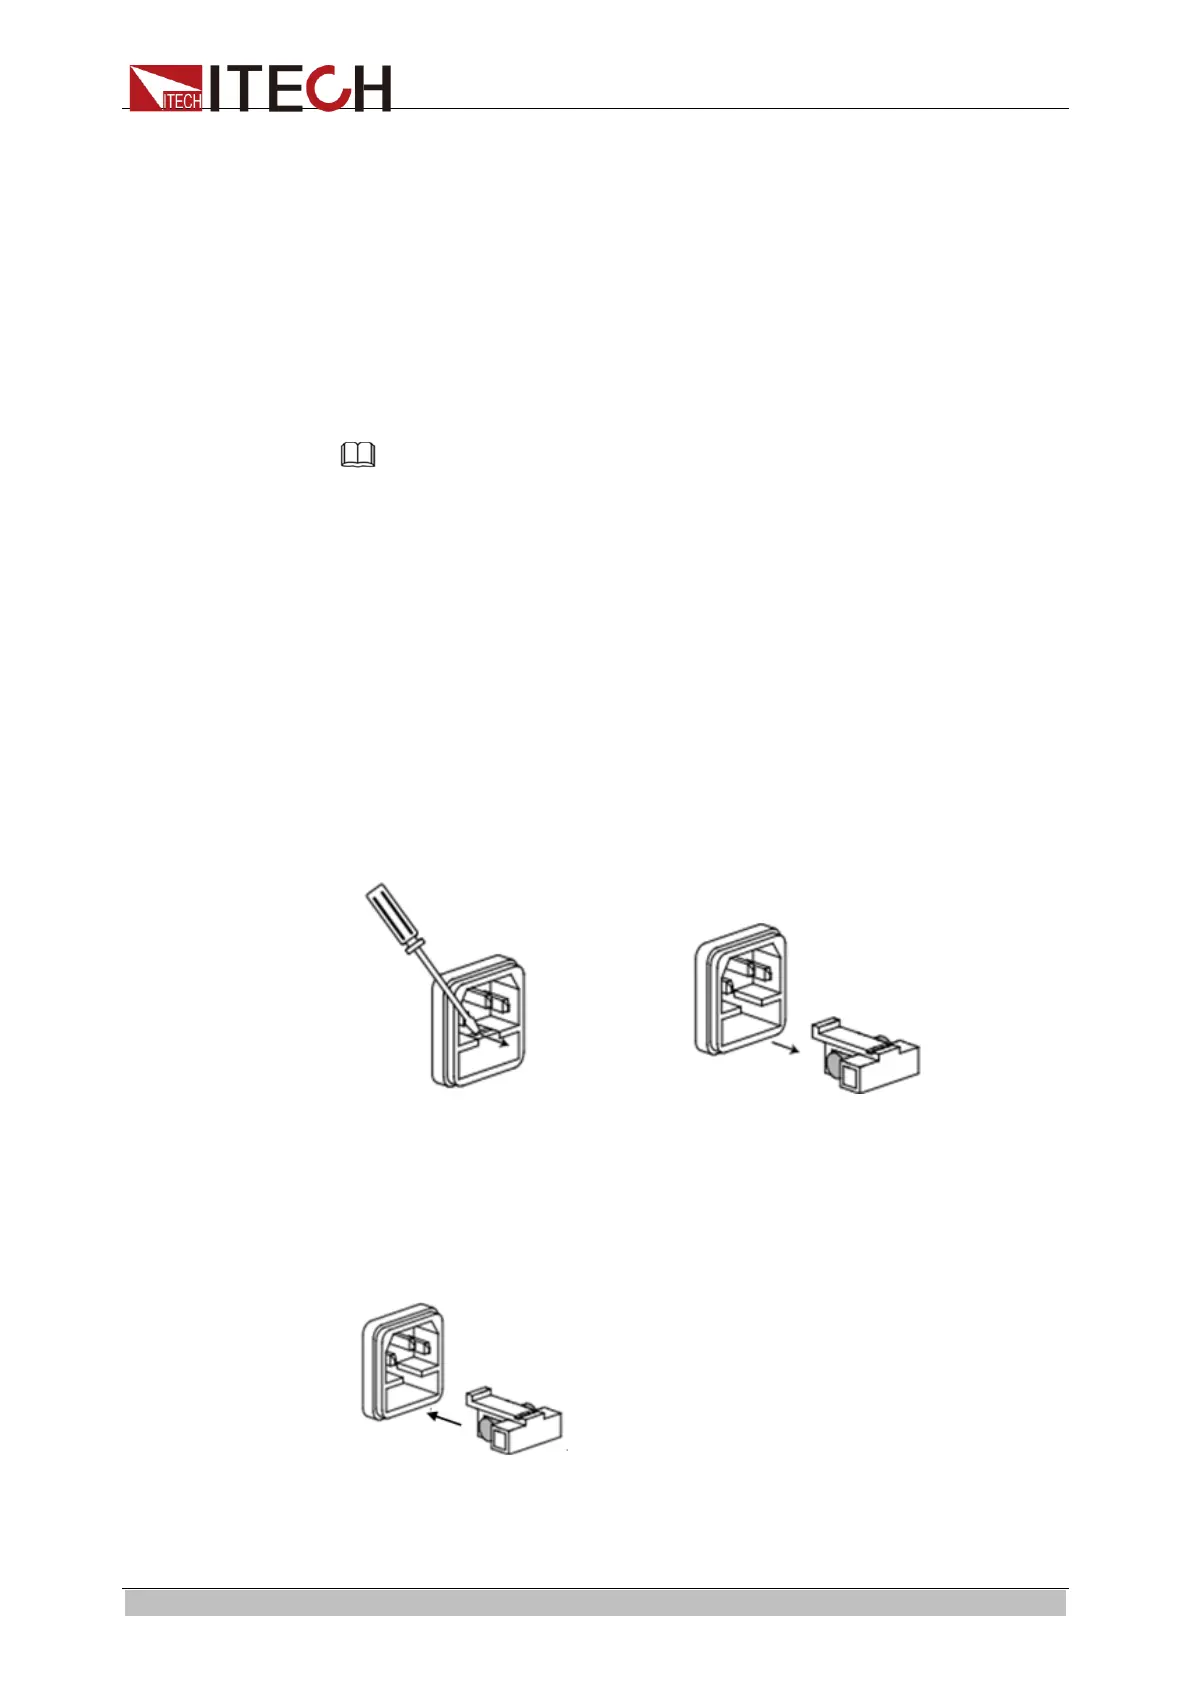
1. First pull out the power cord, and then take out the fuse block from the
power cord jack with a small screwdriver, as shown below:
2. Have a visual inspection of the fuse to see whether it is burnt out; if yes,
replace it with another fuse of the same specification. Refer to the
corresponding technical specifications for fuse rating.
3. After replacement, mount the fuse block to the original position, as
illustrated below:
ООО "Техэнком" Контрольно-измерительные приборы и оборудование www.tehencom.com