This document is a user manual for an iTOMA clock radio, model 729, providing detailed instructions for its operation, setup, and maintenance.
Function Description:
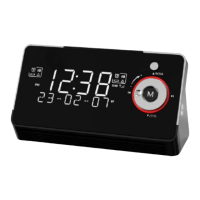
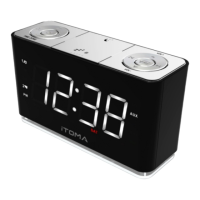
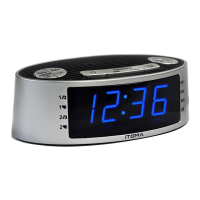
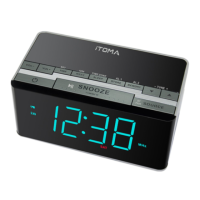
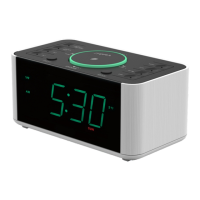
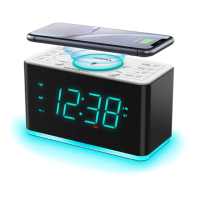
The iTOMA 729 is a versatile clock radio designed to provide timekeeping, alarm functions, and various audio entertainment options. It features both FM and DAB radio capabilities, Bluetooth connectivity for wireless audio streaming, and a USB port for charging external devices. The device also includes a 2-level LED decor light and an earphone jack for private listening.
Important Technical Specifications:
- Power Source: AC power adapter (120V at 60Hz for North America, 220-240V at 50Hz for Europe/Australia). A lithium battery provides backup for time and alarm settings during AC power loss.
- Radio Frequencies: FM and DAB.
- Alarm Functions: Two independent alarms (Alarm 1 and Alarm 2) with selectable wake-up sources (Vibration, Buzzer, FM Radio, DAB Radio). Alarm ringtones include four options.
- Sleep Timer: Adjustable duration from 5 to 120 minutes for falling asleep to radio.
- Display: LED display with adjustable brightness (5 levels, including automatic recognition brightness).
- Connectivity: Bluetooth for audio streaming, USB charging port (Type-C, up to 5V 2.1A), 3.5mm earphone jack.
- Presets: Up to 20 FM/DAB radio station presets.
- DRC (Dynamic Range Control): Adjustable for DAB radio (OFF/LOW/HIGH).
Usage Features:
Unpacking and Setup:
- Remove the clock radio from packaging and retain for future reference.
- Remove descriptive labels from the front/top, but keep labels on the back/bottom.
- Place on a level surface, away from direct sunlight, heat, dirt, dust, moisture, humidity, or vibration.
- Attach the appropriate plug to the AC mains adapter and fully extend the FM antenna cable for best reception.
- Connect the mains adapter to the mains supply and the radio.
Protecting Furniture:
- The device has non-skid rubber feet to prevent movement.
- To avoid marks or stains from certain oil-based furniture polishes, wood preservatives, or cleaning sprays, place a cloth or self-adhesive felt pads under the unit.
Setting the Date/Time Manually:
- Press and hold "MENU/INFO" until the HOUR digits blink.
- Rotate the silver knob to adjust the hour.
- Press "TUNE+" to move to MINUTE, then rotate the knob to adjust.
- Repeat with "TUNE+" for MONTH, DATE, YEAR, and 24H/12H format.
- Rotate the knob to adjust the time format.
- Press "TUNE+" again or wait 40 seconds to save settings.
- To check current date/time, short press "MENU/INFO" repeatedly.
Setting the Alarm:
- Push AL1/AL2 slide switch to ON.
- Press and hold "AL1" (or "AL2") for 3 seconds; HOUR digits will blink.
- Rotate the silver knob to adjust the hour.
- Press "TUNE+" to move to MINUTE, then rotate the knob to adjust.
- Press "TUNE+" again for "DAY(S) OF THE WEEK" (1-7) to blink.
- Rotate the knob to select alarm day mode (EVERYDAY, WEEKDAYS, WEEKENDS).
- Press "TUNE+" again; alarm ringtone will blink. Rotate the knob to select ringtone (Vibration, Buzzer, FM Radio, DAB Radio).
- Press "TUNE+" again; "CURRENT VOLUME LEVEL" (1-16) will blink. Rotate the knob to adjust volume.
- Press "TUNE+" or wait 40 seconds to exit.
- To turn off an alarm completely, push its slide switch to OFF.
- Alarm stops after 60 minutes if no operation is performed.
- "Wake to radio" will play the last listened station.
Snooze/Repeat:
- When alarm sounds, press "SNOOZE" for 9 more minutes of sleep (repeatable for 60 minutes).
- Press "AL1" or "AL2" to stop the alarm.
- To deactivate completely, push AL1/AL2 slide switch to OFF.
Playing the FM Radio:
- Press "ON/OFF" to turn on the radio.
- Press "M(MODE)" to switch to FM mode; "MHz" will appear.
- Extend and adjust the antenna for best reception.
- Adjusting Frequency: Press "TUNE-" or "TUNE+" to adjust MHz frequency.
- Auto-search/scan: Press "TUNE-" or "TUNE+" for 2 seconds to search for the next available station.
Playing the DAB Radio:
- Press "ON/OFF" to turn on the radio.
- Press "M(MODE)" to switch to DAB mode; "DAB" will appear.
- First-time use in DAB mode will trigger an "Auto Scan."
- Press "SCAN/BT►II" to manually start an auto scan.
- After scanning, the first station is selected, and the clock sets to current time.
- Press "TUNE-" or "TUNE+" to select available stations, then "SELECT" to confirm.
- Manual Tuning DAB: Hold "MENU/INFO" until "FULL SCAN" appears, then "TUNE+"/"TUNE-" until "MANUAL" appears. Press "SELECT" to enter, then "TUNE+"/"TUNE-" to highlight desired channel.
- Dynamic Range Control (DRC) Setting: Hold "MENU/INFO" until "FULL SCAN" appears, then "TUNE+"/"TUNE-" until "DRC" appears. Press "SELECT" to enter, then "TUNE+"/"TUNE-" to select OFF/LOW/HIGH. Press "SELECT" to confirm. (Note: Not all DAB broadcasts support DRC.)
Storing FM/DAB Radio Station Presets:
- In FM/DAB mode, press "TUNE-" or "TUNE+" to find desired station.
- Press and hold "PRESET" until Program Number (01-20) appears.
- Press "TUNE-" or "TUNE+" to change to desired Program Number.
- Press "SELECT" to store the station.
Recalling Preset FM/DAB Radio Stations:
- In radio mode, short press "PRESET"; Program Number (01-20) appears.
- Press "TUNE-" or "TUNE+" to select stored Program Number.
- Press "SELECT" to play the station.
- Keep the clock radio away from other electronic devices to avoid interference.
Using the Sleep Timer:
- Press and hold "SLEEP/DIMMER"; "SLP" and "5" (for 5 minutes) will appear.
- Press "TUNE-" or "TUNE+" to adjust duration (5-120 minutes).
- Press "SELECT" to store selection.
- To deactivate, keep pressing "SLEEP/DIMMER" until "SLEEP 5" appears, then press "TUNE-" or "TUNE+" until "OFF" appears, or press "ON/OFF" directly.
- "SLP" indicator shows on display until sleep time ends.
Dimmer Control:
- Press "SLEEP/DIMMER" to cycle through 5 brightness levels: Highlighted (L-3), Medium (L-2), Low dark (L-1), OFF, Automatic recognition brightness (AU-).
2-Level LED Decor:
- Press "LED" button to turn the night light on (high/low) or off.
Bluetooth Connection:
- Press "ON/OFF" to turn on.
- Press "M(MODE)" to switch to Bluetooth (BT) mode; "BT" indicator blinks.
- On your external device, search for "729" and connect. "BT" indicator stops blinking when connected.
- Play music from your device through the clock speaker.
- Control music playback from your device or by pressing "BT►II" on the clock to play/pause.
- Press "TUNE+" or "TUNE-" to play music forwards/backwards.
- Rotate the silver knob to adjust volume.
- If pairing fails, disconnect previously paired devices, turn off/on Bluetooth on your device, and set the unit to Bluetooth mode to refresh/search.
USB for Charging:
- Two USB charging ports (including Type-C) on the back provide up to 5V 2.1A for charging smartphones, tablets, etc. (USB cable not provided).
- Note: Charging performance may vary based on cable, battery, and device power management.
Earphone Jack:
- Press "ON/OFF" to turn on.
- Press "M(MODE)" to select audio source (Bluetooth, Radio, DAB Radio).
- Adjust output volume by rotating the silver knob.
- Connect 3.5mm earphone plug for stereo listening.
- Note: If headphones are connected, alarms will sound only through headphones, not the speaker.
- CAUTION: Prolonged high-volume use can cause hearing loss. Adjust to a reasonable level.
Maintenance Features:
Care of Cabinets:
- Wipe dusty cabinets with a soft, dry cloth.
- Clean smudged/dirty cabinets with a soft, slightly dampened cloth.
- Do not allow water or liquids inside the cabinet.
- Do not use abrasive cleaners or pads as they will damage the finish.
Lithium Battery Precautions:
- Dispose of old batteries properly; do not leave them where children or pets can access them.
- If swallowed, contact a physician immediately.
- Battery may explode if mistreated; do not recharge, disassemble, or dispose of in fire.
- Apparatus must not be exposed to dripping or splashing liquids.
- Do not place liquid-filled objects (e.g., vases) near the apparatus.
- The product should not be disposed of with household waste. Recycle responsibly by using return and collection systems or contacting the retailer.
FCC Warning:
- The device complies with FCC rules (Part 15) for digital devices.
- Operation is subject to two conditions: (1) no harmful interference, and (2) acceptance of any interference received.
- Changes or modifications not expressly approved by the party responsible for compliance could void user's authority to operate the equipment.
- The equipment generates, uses, and can radiate radio frequency energy. If not installed and used according to instructions, it may cause harmful interference to radio communications.
- To correct interference: reorient/relocate antenna, increase separation between equipment/receiver, connect equipment to a different circuit, or consult dealer/technician.
- The device has been evaluated for general RF exposure and should be installed/operated with a minimum distance of 20cm between the radiator and your body.
Limited Warranty:
- iTOMA (Hong Kong) Company Limited provides a 1-year limited warranty from the original purchase date.
- iTOMA will replace or repair defective parts under normal use.
- Warranty excludes cosmetic appearance, consumable items (antennas, knobs, cabinets, cases), and damage from leaking batteries.
- Warranty does not cover misuse, negligence, incorrect installation, or unauthorized repairs/alterations.
- Specific legal rights may vary by state.
- Contact iTOMA for service, warranty, or product information via www.itoma.com/contact or info@itoma.com.
- Retain the warranty card with proof of purchase.