3-40 4271491-Second Edition
GENSET AND BATTERY PACK
3
Label all wires before disconnecting to ensure correct
installation.
4. Disconnect the negative (–) 48-volt connector cable
(2) and negative (–) battery charger cable (10).
5. Disconnect the positive (+) 48-volt connector cable
(1) and positive (+) battery charger cable (11).
6. Disconnect battery cables (7, 8, and 9) from each
upper battery negative (–) battery post.
7. Disconnect battery cables (4, 5, and 7) from each
upper battery positive (+) battery post.
Figure 3-66
8.Remove four nuts (14), lock washers (15), bushings
(16), and J-bolts (17).
9. Remove battery hold-down carrier (18).
10. Remove the four upper batteries.
11. Remove twelve hoses (12) and sixteen battery filling
system plugs (13) from the upper batteries. Cap
batteries to prevent leakage and contamination.
12. Remove upper tray mat (19).
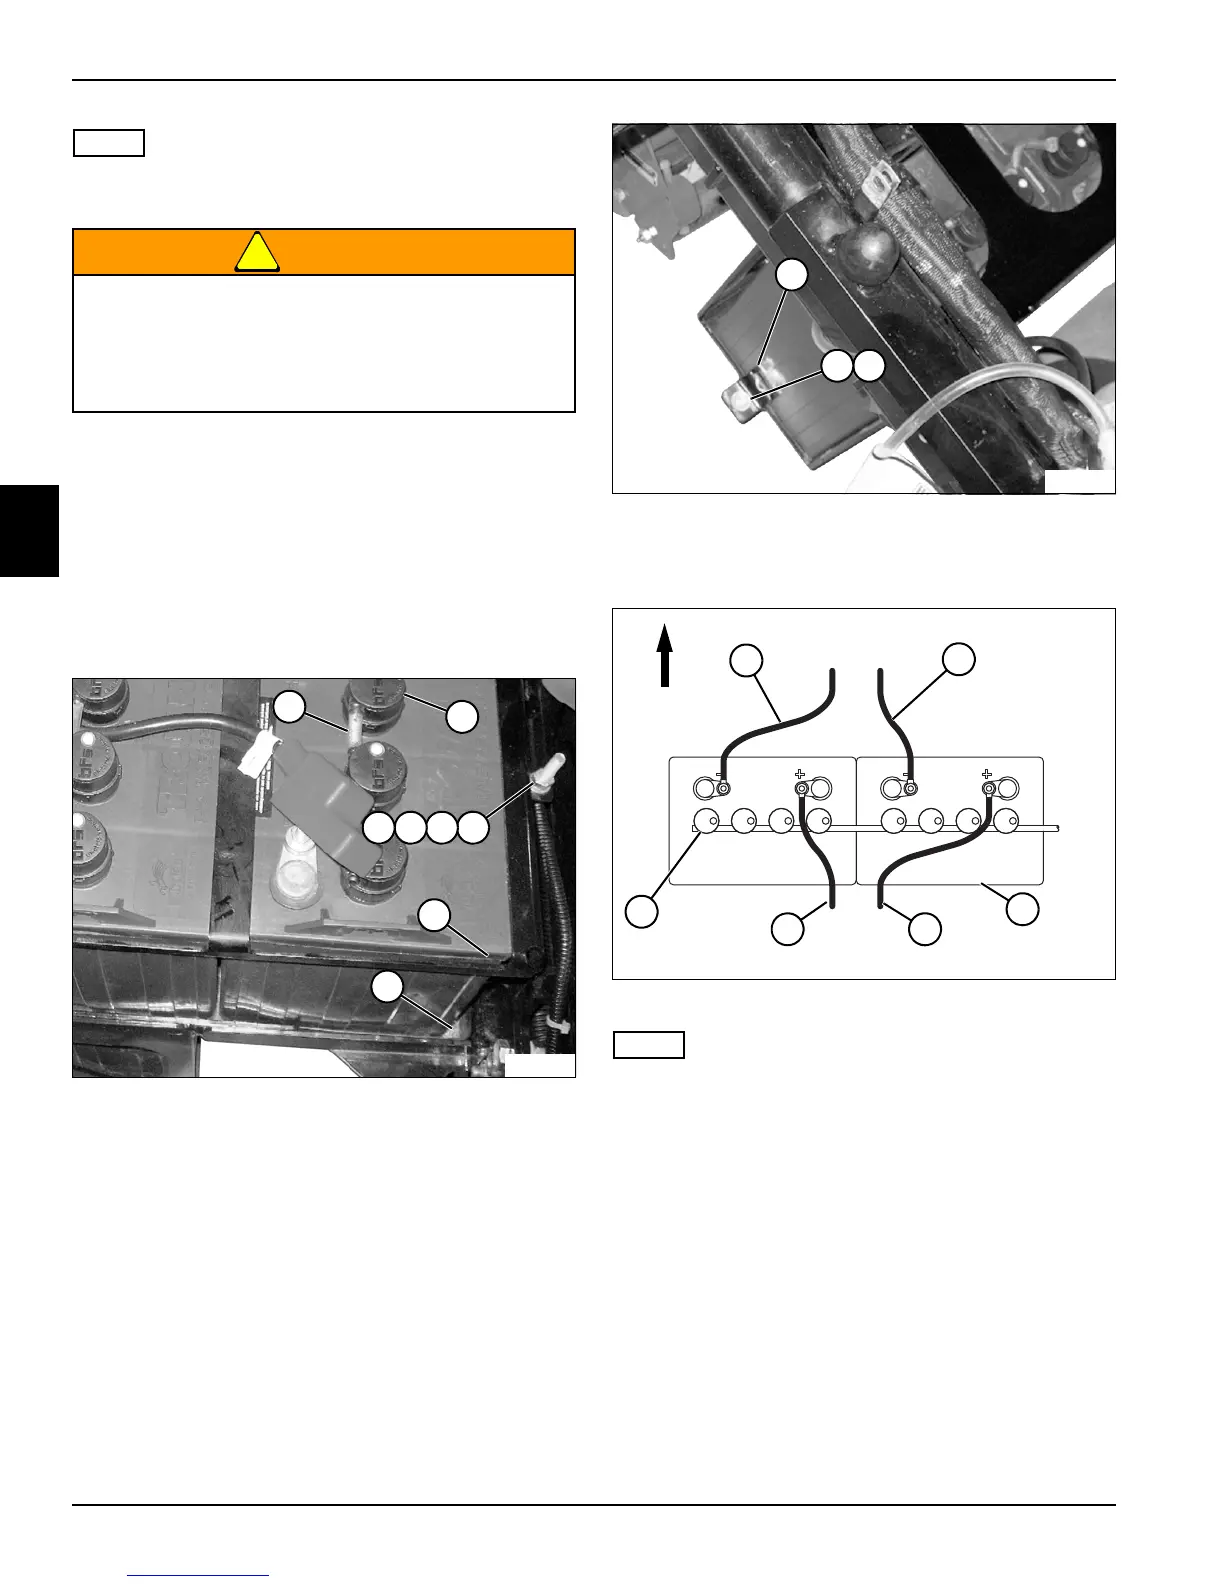
Figure 3-67
13. Remove screw (21), nut (22), and battery bracket
(20).
Figure 3-68
Direction of arrow indicates front of machine.
14. Disconnect battery cables (4 and 5) from the two
8-volt lower batteries (23).
15. Remove boots from battery cables (4 and 5) and
route cables through grommet at front of battery tray.
16. Disconnect battery cables (8 and 9) from lower
batteries.
17. Remove boots from battery cables (8 and 9) and
route cables through grommet at rear of battery tray.
18. Remove the two lower batteries.
19. Remove battery filling system (24) from lower
batteries. Cap batteries to prevent leakage and
contamination.
Always disconnect the negative terminal first and
positive terminal last. Connect positive terminal
first and negative terminal last. Use care when
testing live circuits to prevent arcing. Arcing
could result in death or serious injury.