Meat Racks and Hangers
Type 3. Double hangers with two pairs of hooks on each hanger (see photo on the next
page). For this style you also have to follow the directions in Illustrations 1 and
2 on the next page.
Wire racks & hangers are shipped unassembled so that they may be used where
required in the unit. They must be properly assembled before use to reduce the
possibility of a rack jam.
When installing the racks and hangers, install the 12 hangers and 6
bottom racks first, and then install the upper racks.
Type 2. Triple hangers with wire hooks on the lowest level and slide rails for the middle
and upper levels (see photo on the next page). For this style, you must follow
the directions in Illustrations 1 and 2 on the next page. The “nibs” on the
middle and upper racks must be properly secured in the slide rails to prevent
a rack jam.
NO
TE:
YOU MUST ALWAYS have a rack installed in the lowest position
of the hanger to avoid a rack jam.
N
OTE:
With all three types, YOU MUST ALWAYS have a rack installed in the
lowest position of the hanger to avoid a rack j
am. Never mix hanger types (use all
double hangers or all triple hangers).
Model 700E
The hangers for Model 700Es will be one of the following:
Type 1. Triple hangers with three pairs of wire pegs per hanger (starting mid- 2017:
see photo on the next page.
9
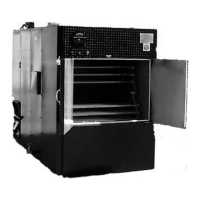
Model 1300 E
All Model 1300E rack hangers are “triple” (designed for a set of three racks per pair of
hangers). Each hanger has three pairs of wire loops (see photo on the next page). Each
rack will have corner “voids” through which the wire loops will be inserted. Hangers for
older units (not shown) may have three pairs of ferrules instead of wire loops, and the
racks associated with them will have rings in the corners through which the ferrules are
inserted.