Page 19
ePump
™
Series Pumps, Installation and Operation Manual
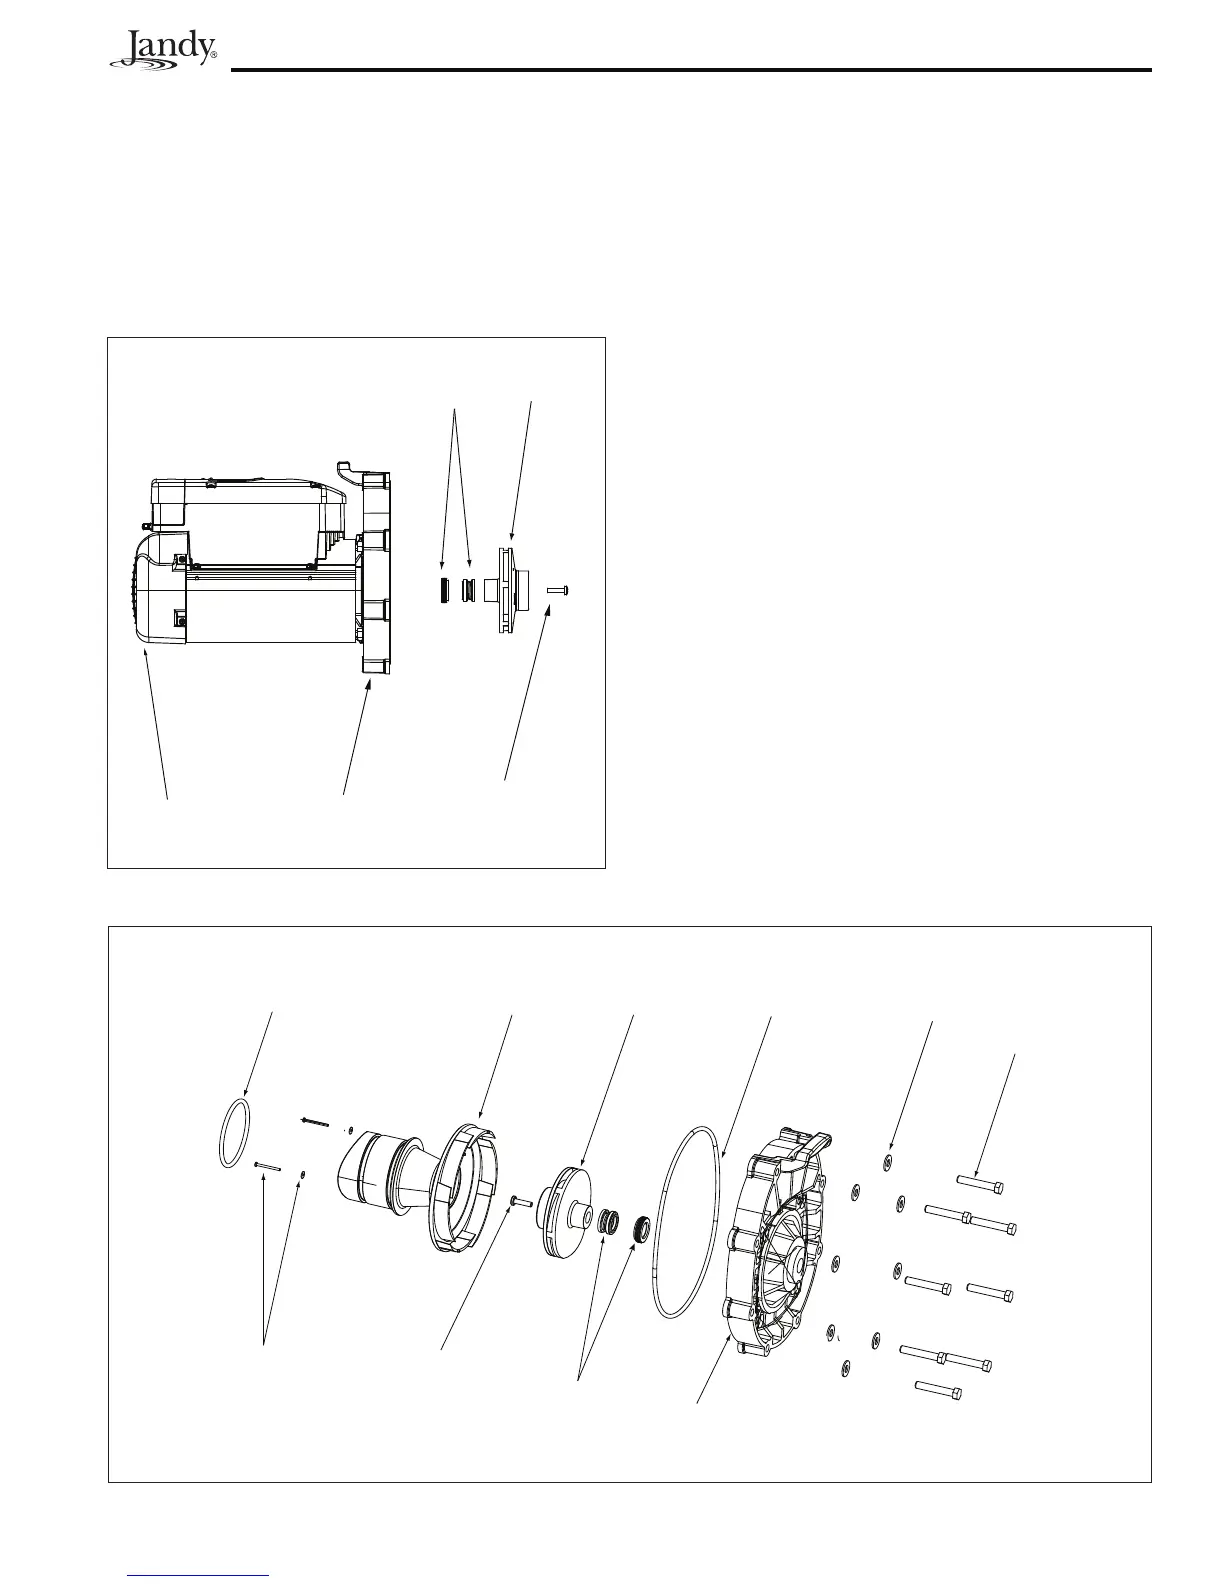
Figure 9. Remove the Impeller
Figure 10. Diffuser and Impeller Exploded View
Fan
Backplate
Mechanical
Seal
Impeller
Self Sealing
Left Handed
Screw
Diffuser
O-ring
Diffuser
Impeller
Backplate
Bolts (8)
Washers (8)
Diffuser Screws
and Washers (2)
Self Sealing
Left Handed
Screw
Mechanical
Seal
Backplate
O-ring
NOTE Do not hold the fan to remove the impeller
screw.
9. Hold the motor shaft with a ½" wide flat blade
screw driver while unscrewing the impeller from
the motor shaft with your hand. Turn the impeller
counter-clockwise to unscrew it.
10. Inspect the impeller and diffuser for signs of
rubbing and/or damage.
7. Remove the fan cover on the back of the motor by
removing the screws. (See Figure 7.) The motor
shaft and fan will be exposed.
8. Hold the exposed motor shaft with a ½" wide flat
blade screw driver while removing the impeller
center screw. Use a No. 3 Phillips screwdriver and
turn the left-hand threaded screw clockwise to
loosen it. See Figure 9.
 Loading...