Page 11
Jandy
®
Pumps
6. Remove the shaft cover on the back of the
motor by prying it off with a flat head
screwdriver. This will allow a wrench to be
placed on the motor shaft and prevent it from
rotating while the impeller is removed.
7. Turn the impeller counterclockwise, while holding
the motor shaft still.
9.3 Replacing the Impeller
1. Thread the impeller back on the motor shaft
while holding the shaft with a wrench. Hand
tighten the impeller clockwise.
2. Replace the motor shaft cover by tapping it back
into place.
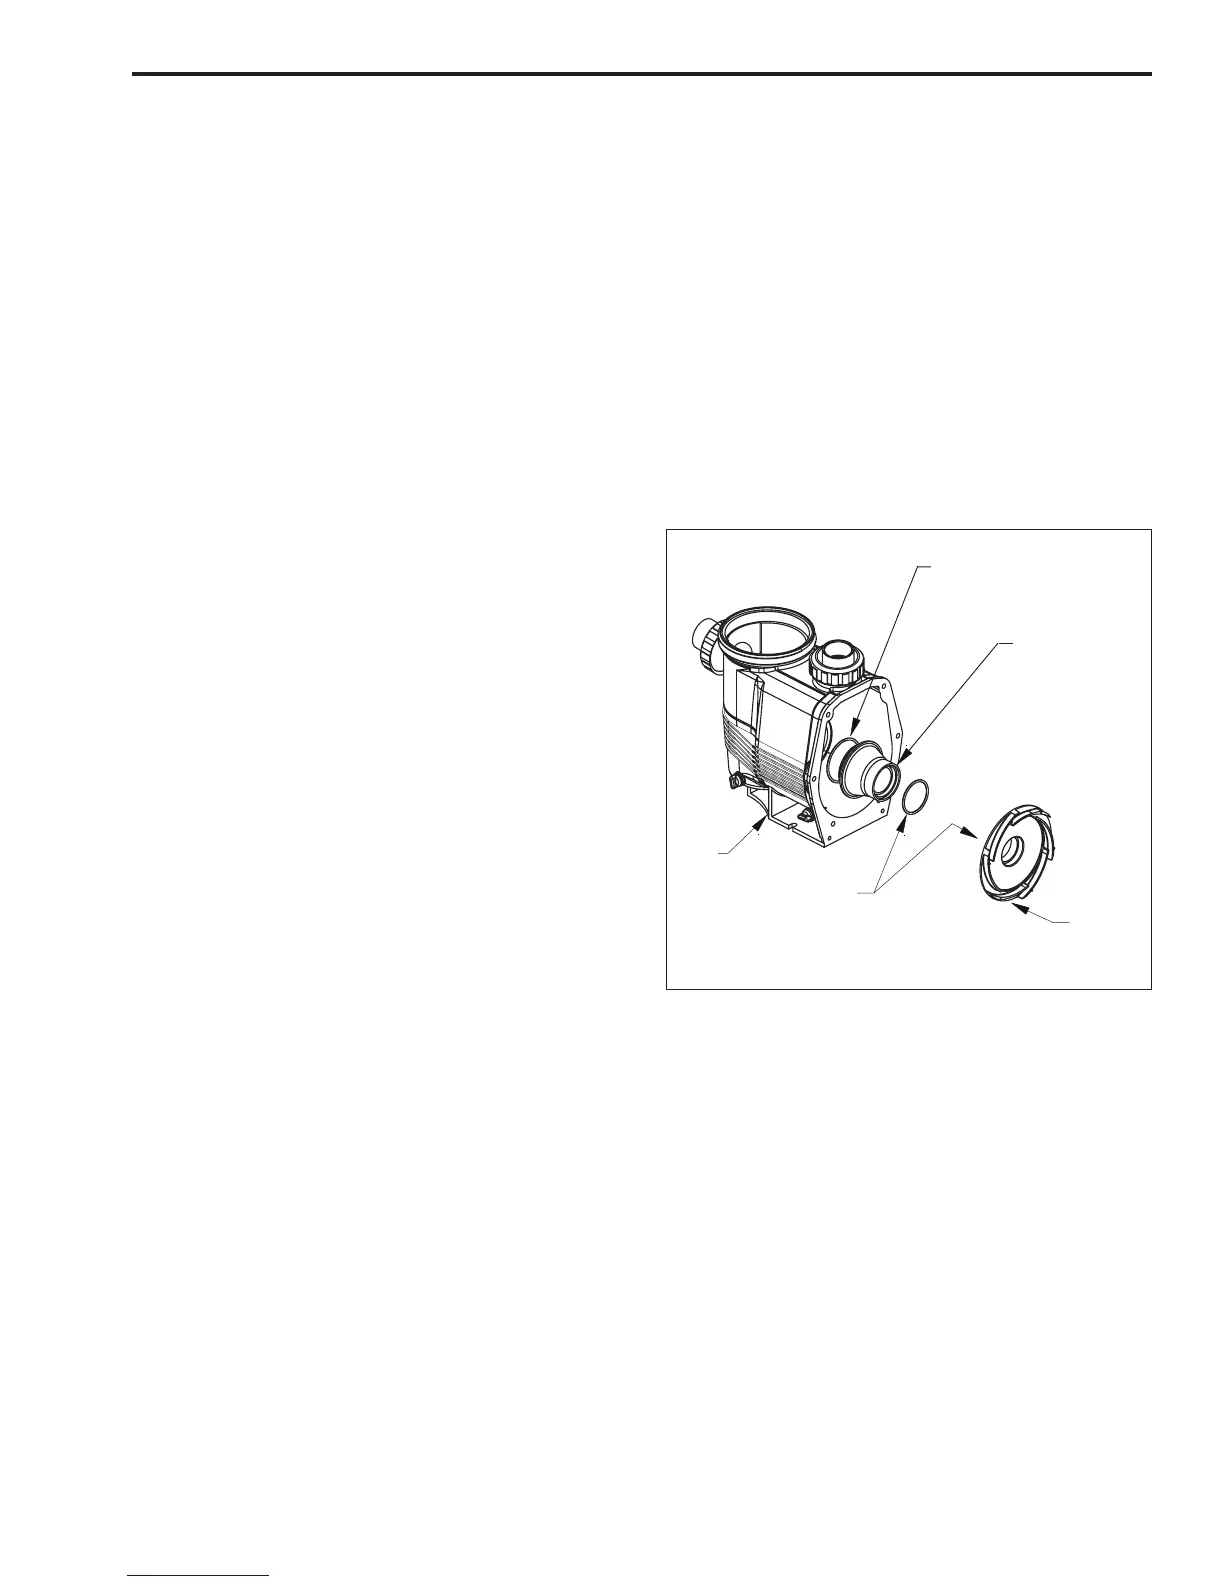
3. Replace the diffuser on the mounting bracket
assembly by snapping it into the screw holes. It
will only fit one way (See Fig. 2).
4. Replace the phillips head screws. Use the
screws to tighten the diffuser flush against the
mounting bracket. Tighten to a maximum of
1 ft-lb.
5. There is an o-ring located between the diffuser
and the pump body cone. Place the diffuser
o-ring over the diffuser's suction side
(See Fig. 3).
6. Check for debris around the pump body o-ring
seat, as this will cause leaks. Clean and place the
o-ring on the mounting bracket assembly.
7. Slide the motor assembly into the pump body and
press firmly, matching up the bolt holes.
8. Replace the bolts, making sure the washers are
in place. Use a star pattern to tighten the bolts.
Do not over tighten (max. 6 ft-lbs).
9. If the pump is located above water level of the
pool, remove the lid and fill the basket with
water before starting the pump.
10. Prior to replacing the lid, check for debris
around the lid o-ring seat, as this will cause air
leaks into the system.
11. Hand tighten the lid to make an air tight seal. Do
not use any tools to tighten the lid, hand tighten
only.
12. Open the pressure release valve on the filter, and
make sure it is clean and ready for operation.
13. Switch on the circuit breaker to the pump motor.
14. Turn on the pump and check for normal
operation.
15. Once all the air has left the filter, close the
pressure release valve.
Figure 3. Diffuser O-ring
Diffuser
Place Diffuser
O-ring on
suction side of
the diffuser
Pump
Body
Pump Body
Cone O-ring
Pump Body
Cone