Page 10
ENGLISH
Jandy
®
, JXi
™
Gas-Fired Pool & Spa Heater
|
Installation & Operation Manual
a
c
d
b
e
f
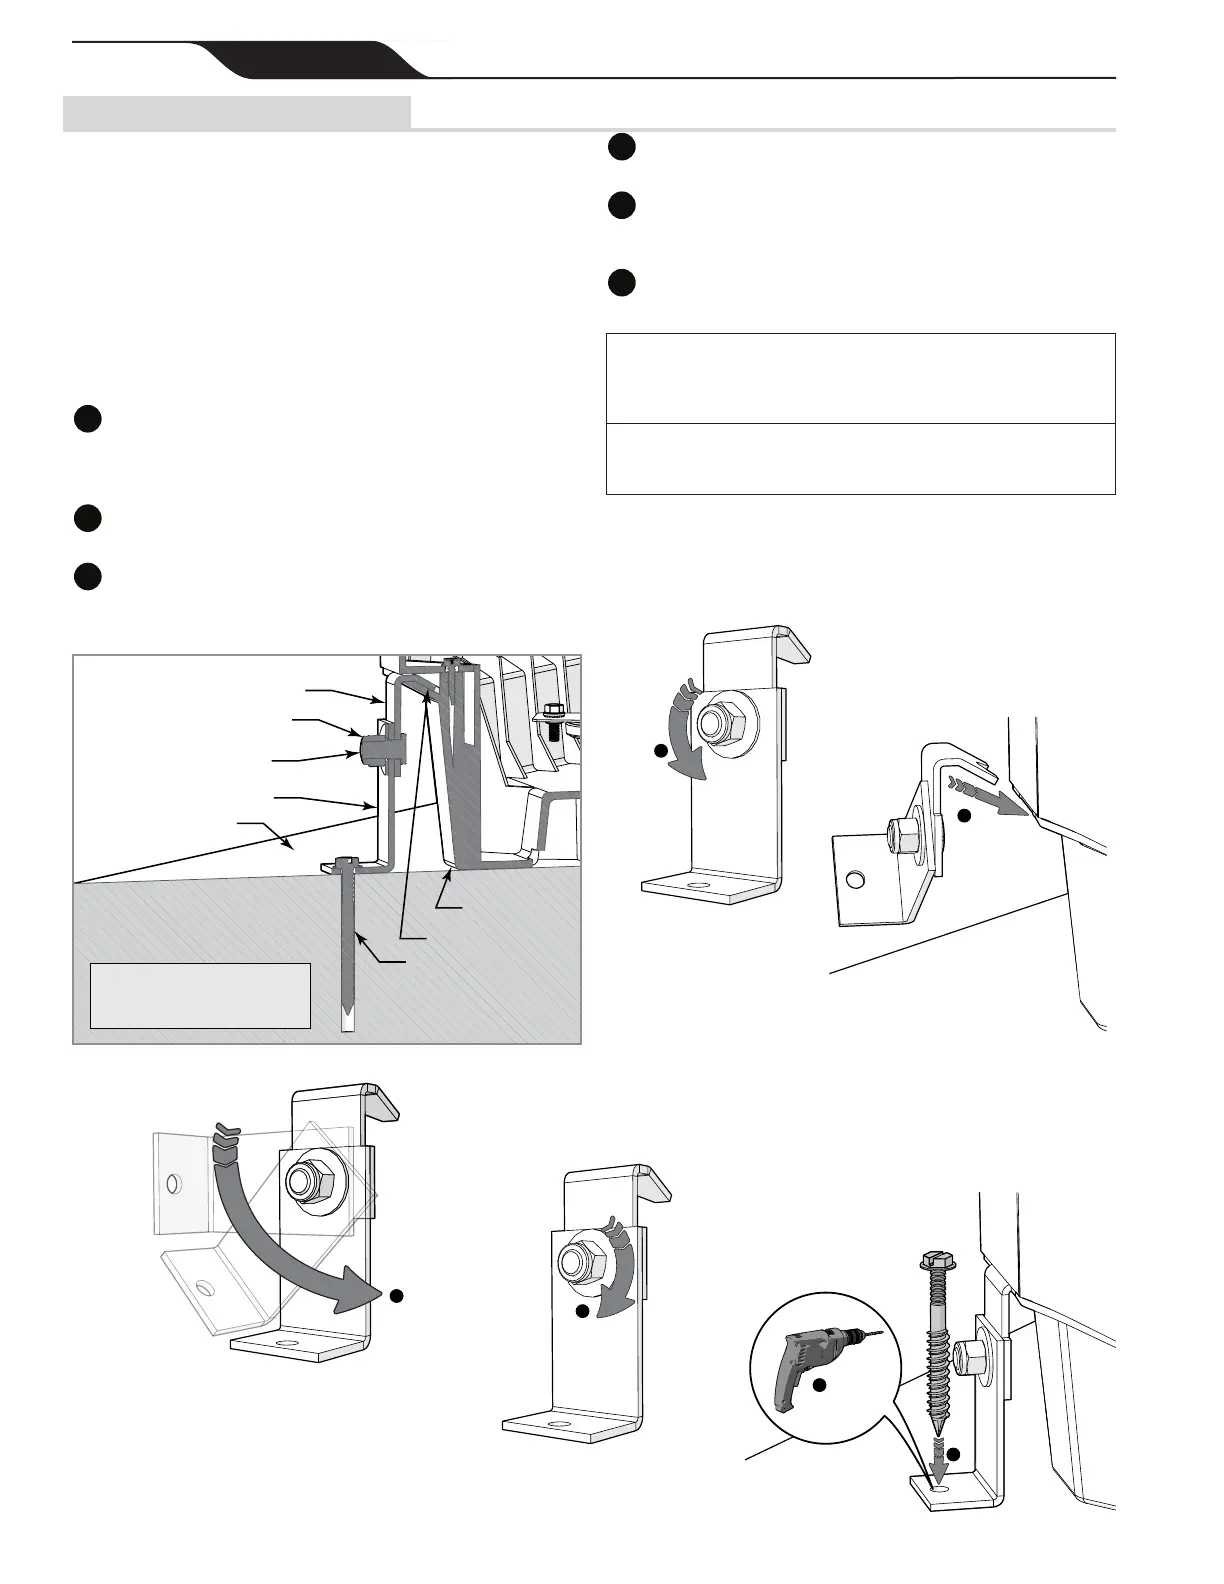
Anchor Bracket Upper
Anchor Bracket Lower
Concrete Equipment Pad
ANCHOR BRACKET INSTALLATION
SECTION VIEW
Concrete Screw
JXi™ Heater Base
Anchor Bracket Slot
Retaining Nut
Retaining Pin
4.2.1 Anchor Bracket Installation
Anchor brackets do not come standard with the JXi.
If you require the anchor brackets for your installation
please order kit #R0593400.
Anchor brackets should be installed in any circumstance
where the heater may be subject to natural risks such as
extreme weather or earthquake. In Florida, the heater is
required to be securely fastened to the equipment pad to
meet the applicable requirements of the Florida Building
Code. Other jurisdictions may have similar requirements
for extreme weather or other natural hazards. Check your
local codes for details.
Using an adjustable wrench or equivalent tool loosen (DO
NOT REMOVE) the retaining nut on the bracket. The upper
and lower anchor bracket should be able to rotate freely about
the retaining pin.
Slide the bracket into the slot located at the lower corner of
the heater base.
Rotate lower anchor bracket into nal position. Ensure
that the lower anchor bracket is ush with the equipment pad
surface and level.
Tighten the retaining nut so that the anchor bracket
assembly is secure.
Drill a hole in the concrete using the lower anchor bracket
hole as a guide. It is advised that a hammer drill with an
appropriate concrete drill bit be used.
Place a screw in the hole and tighten to fasten the anchor
bracket to the concrete pad. Do not over torque the screws.
NOTE: Depending on the location of and access to the bracket, it
may be necessary to mark the drill location using the lower anchor
bracket hole as a guide. Remove the bracket from the heater, drill
the hole and then reattach the bracket to the heater base.
NOTE: Concrete screws are not provided in the anchor bracket kit.
Use size 1/4 in x 2-1/4 in galvanized or plated concrete screws and
washers.
 Loading...