43
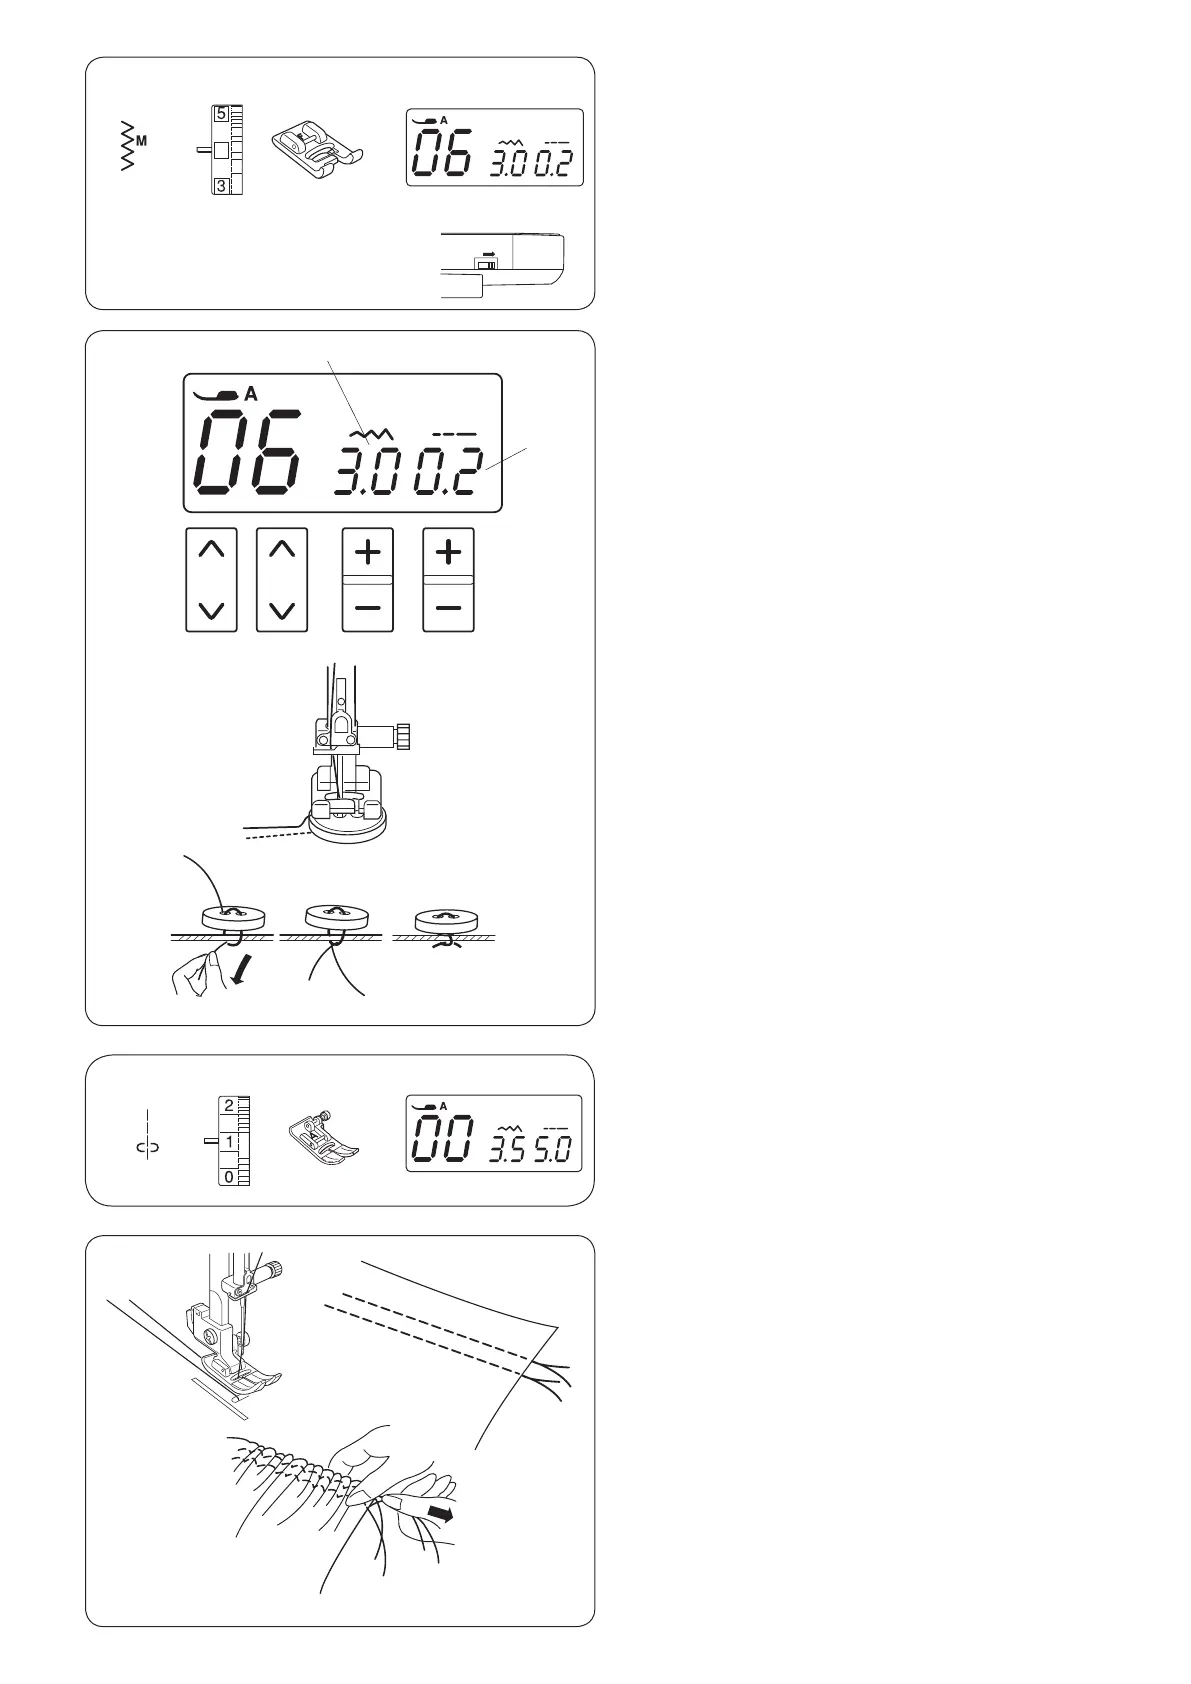
Button Sewing
q Stitch pattern: 06
w Thread tension dial: 3 to 7
e Presser foot: Satin stitch foot F
r Feed dog: Lowered
Lower the feed dog.
Set the speed control slider at a slower speed.
Set the stitch length at the minimum (0.2).
q Stitch length (0.2)
Match the holes of button to the horizontal slot of the
presser foot and lower the foot to hold the button in place.
Adjust the stitch width so the needle will enter the left
hole of the button.
Turn the handwheel so that the needle will enter the
right hole of the button. Readjust the stitch width if
necessary.
w Stitch width (adjust to span of holes)
Stitch several times.
After you nish sewing, cut the thread but leave 10 cm (4˝)
of threads at the end.
Pull the bobbin thread to draw the top thread to the
reverse side of the fabric and knot the threads.
After the button sewing is completed, raise the feed dogs
for normal sewing.
r
q
w
Gathering
q Stitch pattern: 00
w Thread tension dial: 1
e Presser foot: Zigzag foot A
Loosen the thread tension to “1” and increase the stitch
length to 5.0.
Sew two rows of straight stitches 0.6 cm (1/4˝) apart.
Knot the threads at the beginning.
Pull the bobbin threads at the end to gather the fabric.
Knot the threads at the end and distribute the gathers
evenly.
w
eq
w eq