13
STEP 9: LIFTING DOOR ASSEMBLY
►Raise door using appropriate lifting equipment, assuring a protective barrier is maintained between product and any
surface or object that it may come into contact with.
►Raise door using appropriate lifting equipment, assuring a protective barrier is maintained between product and any
surface or object that it may come into contact with.
►Door should be positioned as close as possible to the header and still be able to rotate and clear bottom bar.
►Each end of door should be equal distance from the header and the curtain must be centered in the opening.
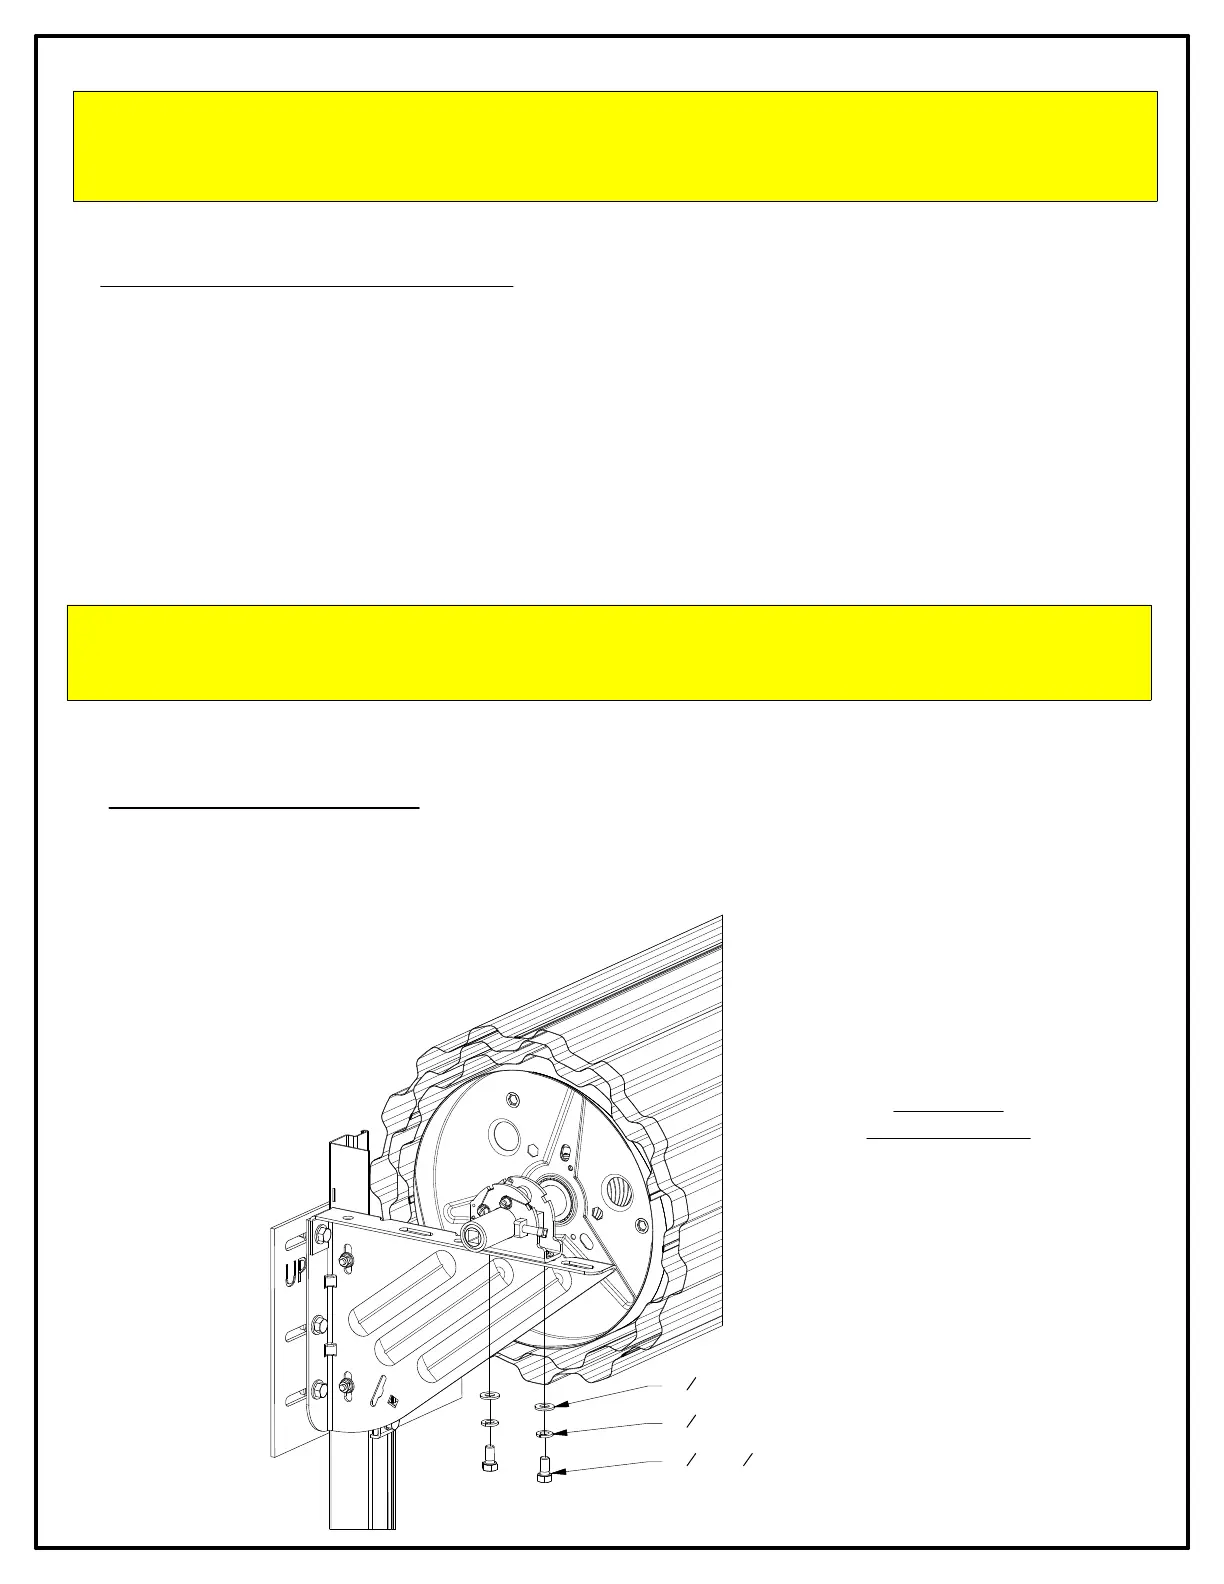
STEP 10: TENSIONER END
► Attach tensioner assembly to door bracket using two (2) 3/8 - 16 x 3/4" grade 5 hex bolts, (2) 3/8" lock washers and (2) 3/8" flat washers.
WARNING!
DO NOT ALLOW DOOR ASSEMBLY TO ROLL OFF BRACKETS OR MOVE SIDEWAYS OFF EDGE OF BRACKET.
IF DOOR FALLS, SERIOUS INJURY OR DEATH AND/OR DAMAGE TO DOOR CAN RESULT.
FIGURE 16:
TENSIONER END
(2)
3
8" FLAT WASHER
(2)
3
8" LOCK WASHER
(2)
3
8" - 16 X
3
4" GRADE 5 HEX BOLT
WARNING!
BEFORE LIFTING DOOR INTO POSITION, ASSURE THAT ALL SET SCREWS ARE TIGHTENED TO ADEQUATELY
SECURE AXLE SUPPORTS AND TENSIONER. FAILURE TO SECURE WILL RESULT IN FALLING PARTS, WHICH
WILL LEAD TO SERIOUS INJURY OR DEATH.